Style3D in Pills: How to Use Virtual Try-On Technology to Bring Your Designs to Life
AI Garment Try-On: Feature Overview
See how your projects will look in real life!
In today’s fast-paced fashion e-commerce and retail landscape, one of the biggest consumer pain points is the inability to visualize how garments look when worn. Often, online services and software struggle to meet this vital need when managing a fashion business. Knowing what you’re selling before selling it is crucial to the success of your company, and luckily Style3D AI provides the AI-powered fashion design solution to these demands. Our “AI Garment Try-On” feature is a tip-of-the-spear example of virtual try-on technology, powered by state-of-the-art artificial intelligence algorithms, giving designers, merchants, buyers, marketers, and fashion enthusiasts the possibility to visualize any garment on a realistic 3D model. This not only makes the presentation of your projects much more engaging and attractive to customers, but also reduces return costs, propelling your business into the future of the fashion industry. Whether previewing the fit and drape of new designs through 3D garment simulation or creating captivating AI garment showrooms for your e-commerce platform, this feature is your invaluable asset.
Step-by-Step Guide
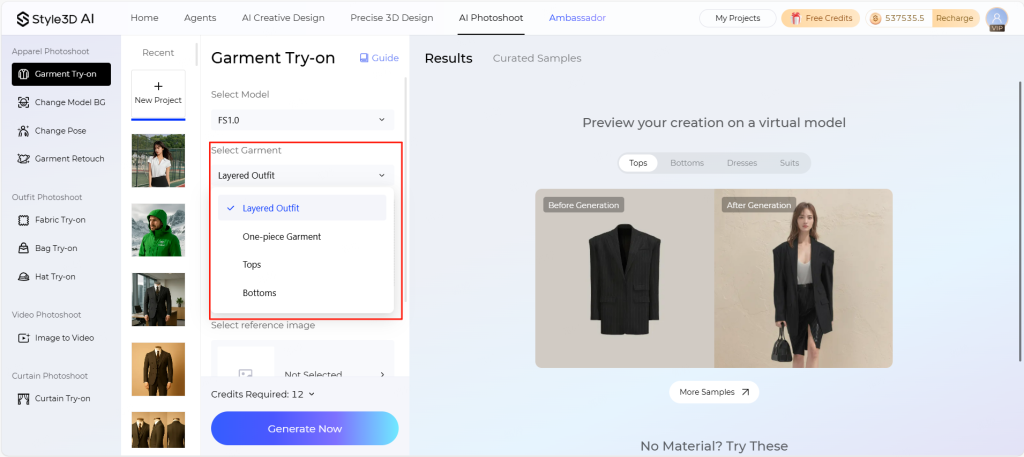
Step 1: Choose from different garment models and layers (Layered Outfit, One-piece Garment, Tops, Bottoms)
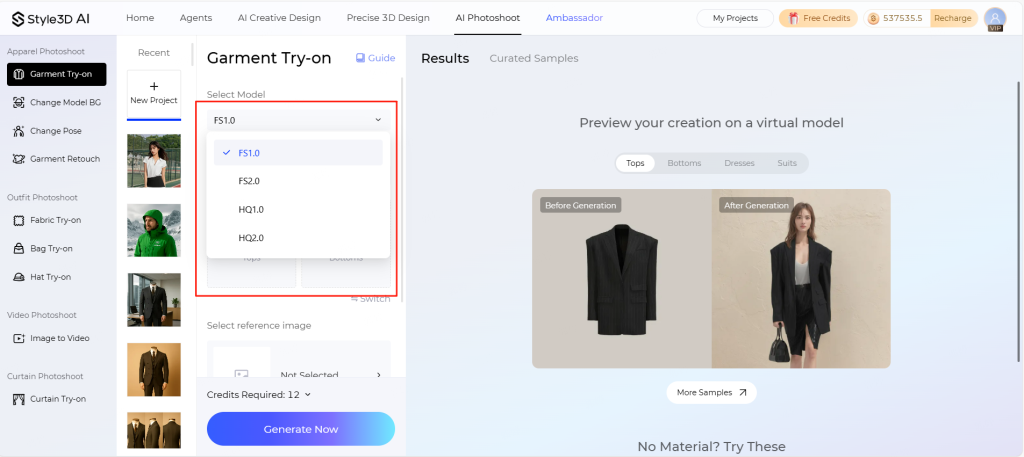
The differences between the four models are:
| Models | Speed | Image Detail | Application Scope |
|---|---|---|---|
| FS1.0 | Fast, about 15 seconds | Low | It is fast, but there may be problems with deformed hands and feet and white edges. It is suitable for large-volume, simple, and clean-background clothing upper bodies. |
| FS2.0 | Faster, about 1 minute and 30 seconds | High | Faster speed, improved hand and foot deformities and white edge issues, improved image quality, but may cause model face and body shape changes. Suitable for medium-quality clothing upper body (this model is not currently supported for underwear, swimwear, and yoga wear) |
| HQ1.0 | Medium speed, about 3 minutes | Medium | Medium speed, basically no hand and foot deformities and white edge problems in the image, the model's face and posture are completely restored, but the image clarity is average, and it is necessary to choose clothing of similar categories for the clothing to be put on. It is suitable for those who do not have high requirements for image clarity but need to restore the model's clothing torso. |
| HQ2.0 | Slow, about 4 minutes | High | The speed is slow, the hands and feet are not deformed, there is no white edge problem, the image quality is high, and the degree of detail is good, but the model's face and posture will be slightly changed. It is suitable for high-quality clothing upper body (this model does not currently support underwear, swimwear, and yoga wear) |
Then select the type of clothing you want to work on (Layered Outfit, One-piece Garment, Tops, Bottoms).
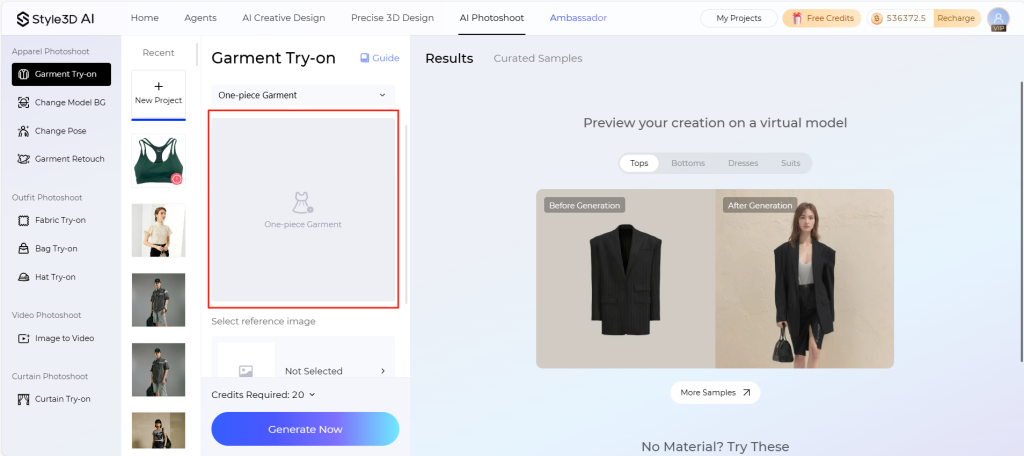
Step 2: Select the picture of the article you want to wear.(Uploaded files support JPG, JPEG, PNG, and WEBP formats, with a size between 20 KB and 10 MB, and a width and height between 400px and 4096px.)
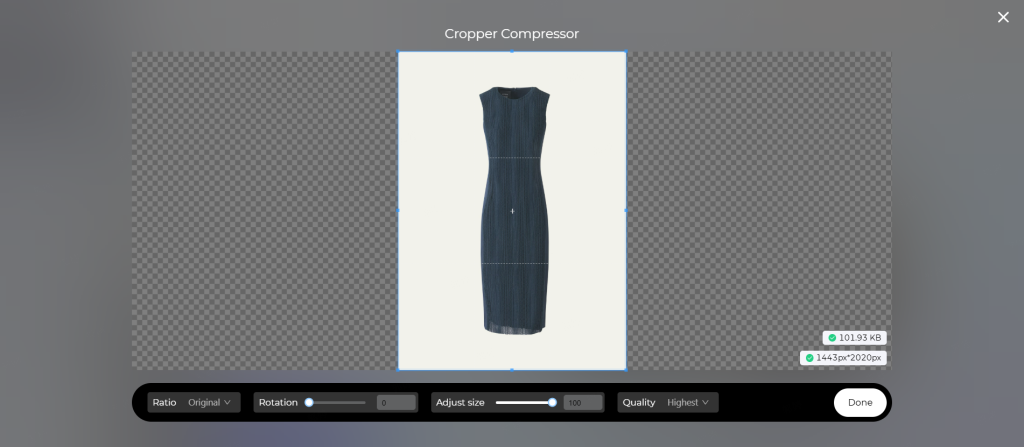
You can crop and personalize your picture on the same page.
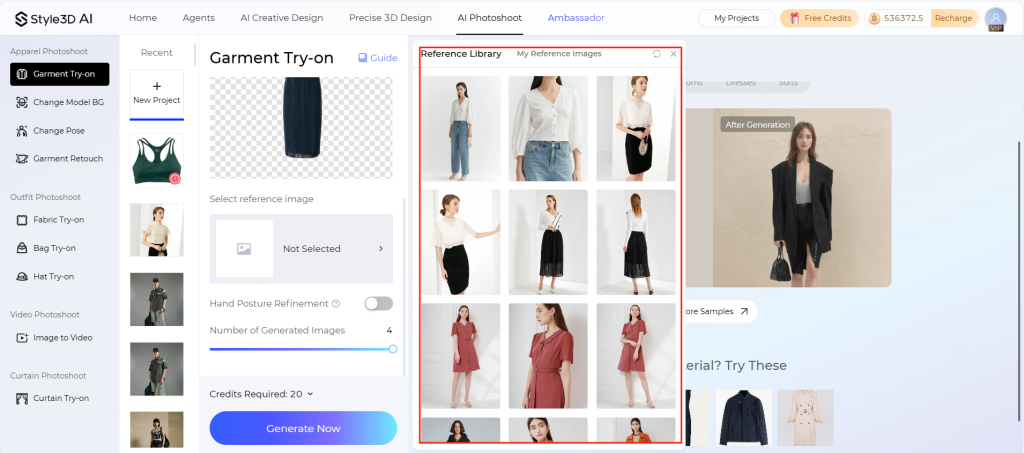
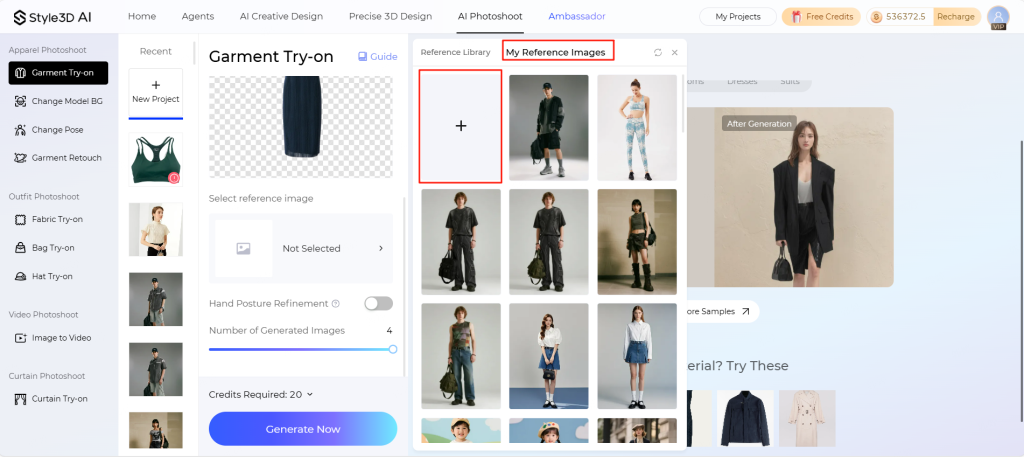
Step 3: Select Model.

You can select your model from the official reference library, or uploaded by yourself.(Note: The closer the model’s clothing is to the clothing you’re going to wear, the better the effect.)
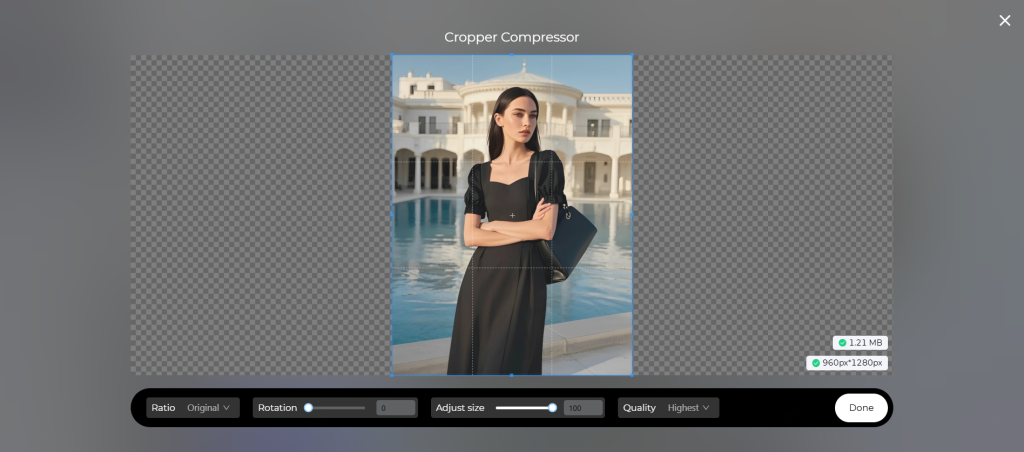
You can crop the model reference image according to your needs.
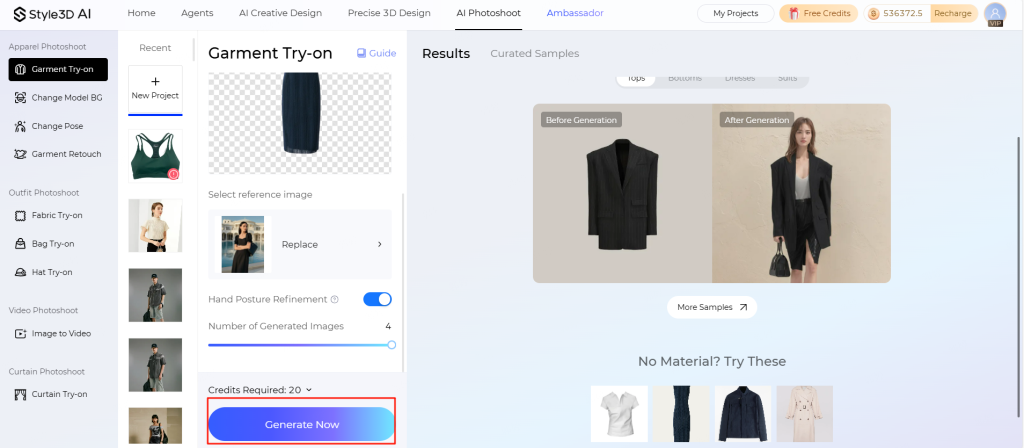
Step 4: You can use the “Hand Posture Refinement” function to tackle the most challenging part of 3D generation (hands and wrists), and then select the number of sheets to be generated. You can generate 1 to 4 sheets.
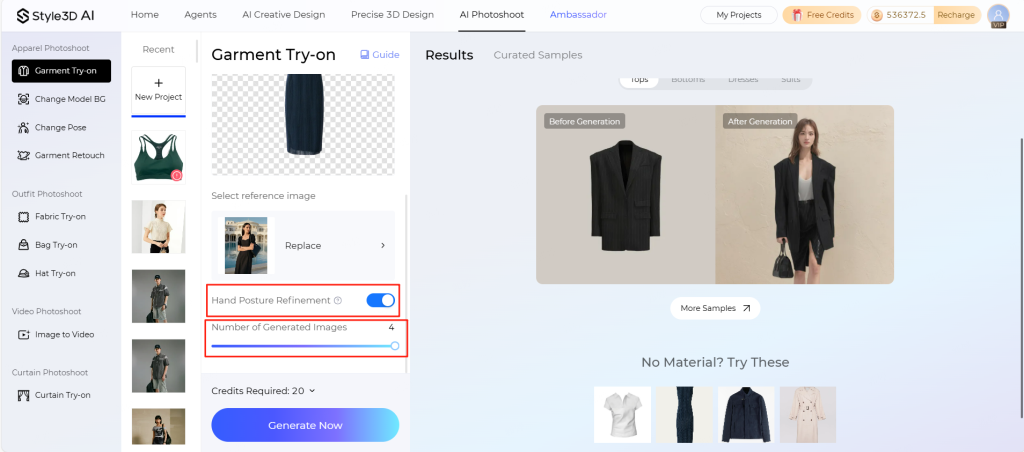
Note: When the hands overlap with the clothing, you can select “Hand Posture Refinement” to avoid hand deformities.
 |  |
|---|---|
| before Hand Posture Refinement after Hand Posture Refinement | after Hand Posture Refinement |
Step 5: Click the “Generate Now” button and wait for AI to work its magic.
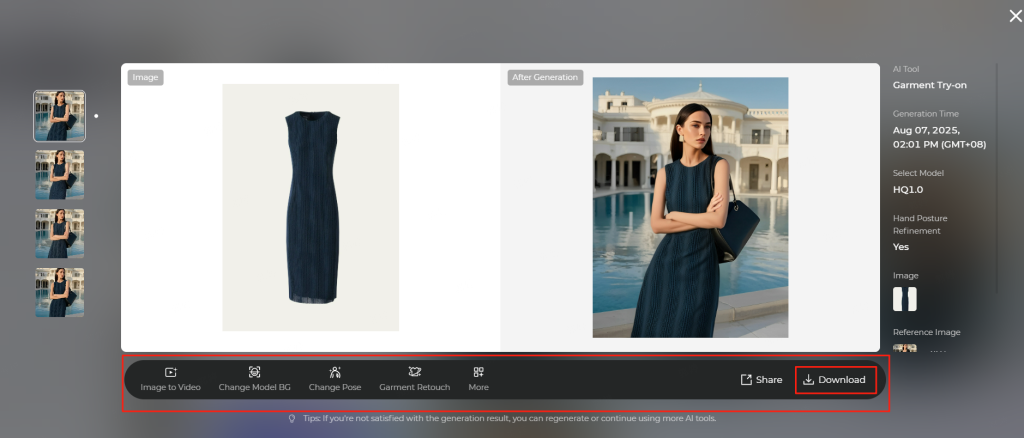
Step 6: View and download the generated rendering.
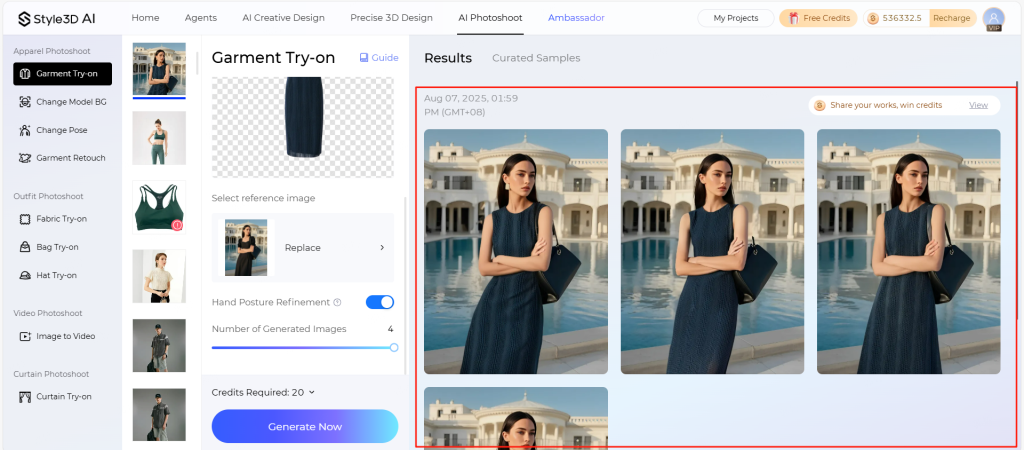
After generation, you can download it or continue editing.
Key Tips & Best Practices: Optimizing Your Results
To create the most realistic and impactful AI fashion visualization results, keep these essential tips in mind:
- Image Quality is Crucial: Use high-quality, well-lit images, making sure that details like necklines, sleeves, and patterns are clearly visible. Photos of people should feature a clear, upright pose with even lighting and a simple background in order for the AI to recognize the body shape.
- Understanding Real-Time Fashion Rendering: Results are AI-generated approximations. Highly realistic, complex garment structures (e.g., multi-layer sheer fabrics, intricate draping), highly reflective materials, or significant pose mismatches between garment and person may indeed require fine-tuning. Experiment with different settings and images for the best outcome.
- Pose Matters: The AI adapts the garment to the model’s pose. For optimal results, use images where the garment is positioned or folded similarly to the model’s pose.
- Explore Diverse Applications: Go beyond product listings! Use this feature for on-demand fashion rendering, social media campaigns, design concept previews, rapid catalog updates, fashion digital twins for collection planning, and more.
Start using Style3D’s immersive fashion experiences today to transform your fashion workflow and revolutionize your customers’ experience!
Need further assistance? Visit our [Help Center Hub] or contact [Customer Support Link].