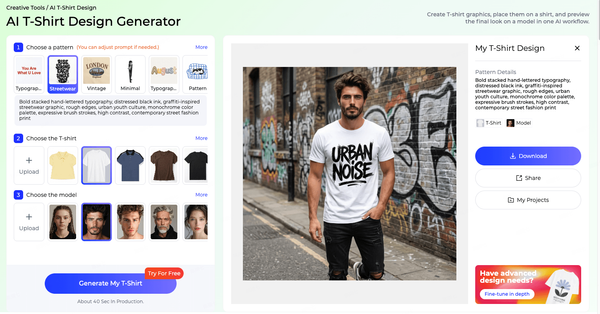

AI product photography for fashion is the use of artificial intelligence to create or extend the images and videos used to sell clothing, footwear and accessories online. Instead of organizing a full studio shoot for every product, brands and sellers use AI to turn product photos into on-model images, change a model's pose, create additional views, place products in new settings and produce short videos.
Fashion e-commerce runs on images. A shopper cannot touch a fabric or try on a jacket, so every product page has to answer their questions visually: how the item looks on a person, how it fits from the front and back, what the details look like and how it moves. Answering those questions has traditionally required a lot of photography, and for many brands, that photography is one of the slowest and most expensive parts of launching a product.
This guide explains how AI changes that. It starts with the essential fashion product shot list, explains ghost mannequin photography and how product photos become on-model images, and covers AI fashion models and virtual models. It then focuses on poses, with an e-commerce pose library, a step-by-step guide to changing a model's pose with AI and a set of pose prompts, before covering multiple views, backgrounds, video, quality checks and common questions.
One idea runs through the whole guide: a single good product or model photo can become a complete set of product content. Style3D AI's Photoshoot tools are built around that idea, with tools for virtual try-on, pose changes, model and background changes, and image-to-video.
Build a complete product shot list without a reshoot. Explore Style3D AI Photoshoot tools.
What Is AI Product Photography for Fashion?
AI product photography for fashion is the process of using AI tools to generate, edit or extend fashion product images, such as on-model shots, alternate poses, additional angles, lifestyle scenes and product videos, starting from existing product or model photos. It complements traditional photography rather than replacing every part of it.
How It Differs from Traditional Product Photography
In a traditional workflow, every image a brand needs is captured in a shoot: flat lays or ghost mannequin shots in a studio, on-model images with booked models, lifestyle images on location and videos with a separate crew. Each new product, color, pose or setting means more shooting and retouching.
In an AI-assisted workflow, a smaller set of high-quality source photos does more work. A clean product photo can become an on-model image. One model image can become several poses. A studio image can be placed in a lifestyle setting. A still image can become a short video. Photography is still important, because AI needs good inputs, but the number of separate shoots drops.
Who Uses AI Product Photography
E-commerce sellers use it to give every product on-model images, even when they launch new items weekly. Fashion brands use it to extend campaigns, localize imagery for different markets and keep catalogs consistent. Marketplace sellers use it to meet image expectations across several platforms. Content and social media teams use it to create more variations for testing and posting. Designers use it to visualize new products on models before samples exist. Each group has the same underlying need: more high-quality images, faster, without a matching increase in shoots. The tools they need overlap heavily: a way to create on-model images, a way to create consistent poses and views, a way to adapt settings, and a way to create video. That is why an integrated set of tools, rather than separate single-purpose apps, tends to save the most time. It also keeps output consistent, because every image in a product set comes from the same source and the same models.
The Business Case
The value of AI product photography comes from three places. First, speed: products can go live with complete imagery as soon as source photos exist, rather than waiting for the next scheduled shoot. Second, flexibility: images can be updated, localized or extended at any time, for a new campaign, a new market or a new platform format. Third, consistency: the same models, poses and backgrounds can be applied across an entire catalog, including late additions and products from different suppliers. Brands should measure these benefits in their own terms, such as time from product arrival to listing, number of products with complete imagery and content output per week.
What AI Can and Cannot Do
AI is strong at producing visual variety from good source material: new poses, new models, new backgrounds, new views and motion. It is much weaker at creating accurate information that was never captured, such as the exact texture of a fabric seen only from far away or a detail on the back of a garment that was never photographed. That is why the best results come from combining a few accurate source photos with AI-generated variations, and reviewing every result against the real product.
Style3D AI's Photoshoot tools follow this approach. Virtual Clothing Try-On turns garment images into on-model photos, Change Pose creates new poses from a model image, Change Model & BG adapts the model and setting, and Image To Video turns still images into short clips.
Key Terms in AI Product Photography
• Source image: the original product or model photo that AI tools work from.
• Packshot: a clean image of the product on a plain background.
• Ghost mannequin image: a product image that shows the garment's shape as if worn by an invisible body.
• On-model image: an image showing the product worn by a person, real or AI-generated.
• Virtual try-on: AI that places a garment from a product photo onto a model.
• Pose change: AI that changes a model's body position while keeping the model and outfit.
• Lifestyle image: a product image in a real-world setting.
• Image-to-video: AI that turns a still image into a short video clip.
The Fashion Product Shot List
A complete fashion product listing usually includes seven types of content: a flat lay or packshot, a ghost mannequin image, on-model images, detail shots, back and side views, lifestyle images and a short video. Not every product needs all seven, but planning from this list helps brands decide which images to shoot and which to create with AI.
1. Flat Lay or Packshot
A flat lay shows the garment laid flat on a clean background, photographed from above. It is quick to produce, shows the whole item clearly and works well for basics, accessories and marketplace main images. Its limitation is that it does not show shape, drape or fit. For best results, iron or steam the item, arrange it symmetrically and shoot from directly above with even lighting, so the image can also serve as a clean input for AI tools.
2. Ghost Mannequin Image
A ghost mannequin image, sometimes called an invisible mannequin image, shows the garment as if worn by an invisible body. It reveals the garment's three-dimensional shape without distracting from it, which makes it popular for product pages and catalogs. The next section explains how it is made. Ghost mannequin images are especially common for outerwear, shirts, knitwear and tailoring, where structure matters.
3. On-Model Images
On-model images show the product on a person. They are usually the most persuasive images on a product page, because they help shoppers imagine wearing the item and understand fit and proportion. They are also the most expensive to produce traditionally, which is why AI tools such as Style3D AI's Virtual Clothing Try-On focus on generating them from product photos.
4. Detail Shots
Detail shots show close-ups of fabric texture, stitching, buttons, zips, prints, labels and other features that matter to quality-conscious shoppers. These are best captured with real photography, because accuracy matters more than variety. AI is less useful here than for other shots. Plan two to four detail shots per product, focusing on the features shoppers ask about most, such as fabric texture, closures and finishing.
5. Back and Side Views
Back and side views show how a garment looks from every angle, including details such as back pockets, vents, open backs and fit through the hips. Instead of reshooting, brands can create alternative views from existing model images using AI pose changes, covered later in this guide. Back views are particularly important for dresses, jeans and tailored jackets, where fit at the back strongly influences buying decisions.
6. Lifestyle Images
Lifestyle images show the product in a real-world context, such as a street, an office or a beach. They help shoppers picture when and where they would wear the item, and they are widely used in ads and social media. Style3D AI's Change Model & BG can place on-model images in new settings without a location shoot. Lifestyle images also work well as the first image in social ads, where context and mood help stop the scroll.
7. Product Video
Short videos show how garments move: how a skirt swings, how a fabric drapes and how a jacket looks when the wearer turns. Video is increasingly expected on product pages and essential on short-video platforms. Image To Video in Style3D AI turns still product images into short clips. Even a few seconds of movement can show drape and fit more clearly than several still images.
Planning Which Shots to Shoot and Which to Generate
A practical rule is to photograph what must be accurate and generate what needs variety. Shoot flat lays or ghost mannequin images and key detail shots for every product, because these are your source of truth. Then use AI to create on-model images, extra poses, lifestyle scenes and video from those sources. This keeps product information accurate while greatly reducing the number of separate shoots.
Ghost Mannequin Photography: How It Works
Ghost mannequin photography creates the effect of a garment being worn by an invisible body. The garment is photographed on a mannequin, then the mannequin is removed in post-production and the inside of the garment, such as the inner neckline or back, is added from a second photo. The result shows the garment's true shape on a clean background.
How to Shoot Ghost Mannequin Images
Start with a mannequin that suits the garment's size and fit, ideally one with removable parts, such as a detachable neck or arms, so inner areas can be photographed separately. Style the garment carefully: smooth wrinkles, pin excess fabric at the back so it does not show from the front, and align seams and hems. Use even, soft lighting and a plain background to make editing easier, and keep the camera position fixed so every product in a collection is shot at the same height and angle.
Take a main shot of the garment on the mannequin from the front. Then, for garments with a visible inner area, such as a neckline or a collar, take a second shot of that inner area, often by turning the garment inside out on the mannequin or photographing the back panel separately. Many teams also shoot the back view the same way.
Equipment for Ghost Mannequin Photography
A basic setup includes a mannequin with removable parts, a camera on a tripod, two or more soft light sources, a plain backdrop and styling tools such as pins, clips and a steamer. Shooting tethered to a computer helps check alignment and lighting as you work. The most important factor is consistency: marking the mannequin and tripod positions on the floor ensures every product is photographed the same way, which makes editing faster and the catalog more uniform.
How to Remove the Mannequin and the Background
In post-production, an editor removes the background and the visible parts of the mannequin, then combines the main shot with the inner shot so the garment appears hollow and three-dimensional. The edges around the neckline, cuffs and hem need careful attention, because rough edges are the most common giveaway of a poorly edited ghost mannequin image. Finally, the image is color-corrected to match the real product and placed on a consistent background.
This editing is usually done in professional image-editing software, either in-house or by specialist editing services, and some AI editing tools now help speed up background removal and masking.
Common Ghost Mannequin Mistakes
Common mistakes include visible pins or clips, uneven shoulders, mannequin parts left in the image, inner areas that do not match the outer garment, and inconsistent sizing across a collection. Shooting every product with the same setup, and checking edges carefully, avoids most of these issues.
Why Ghost Mannequin Images Are Great AI Inputs
Ghost mannequin images are not only useful on their own. Because they show a garment's real shape cleanly, they are also excellent inputs for AI try-on tools. A brand that already has ghost mannequin images can use them with Style3D AI's Virtual Clothing Try-On to create on-model images, with no additional shoot. Clean, consistent inputs consistently produce better AI results.
Ghost Mannequin vs Flat Lay vs On-Model: When to Use Each
Each format has a role. Flat lays are fastest and work well for basics, accessories and marketplace main images where a clean product view is required. Ghost mannequin images show shape and structure, making them ideal for catalogs and for products where silhouette matters, such as coats, blazers and shirts. On-model images show fit and styling and are usually the most persuasive images for apparel. Many brands use all three: a flat lay or ghost mannequin image as the main or second image, followed by on-model images, details and lifestyle shots. Because ghost mannequin and flat lay images are also the best inputs for AI try-on, investing in a consistent setup for them pays off twice.
From Product Photo to On-Model Image
AI virtual try-on turns a product photo, such as a flat lay or ghost mannequin image, into a realistic image of a model wearing the product. It is the fastest way to add on-model images to a catalog without booking models and studios for every item.
In Style3D AI's Virtual Clothing Try-On, you upload garment images, choose a model from the built-in library or upload your own model photo, select the target platform, and generate up to four try-on images in standard or 4K resolution. The HQ3.0 model accepts front, side and back garment uploads for more complete results.
For a full explanation of how virtual try-on works, how accurate it is and how to use it step by step, see our complete guide to virtual try-on. In this guide, the focus is on what happens next: changing poses, creating more views and turning images into video.
Before running try-on at scale, prepare source photos consistently: the same background, lighting, camera height and garment styling for every product in a category. Name files clearly by product code and color. Consistent inputs lead to consistent outputs, which makes the rest of the workflow, from pose changes to video, much easier to manage.
If you only have supplier photos or older images, start by reviewing them for accuracy and quality. Images that are sharp, evenly lit and show the whole garment can often be used as inputs. Where the only available images are poor, a simple in-house flat lay setup, with a plain background, a phone or camera on a stand and two soft lights, is usually enough to create usable source photos quickly.
AI Fashion Models and Virtual Models
A virtual model is a digital person used to present fashion products, instead of, or alongside, a photographed human model. In e-commerce, the most common type is an AI-generated model created by an AI fashion model generator, which can wear products in realistic images without a physical shoot.
What Is a Virtual Model?
The term "virtual model" covers several things. AI-generated models are photorealistic people created by AI for product images. Virtual influencers are fictional digital characters with social media personalities, used mainly for marketing. 3D avatars are digital bodies built in 3D software, often used for fit simulation and virtual fashion. For product photography, AI-generated models are by far the most relevant.
How Brands Choose AI Models
The same principles that guide model casting apply to AI models. Choose models who reflect your customers and your brand. Use a consistent set of models across a product line so pages look cohesive. Represent a range of body types, skin tones and ages where relevant, so more shoppers can picture themselves in your products. For brands selling in several regions, consider models that reflect each market. Style3D AI offers a built-in AI model library, so teams can select models that fit each product line and use them consistently across a catalog.
AI Models for Different Categories
Different categories call for different model choices. Activewear benefits from models who look natural in athletic poses. Tailoring and occasion wear benefit from poised, polished presentation. Kidswear requires particular care and should follow the strict rules that apply to images of children on each platform. Lingerie and swimwear should be presented respectfully and in line with platform policies. For each category, define a small set of models and keep them consistent so the category looks cohesive.
Using Your Own Models
Many brands already work with specific models or have a recognizable campaign look. Style3D AI's try-on tools let brands upload their own model photos, so AI-generated images can match existing campaigns. When using real models' photos with AI, make sure your agreements with those models cover AI editing and the ways the resulting images will be used.
Free AI Fashion Model Generators: What to Expect
Many AI fashion model generators offer free trials or limited free plans. These are useful for testing, but free versions may limit resolution, the number of images, model choices or commercial usage rights. Style3D AI offers a free trial, which is a practical way to test model selection and try-on results on your own products. Before using any generated images commercially, read the tool's terms on ownership and usage.
Ethics and Disclosure
AI models raise important questions. Brands should be thoughtful about representation and avoid presenting unrealistic or misleading body standards. Some platforms and jurisdictions require AI-generated imagery to be disclosed, and expectations are evolving, so check the rules that apply to you. Real models' likenesses should only be used with clear consent. And whatever model is used, product images must accurately represent the actual product. Handling these questions openly protects both customers and the brand.
Once a brand has chosen its AI models, consistency becomes the main goal. Use the same models for a product line across seasons, keep their styling, hair and makeup consistent, and pair each model with the same pose set and background style. This makes the catalog feel curated rather than generated, and helps returning customers recognize the brand's look immediately.
Why Poses Matter: The Essential E-commerce Pose Library
Poses determine what a shopper can learn from an image. A front-facing pose shows overall style, a side pose shows silhouette and fit, a back pose shows back details, a walking pose shows movement and drape, and a seated pose shows how a garment behaves when the wearer sits. A good product page uses several poses to answer different questions. Poses also affect perceived quality: natural, well-balanced poses make products look premium, while awkward poses can make even good garments look cheap. That is why established brands often define a fixed pose sequence for each category and use it for every product.
The poses below form a practical library for fashion e-commerce:
• Front standing, arms relaxed: the main on-model image for most products; shows overall style and proportion.
• Three-quarter turn: adds depth and shows the side of the garment while keeping the front visible; flattering for most categories.
• Side profile: shows silhouette, length and fit through the body, especially useful for trousers, dresses and outerwear.
• Back view: shows back details, such as pockets, vents, zips, open backs and fit through the shoulders and hips.
• Walking: shows movement and drape, ideal for dresses, skirts, wide-leg trousers and coats.
• Hands in pockets or adjusting a garment: makes images feel natural and draws attention to pockets, cuffs or collars.
• Seated: shows how trousers, skirts and dresses behave when the wearer sits, useful for workwear and occasion wear.
• Detail-focused pose: angles the body to show a specific feature, such as a sleeve detail, a belt or a print placement.
• Dynamic or lifestyle pose: more expressive poses for campaigns and social media, such as leaning, turning or mid-stride.
Poses by Garment Type
Different garments need different poses to show what matters most:
• Dresses and skirts: walking and turning poses show movement and drape; a side pose shows length; a back view shows closures and open backs.
• Trousers and jeans: side profile and back views show fit through the hips and legs; a walking pose shows leg width and movement.
• Outerwear: open and closed views show both the outer shell and the lining; hands-in-pockets poses show pocket placement; a three-quarter pose shows structure.
• Tops and shirts: front and three-quarter poses show neckline and fit; a raised-arm pose shows sleeve length and side seams.
• Activewear: dynamic poses such as lunges, stretches and strides show stretch and range of motion.
• Knitwear: relaxed poses with natural folds show texture and drape; close crops show knit detail.
Consistency matters as much as variety. Using the same set of poses, in the same order, across a category makes a store look professional and helps shoppers compare products. Creating each of these poses through separate shoots is costly, which is where AI pose changing helps: Style3D AI's Change Pose creates new poses from a single model image.
How to Change a Model's Pose with AI
To change a model's pose with AI, upload a model photo, choose a generation mode, describe or show the new pose, generate several variations and review them before exporting. An AI pose changer keeps the model and the outfit the same while changing the body position, so one image can become a full set of poses.
The steps below use Style3D AI's Change Pose.
Step 1: Upload a Model Image
Start with a clear image of a model wearing the product. This can be an on-model product photo, an e-commerce image, a lookbook image or a campaign asset, including images created with Virtual Clothing Try-On. Choose an image where the garment is fully visible, well lit and in focus, because the AI needs to see the garment clearly to keep it consistent in new poses.
Step 2: Choose a Generation Mode
Change Pose offers two modes. FS1.0 generates new poses from a pose reference image and delivers faster results. HQ1.0 generates new poses from a text prompt and delivers more stable results. Use FS1.0 when you have an example image of exactly the pose you want, for example to match a pose used across your existing catalog. Use HQ1.0 when you want to describe the pose in words, or when stability matters more than speed. Many teams use both: FS1.0 to match an established pose from their existing catalog, and HQ1.0 to explore new poses for campaigns or new categories.
Step 3: Show or Describe the Pose
For FS1.0, upload a pose reference image showing the body position you want. For HQ1.0, write a short prompt describing the pose, such as "model standing in a three-quarter turn to the left, one hand in the trouser pocket, looking at the camera". Keep the description focused on body position, rather than changing the outfit or setting. The next section includes ready-to-use pose prompts.
Step 4: Generate Variations
Generate the new poses. Change Pose produces up to four pose variations from a single image, so you can compare options and choose the best. If none are right, adjust the reference image or prompt and try again.
Step 5: Review and Export
Check every result carefully. The garment should look the same as in the original: same color, print, logo, length and details. The model's face and body should stay consistent. Hands, feet and areas where arms overlap the garment deserve particular attention. Export the approved images for product pages, lookbooks, social media or campaigns.
Common Pose-Change Problems and How to Fix Them
A few problems come up often. If the garment changes in the new pose, for example a print shifts or a length changes, start from a clearer source image where the whole garment is visible and in focus. If hands look unnatural, choose poses where hands are relaxed or partly hidden, such as in pockets, or try another variation. If the model's face changes, select the variation that stays closest to the original. If a pose looks unbalanced or distorts the garment, simplify the pose: subtle changes, such as a three-quarter turn, usually produce more reliable results than dramatic ones. And if results vary between products, use the same reference image or prompt for every product in the category.
Building a Full Pose Set from One Image
Using these steps, a brand can build a consistent pose set for every product from one strong model image: front, three-quarter, side and back views, plus a walking pose for movement. Applying the same references or prompts to every product in a category keeps the whole catalog consistent.
Get up to four new poses from one model photo. Try Style3D AI Change Pose.
Writing Pose Prompts
A good pose prompt describes the body's direction, the position of the arms and hands, the leg position or movement, and the gaze. Keep prompts short and focused on the pose, and reuse the same wording across products to keep results consistent.
A simple structure is: body direction + arms and hands + legs or movement + gaze or expression.
The following prompts are written for text-based pose generation, such as HQ1.0 in Style3D AI's Change Pose:
• "Standing facing the camera, arms relaxed at the sides, feet hip-width apart, neutral expression."
• "Three-quarter turn to the left, right hand in trouser pocket, looking at the camera."
• "Three-quarter turn to the right, left hand lightly holding the jacket lapel, soft smile."
• "Side profile facing left, arms relaxed, standing straight, looking ahead."
• "Back view, standing straight, arms relaxed, head turned slightly over the right shoulder."
• "Walking toward the camera mid-stride, arms swinging naturally, looking ahead."
• "Walking to the right, mid-stride, skirt in motion, looking forward."
• "Standing with weight on one leg, one hand on the hip, confident expression."
• "Both hands in jacket pockets, shoulders relaxed, looking slightly away from the camera."
• "Adjusting the shirt cuff with one hand, body angled three-quarter left, looking down at the cuff."
• "Seated on a stool, legs crossed at the knee, hands resting on the lap, looking at the camera."
• "Seated on a step, leaning forward with elbows on knees, relaxed expression."
• "Leaning against a wall with one shoulder, arms crossed loosely, looking at the camera."
• "Turning away from the camera, looking back over the left shoulder, showing the back of the dress."
• "Standing with arms raised slightly away from the body to show the sleeves and sides of the garment."
Avoid prompts that ask for extreme or unusual poses for product pages, because they can distort the garment and make fit harder to judge. Save expressive poses for campaigns and social content.
If you already have an established pose style, write prompts that describe your existing catalog poses precisely and save them as templates. New products can then be generated in exactly the same poses as older ones, so the catalog stays consistent as it grows. Reference images work the same way: keep a small library of approved pose references and reuse them with FS1.0 for every new product.
Multiple Views, Model Variations and Backgrounds
Beyond poses, AI can create additional views of a product, show the same product on different models and place images in new settings. Together, these turn a single photo into content for many channels.
Multiple Views
Shoppers often want to see a product from several angles before buying. Pose changes can show side and back views of an on-model image, and dedicated view-generation tools can extend this further. Style3D AI also includes a Generate Views tool for creating additional views. Additional views are particularly useful when a product has important details on the back or sides, or when shoppers frequently ask about fit from different angles.
Model Variations
Showing a product on more than one model helps different shoppers relate to it, and helps brands localize imagery for different markets. Style3D AI includes Model Variations and Change Model & BG, so the same outfit can be shown on different models without a new shoot.
Backgrounds and Settings
Product pages usually need clean, consistent backgrounds, while ads and social media benefit from lifestyle settings. Changing the background lets one on-model image serve both. Match the setting to the product: outerwear outdoors, loungewear at home, eveningwear in a refined interior. Keep lighting and color consistent with the original image so the product still looks accurate.
Seasonal and Campaign Variations
The same product often needs different imagery through the year: a summer setting for launch, a holiday setting for gifting promotions and a clean studio look for the product page all year round. Instead of reshooting, brands can create seasonal variations from the same source images. With Style3D AI, teams can combine Change Pose, Change Model & BG and Image To Video to refresh campaign content for each season from the same set of on-model images. This keeps marketing fresh while product information stays consistent.
Video and 360 Product Content
Product video shows how garments move and drape, which still images cannot fully capture. Short clips of a model turning, walking or moving are increasingly common on product pages and essential on short-video platforms, and 360-degree product views let shoppers see an item from every side.
Traditionally, video requires its own shoot, crew and editing. AI makes it possible to create short clips from existing images. Style3D AI's Image To Video turns still images into short video content, and Reference To Video creates video guided by a reference. A simple product video might show the model turning slowly to reveal the front, side and back of a garment, giving shoppers a 360-degree impression without a turntable setup.
Video Ideas by Category
For dresses and skirts, a slow turn or a few steps shows movement. For outerwear, opening and closing the jacket shows the lining and structure. For trousers, walking shows leg shape and drape. For knitwear, a gentle movement shows texture and softness. For accessories, a slow rotation or a close-up of the item in use works well. Planning a standard video type for each category makes production faster and keeps product pages consistent.
Product videos work in several places: as the second or third item in a product page gallery, in short-video and social feeds, in paid social ads, in marketplace listings that support video, and in email campaigns as animated previews. Creating one short clip per product, and reusing it across these channels, is an efficient way to start.
Keep product videos short, focused on the garment and consistent in style across a category. As with images, make sure videos accurately represent the product's color, fabric and fit.
Turn your best product images into short videos. Try Style3D AI Image To Video.
Building an AI Photoshoot Workflow
An AI photoshoot workflow turns AI tools into a repeatable production process. It usually has six stages: capture accurate source images, generate on-model images, create a standard pose set, add backgrounds and variations, produce video, and review before publishing.
Here is how those stages map to Style3D AI:
1. Capture source images: shoot flat lays or ghost mannequin images and key details for every product, using a consistent setup.
2. Generate on-model images: use Virtual Clothing Try-On with an approved set of models for each category and select the target platform.
3. Create a standard pose set: use Change Pose with saved pose references or prompts to produce front, three-quarter, side and back views.
4. Add backgrounds and variations: use Change Model & BG and Model Variations for lifestyle settings, markets and campaigns.
5. Produce video: use Image To Video for short product clips.
6. Review and publish: check every image and video with the accuracy checklist below, then upload with consistent file names.
Assign clear owners for each stage and keep a short style guide covering models, poses, backgrounds and video. Processing products in batches, by category or by delivery, keeps quality consistent and makes it easy to scale as the catalog grows.
Quality and Accuracy Checklist
Every AI-generated product image or video should be checked against the real product before publishing. Accuracy protects customer trust and reduces the risk of returns caused by products looking different from their images.
Use this checklist:
1. Color matches the real product under neutral lighting.
2. Prints, patterns and logos are correct, sharp and in the right position.
3. Details such as buttons, zips, pockets and stitching match the product.
4. Length and proportions look accurate for the garment and size shown.
5. Fabric looks plausible for its type and weight.
6. Hands, feet, hair and overlapping areas look natural.
7. The model's face and body are consistent across all images of the product.
8. Backgrounds and lighting are consistent within the category.
9. Images meet each platform's current guidelines.
10. AI-generated imagery is disclosed where platform rules or local regulations require it.
If an image fails any of these checks, regenerate it, adjust the input or choose another variation. It is better to publish fewer, accurate images than more images that misrepresent the product.
Common Causes of Inaccurate Images
Most accuracy problems trace back to a few causes: low-quality or poorly lit source photos, garments photographed with wrinkles or folds hiding details, incorrect garment type selection, complex prints that are hard to preserve, and poses that stretch or hide parts of the garment. Fixing the source photo or simplifying the pose solves most issues faster than repeated regeneration.
Who Should Review AI Images
Assign review to someone who knows the products well, such as a merchandiser, product manager or the person who handled the samples. They are best placed to spot differences in color, length and details. For larger catalogs, a two-step review works well: a quick check by the content team, followed by a product check before publishing.
FAQ
What is AI product photography?
AI product photography is the use of AI to create or extend product images and videos, such as on-model shots, new poses, additional views, lifestyle scenes and short clips, from existing product or model photos. In fashion, it reduces the number of separate shoots needed per product.
How do you do ghost mannequin photography?
Photograph the garment on a mannequin with even lighting and a plain background, then photograph inner areas such as the neckline separately. In editing, remove the mannequin and background and combine the shots so the garment appears worn by an invisible body.
How do I remove the mannequin from product photos?
Use image-editing software to mask out the mannequin and background, then add the garment's inner area from a second photo. Pay close attention to edges around the neckline, cuffs and hem, and color-correct the final image to match the product.
What is a virtual model?
A virtual model is a digital person used to present fashion products. In e-commerce, this usually means an AI-generated model shown wearing products in realistic images, created without a physical photoshoot.
Can AI change a model's pose?
Yes. AI pose changers create new poses from an existing model image while keeping the model and outfit consistent. Style3D AI's Change Pose generates up to four pose variations from a single image, using either a pose reference image or a text prompt.
Is there a free AI fashion model generator?
Several tools offer free trials or limited free plans. Style3D AI offers a free trial, so you can test its Photoshoot tools on your own product photos. Check output quality, resolution and commercial usage terms before choosing a tool.
How many product photos should a clothing listing have?
Many fashion listings use around five to eight images, typically a main image, several on-model poses including a back view, detail shots and, where possible, a lifestyle image or video. The right number depends on the product and platform.
What is the best pose for clothing product photos?
The front standing pose with relaxed arms is the standard main image for most garments, followed by a three-quarter turn, a side view and a back view. Walking poses are valuable for dresses, skirts and trousers because they show movement.
Can I use AI product photos on marketplaces?
Generally yes, provided images accurately represent the product and follow each marketplace's current image requirements. Many sellers use clean product photos as main images and AI-generated on-model and lifestyle images as additional images.
How do I make product photos look consistent?
Use the same background, lighting, camera position, models and pose sequence for every product in a category. With AI tools, save the model choices, pose references and prompts you use, and apply them to every new product.
Do I need to disclose AI-generated fashion images?
It depends on the platform and jurisdiction, and the rules are evolving. Check the guidelines of each platform you sell on and any local regulations. In all cases, images should accurately represent the product.
Conclusion
AI product photography gives fashion brands and sellers a new way to build complete product content: shoot a small set of accurate source images, then use AI to create on-model photos, new poses, additional views, lifestyle settings and video. The result is faster launches, more consistent catalogs and more content for every channel, as long as every image is checked against the real product. Start with one category, define your shot list, models and pose set, and build the workflow step by step. Once the process works for one category, it can be applied across the whole catalog.
Create on-model images, new poses and product videos from the photos you already have. Start with Style3D AI.
Written by