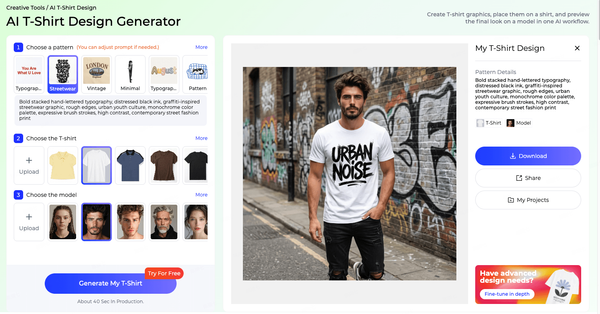
How to Edit Specific Garment Areas and Details Without Starting Over?
Small garment edits should not require a full redesign. Style3D AI Garment Refine lets you modify specific areas and details of any existing garment image directly, generating a realistic updated visual in seconds. This guide covers the full workflow from upload to final output.

Introduction: What is Garment Refine?
Most garment modifications start small. You want to remove a pocket, lengthen a sleeve, change a neckline, or swap the fabric on one section. But even small edits traditionally mean going back to the drawing board, producing a new sample, or spending hours in editing software.
Garment Refine handles targeted edits directly on your existing garment image. Upload a reference photo, describe the change you want, and Style3D AI applies it to the specific area you define — without rebuilding the rest of the design. Whether you are refining a collection piece, responding to client feedback, or testing a detail change before sampling, Garment Refine turns what used to be a full iteration into a single generation.
Quick Start Guide
Step 1: Choose Your AI Generation Model
Select the processing engine according to your needs:
- FS1.0 (Fast Speed): Best for rapid iteration and quick edits.
- HQ1.0 (High Quality): Optimized for refined, retail-ready visuals with more precise garment details.
Step 2: Upload Your Garment Image
Click the Upload Image box to add the garment you want to edit — a product photo, flat-lay, or existing design visual.

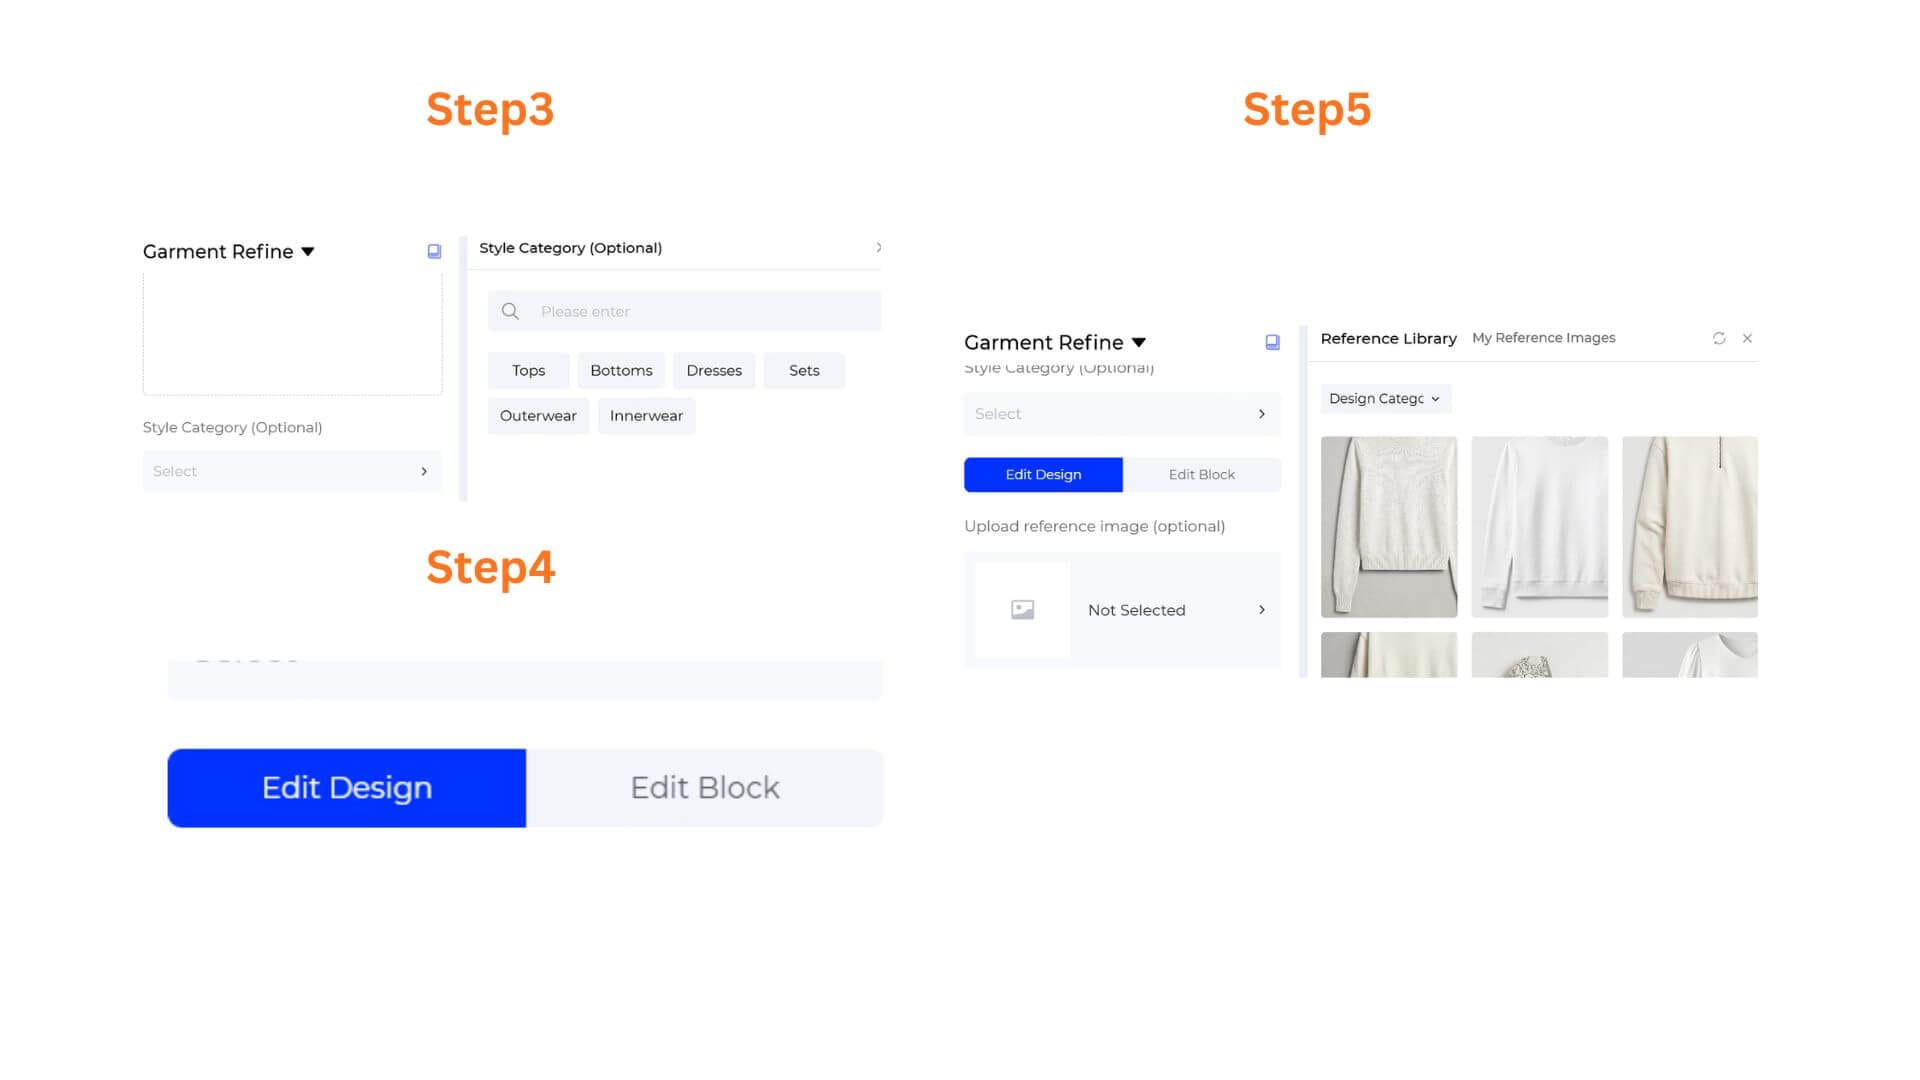
Step 3: Tag the Style Category (Optional)
Click the Style Category dropdown to open the side panel and select the tag that matches your garment: Tops, Bottoms, Dresses, Sets, Outerwear, or Innerwear. This helps the AI recognize the garment's structure and apply edits more accurately.
Step 4: Choose Your Edit Mode
Select how you want to apply the changes:
- Edit Design: Makes broader style changes to the overall garment based on your Style Description and an optional reference image. Use this for overall modifications like changing silhouette, fabric, or aesthetic direction.
- Edit Block: Targets a specific structural element of the garment for editing. Use this when you want to change one detail — a collar, pocket, sleeve, or hem — without affecting the rest of the design.
Step 5 (Edit Design only): Upload a Reference Image (Optional)
Click the Upload reference image field to open the Reference Library panel. You have two options:
- Reference Library: Browse Style3D's curated image library and filter by Design Category to find a reference that matches the direction you want.
- My Reference Images: Upload your own reference images — a fabric swatch, a detail from another garment, or any style visual you want the AI to draw from.
Select a reference image and the AI will incorporate elements from it into your edit.
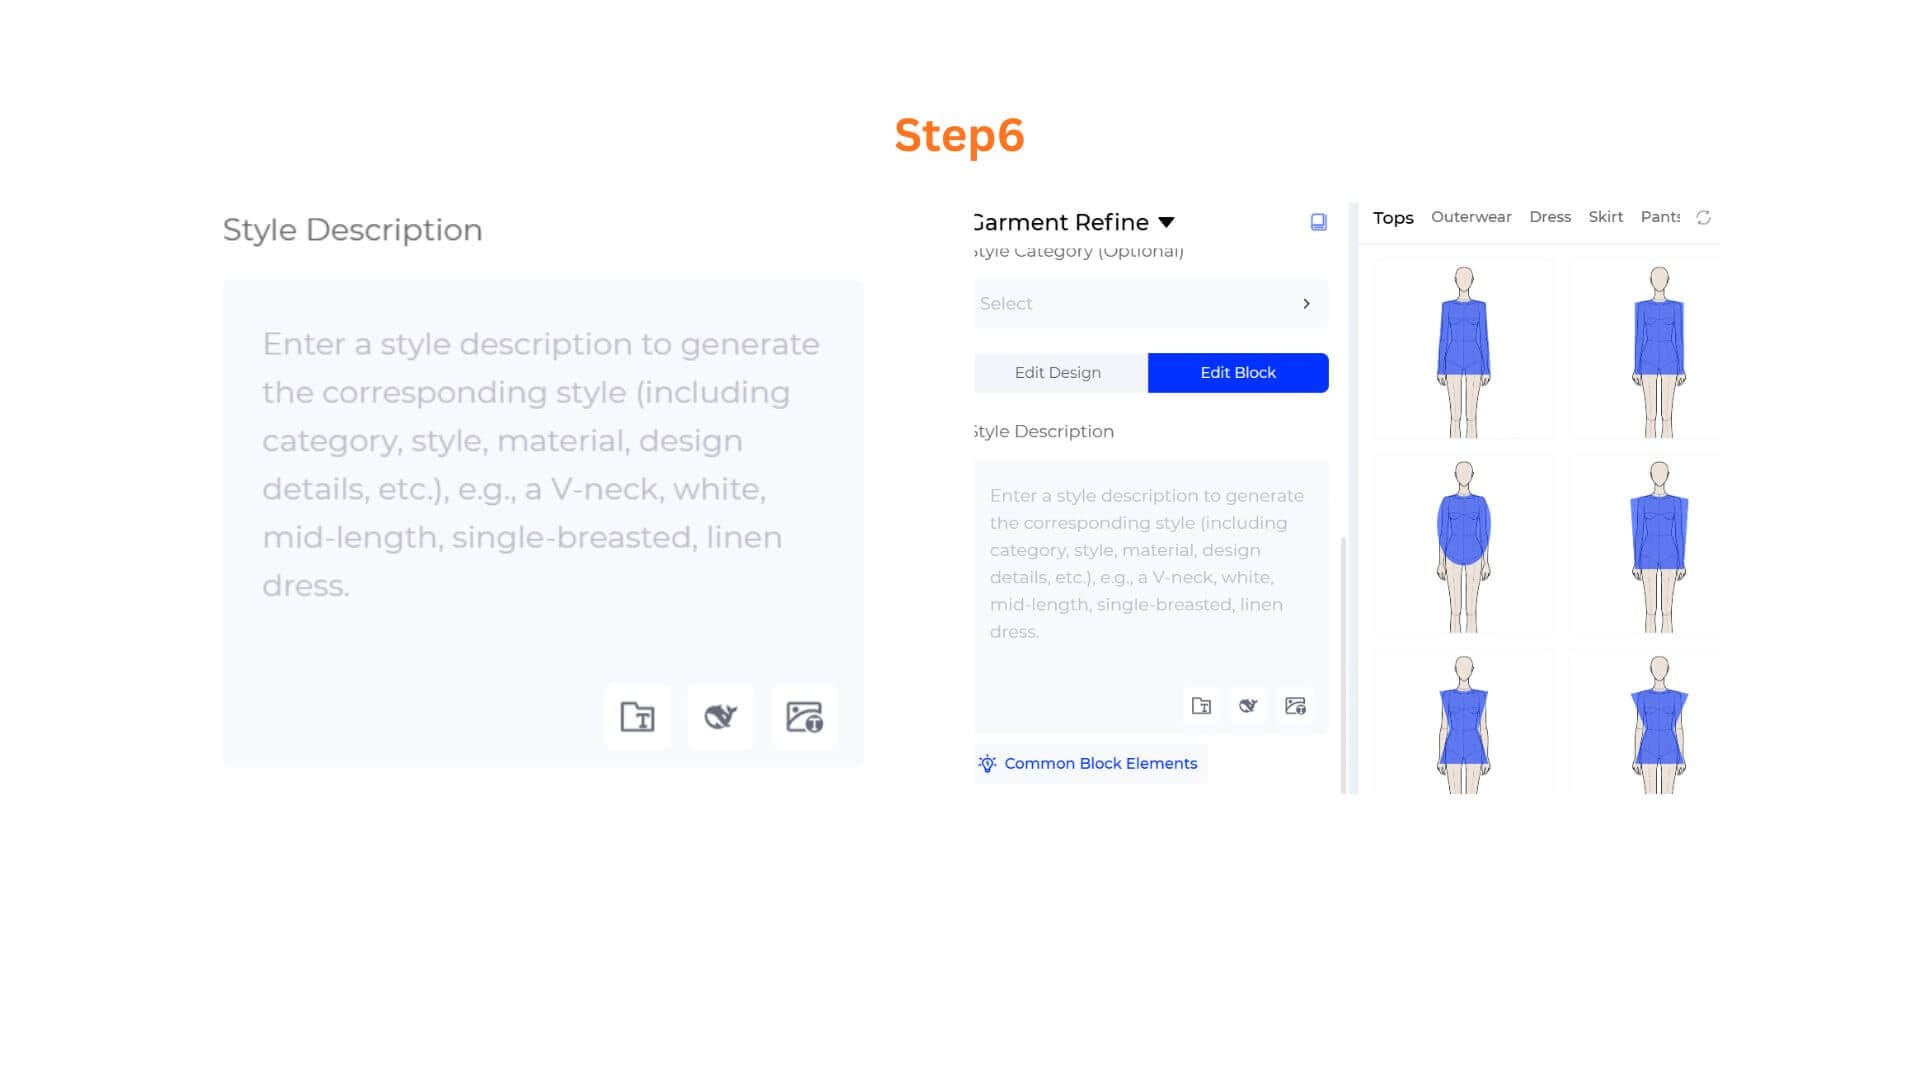
Step 6: Write Your Style Description
In the Style Description box, describe exactly what you want to change. Be specific about the element you are modifying and any material or structural details to keep or adjust.
Example: "Replace the side chest pocket with a clean panel seam. Keep the hoodie structure and cream fabric unchanged."
Smart Shortcuts: Utilize the three quick-action tool icons (Prompt Manager, Opt Prompt, Rev Prompt) at the bottom right corner of the field to instantly optimize your descriptive vocabulary or reset entries.
- Prompt Manager: Click to open the side panel to search, manage, or add custom prompt templates to your workspace.
- Opt Prompt: Click to instantly expand a simple idea into professional, highly descriptive prompt options.
- Rev Prompt: Click to upload an inspiration or trend reference photo, automatically reverse-engineering the visual into text inside your box.
For Edit Block mode, you can also click Common Block Elements to browse a list of common garment parts as a starting point for your description.
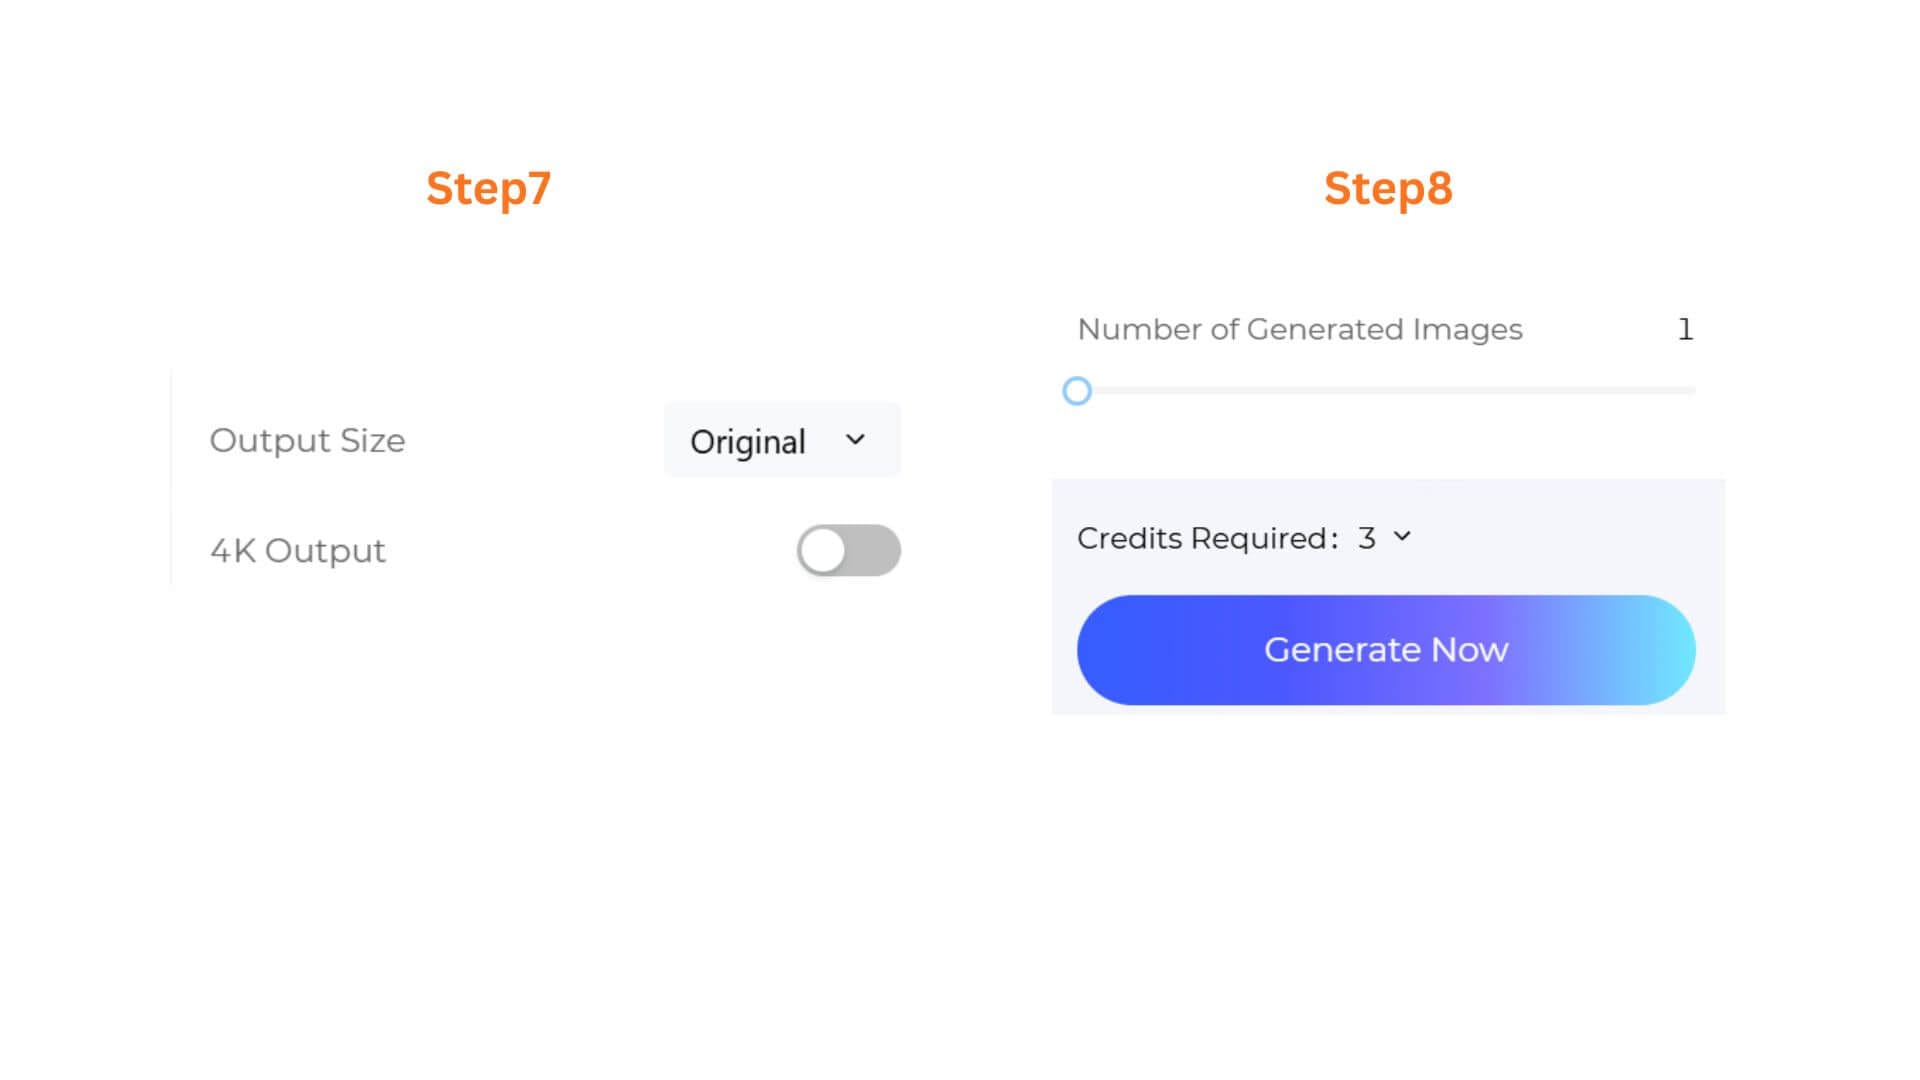
Step 7: (HQ1.0 only)Configure Output Size & Toggle 4K Resolution
- If you selected HQ1.0, you can select an Output Size to match your intended use, and toggle 4K Output on for ultra-high-definition renders suited for client presentations or premium marketing assets. These options are not available on FS1.0.
- Select an Output Size that matches your intended use.
Step 8: Set Batch Quantity & Generate
Use the slider to choose how many variations you want in a single run, from 1 to 4 images. Check the Credits Required counter, then click the gradient Generate Now button. Your edited garment visual is ready to view, download, or bring into the next stage of your workflow.
Pro-Tips
Use Edit Block for Precise, Targeted Changes
When you only want to modify one detail — a collar shape, a button placement, a hem finish — use Edit Block rather than Edit Design. Edit Block keeps the rest of the garment intact and focuses the AI's attention on the specific element you define, which produces much cleaner results for small, precise edits.
Be Specific About What to Keep
As important as describing what you want to change is describing what you want to preserve. If you are editing a sleeve but want the fabric, color, and silhouette of the rest of the garment to stay exactly the same, say so explicitly in your Style Description. Vague prompts leave more room for unintended changes elsewhere.
Use the Reference Library for Faster Direction-Setting
Instead of trying to describe a design direction entirely in words, browse the Reference Library to find an image that already captures the look you want, then let the AI interpret it. This is faster and often produces more accurate results than a long text description, especially for complex fabric textures or structural details.
Use a Reference Image for Material Changes
If you want to swap a fabric or introduce a specific texture, uploading a reference image of that material via My Reference Images gives the AI a much clearer target than a text description alone. This is especially useful for prints, weaves, and specialty fabrics that are difficult to describe precisely in words.
Frequently Asked Questions
Q: What is the difference between Edit Design and Edit Block?
A: Edit Design applies changes to the garment as a whole based on your Style Description and an optional reference image, making it suitable for broader style shifts like changing the silhouette, overall fabric, or aesthetic direction. Edit Block focuses on a specific structural element and is better suited for precise, localized edits like modifying a collar, adjusting a pocket, or changing a hem without touching the rest of the design.
Q: My edit changed parts of the garment I did not want to modify. What should I do?
A: This usually happens when the Style Description is focused only on the change and does not specify what to preserve. Try adding explicit instructions to keep certain elements unchanged, for example: "Change the collar to a mandarin style. Keep the fabric, color, and all other structural details exactly as in the original image." Switching to Edit Block mode can also help by restricting the AI's attention to a defined area.
Q: Can I use Garment Refine to test how a different fabric looks on an existing design?
A: Yes. Upload your garment image, describe the fabric change in the Style Description, and optionally upload a fabric reference via My Reference Images. Garment Refine will generate a realistic visualization of the same design in the new material without rebuilding the garment from scratch.
Written by
What's Next?

How to Instantly Swap Garment Colors with AI?
Style3D AI Change Colors lets you swap fabric colors and preview multiple colorway variations directly from any garment photo. This step-by-step guide walks you through the full workflow, from uploading your garment to generating accurate, production-ready colorway visuals in moments.