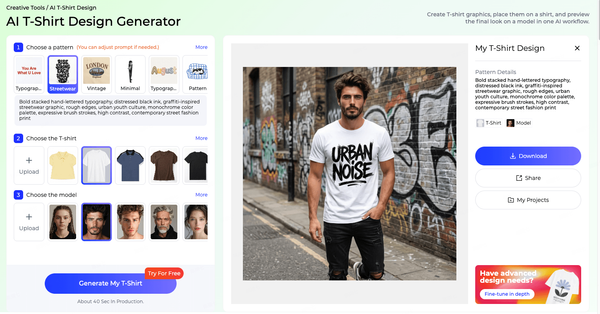
How to Instantly Swap Garment Colors with AI?
Style3D AI Change Colors lets you swap fabric colors and preview multiple colorway variations directly from any garment photo. This step-by-step guide walks you through the full workflow, from uploading your garment to generating accurate, production-ready colorway visuals in moments.

Introduction: What is Change Colors?
Adjusting a garment's color to match a client brief, test a seasonal palette, or respond to a last-minute change used to mean going back into editing software or ordering a new physical sample. Both options take time that most production timelines do not have.
Change Colors handles the swap directly on your existing garment image. Upload a reference photo, choose how you want to define the new color, describe the area you want to recolor, and Style3D AI applies the change with accurate fabric rendering — preserving the texture, shading, and material behavior of the original. Cotton, leather, sequins: the AI adjusts based on how light interacts with each material, so the result is ready for client review, e-commerce display, or internal sign-off without any additional retouching.
Quick Start Guide
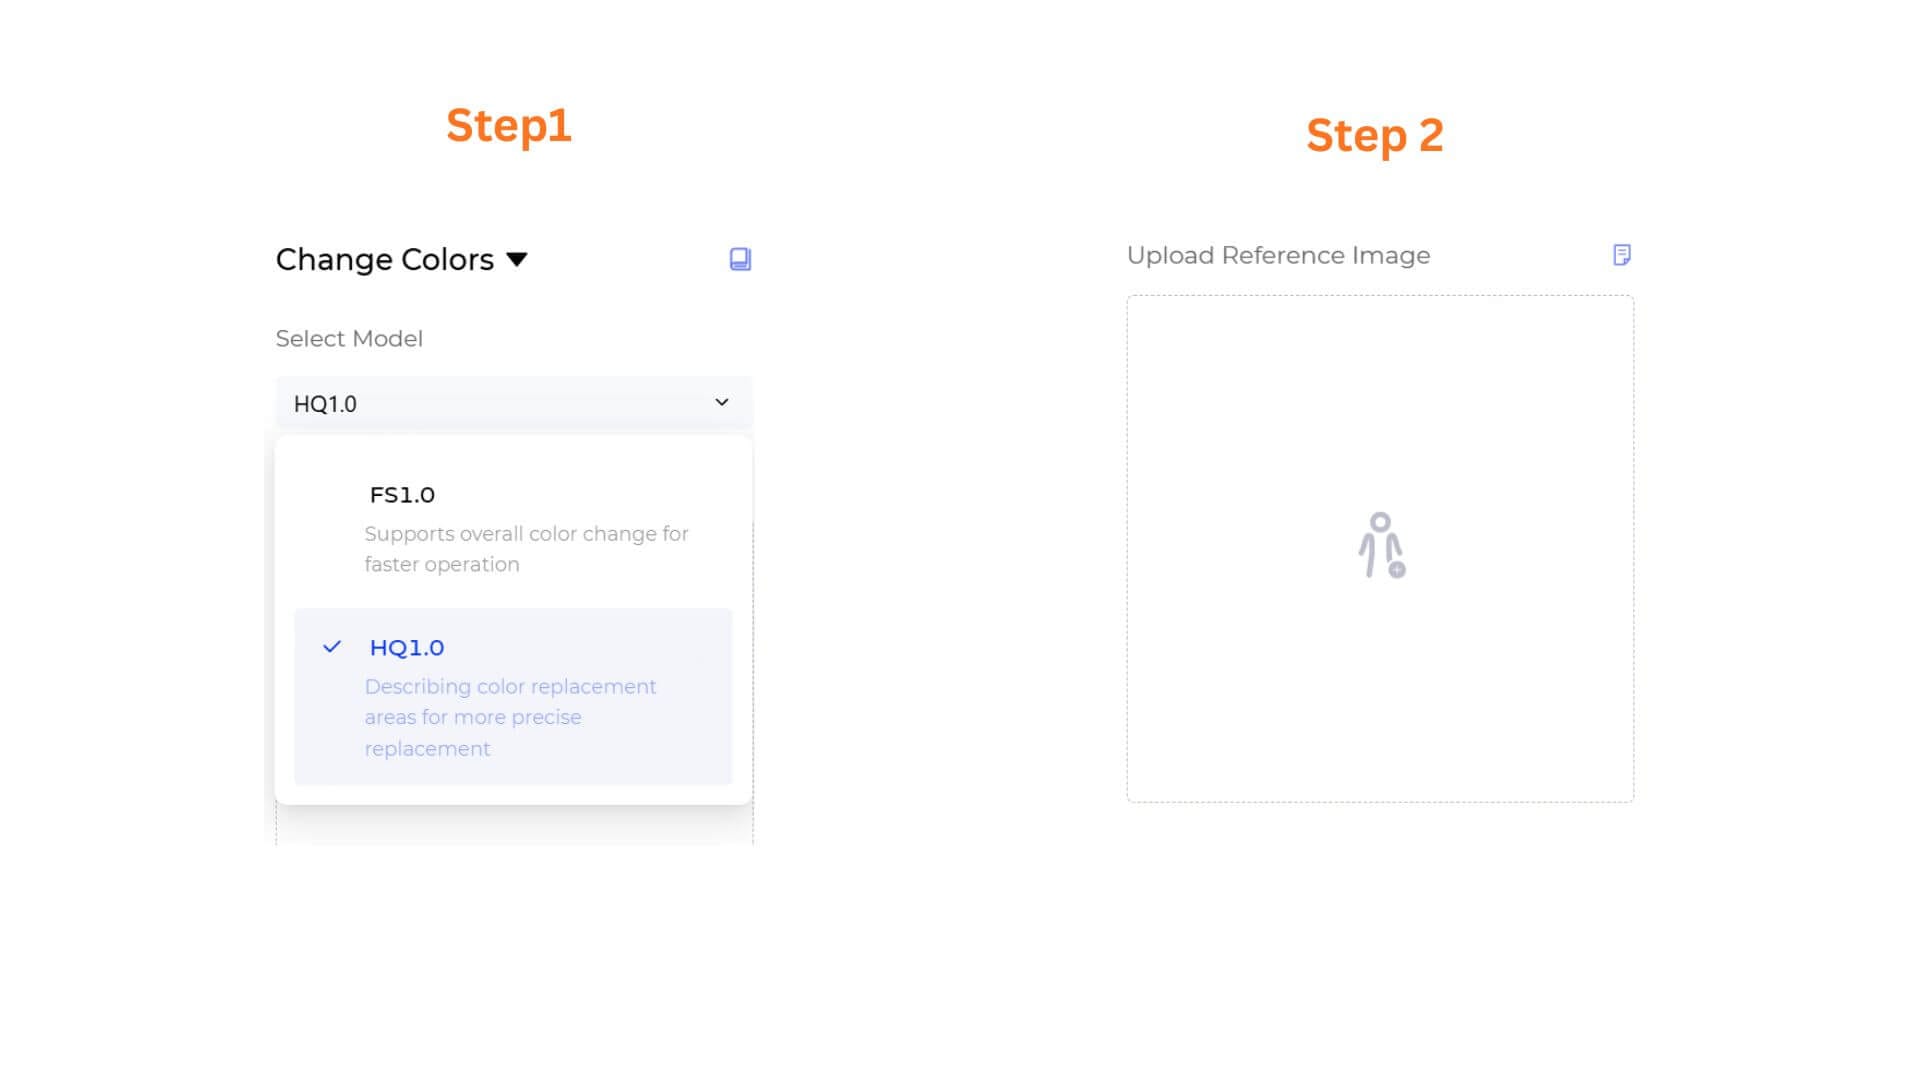
Step 1: Choose Your AI Generation Model
Select the processing engine according to your needs:
- FS1.0 (Fast Speed): Best for rapid colorway exploration and quick concept testing.
- HQ1.0 (High Quality): Optimized for precise, retail-ready color rendering with accurate fabric behavior.
Step 2: Upload Your Reference Image
Click the Upload Reference Image box to add the garment you want to recolor. For best results, use a well-lit photo with a clear garment outline and minimal background distractions.
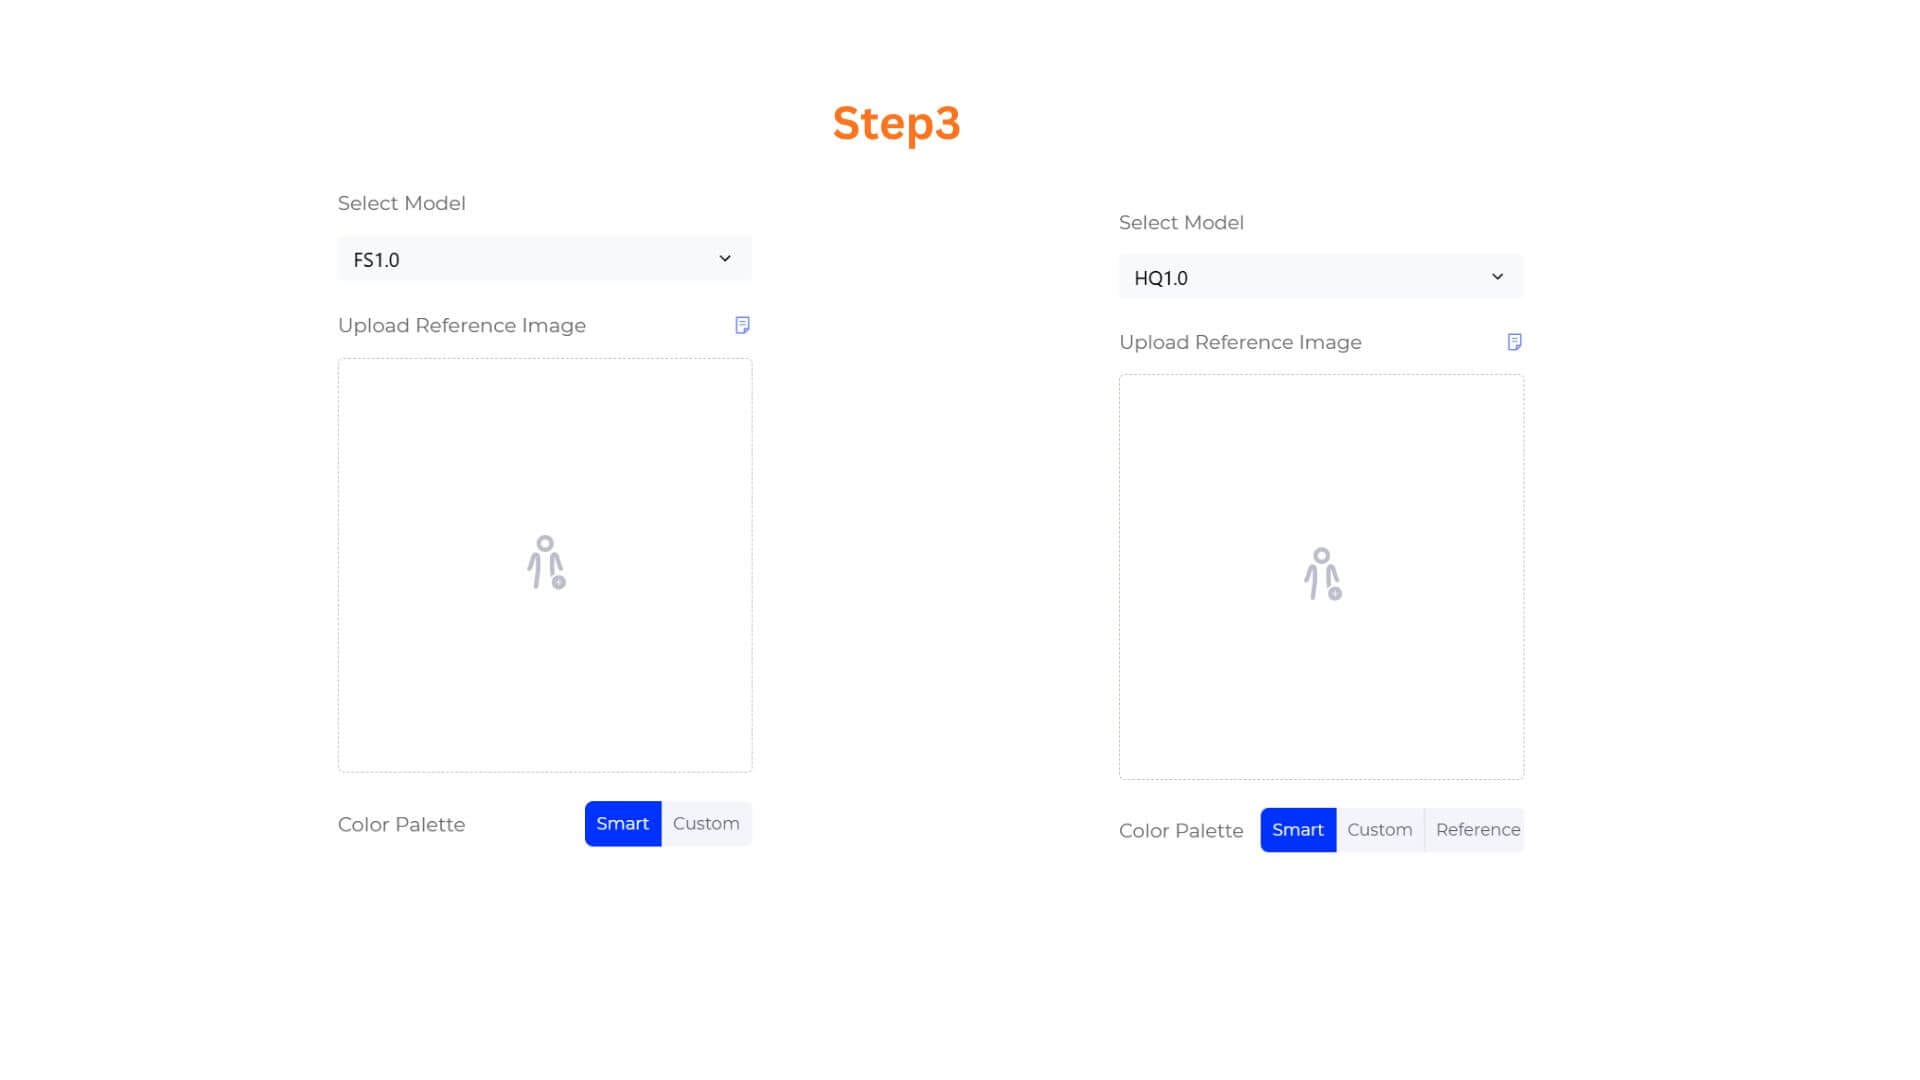
Step 3: Choose Your Color Palette Mode
Select how you want to define the new color. Available modes depend on the model you selected:
- Smart: The AI suggests a color palette based on the garment and your Color Area Description. Available on both FS1.0 and HQ1.0. Use this when you want to explore options without specifying an exact color.
- Custom: Pick your exact color using the Color Wheel. You can enter a precise color value in either HEX (e.g. #FF0000) or RGB format depending on what your brand guidelines or client brief specifies. Use the eyedropper to sample a color from anywhere on screen. Click Add Color to add multiple colors to the palette. Available on both FS1.0 and HQ1.0.
- Reference: Upload a reference image to extract colors from. This can be a fabric swatch, a trend image, a brand palette card, or any visual that carries the color direction you want to apply. Available on HQ1.0 only.
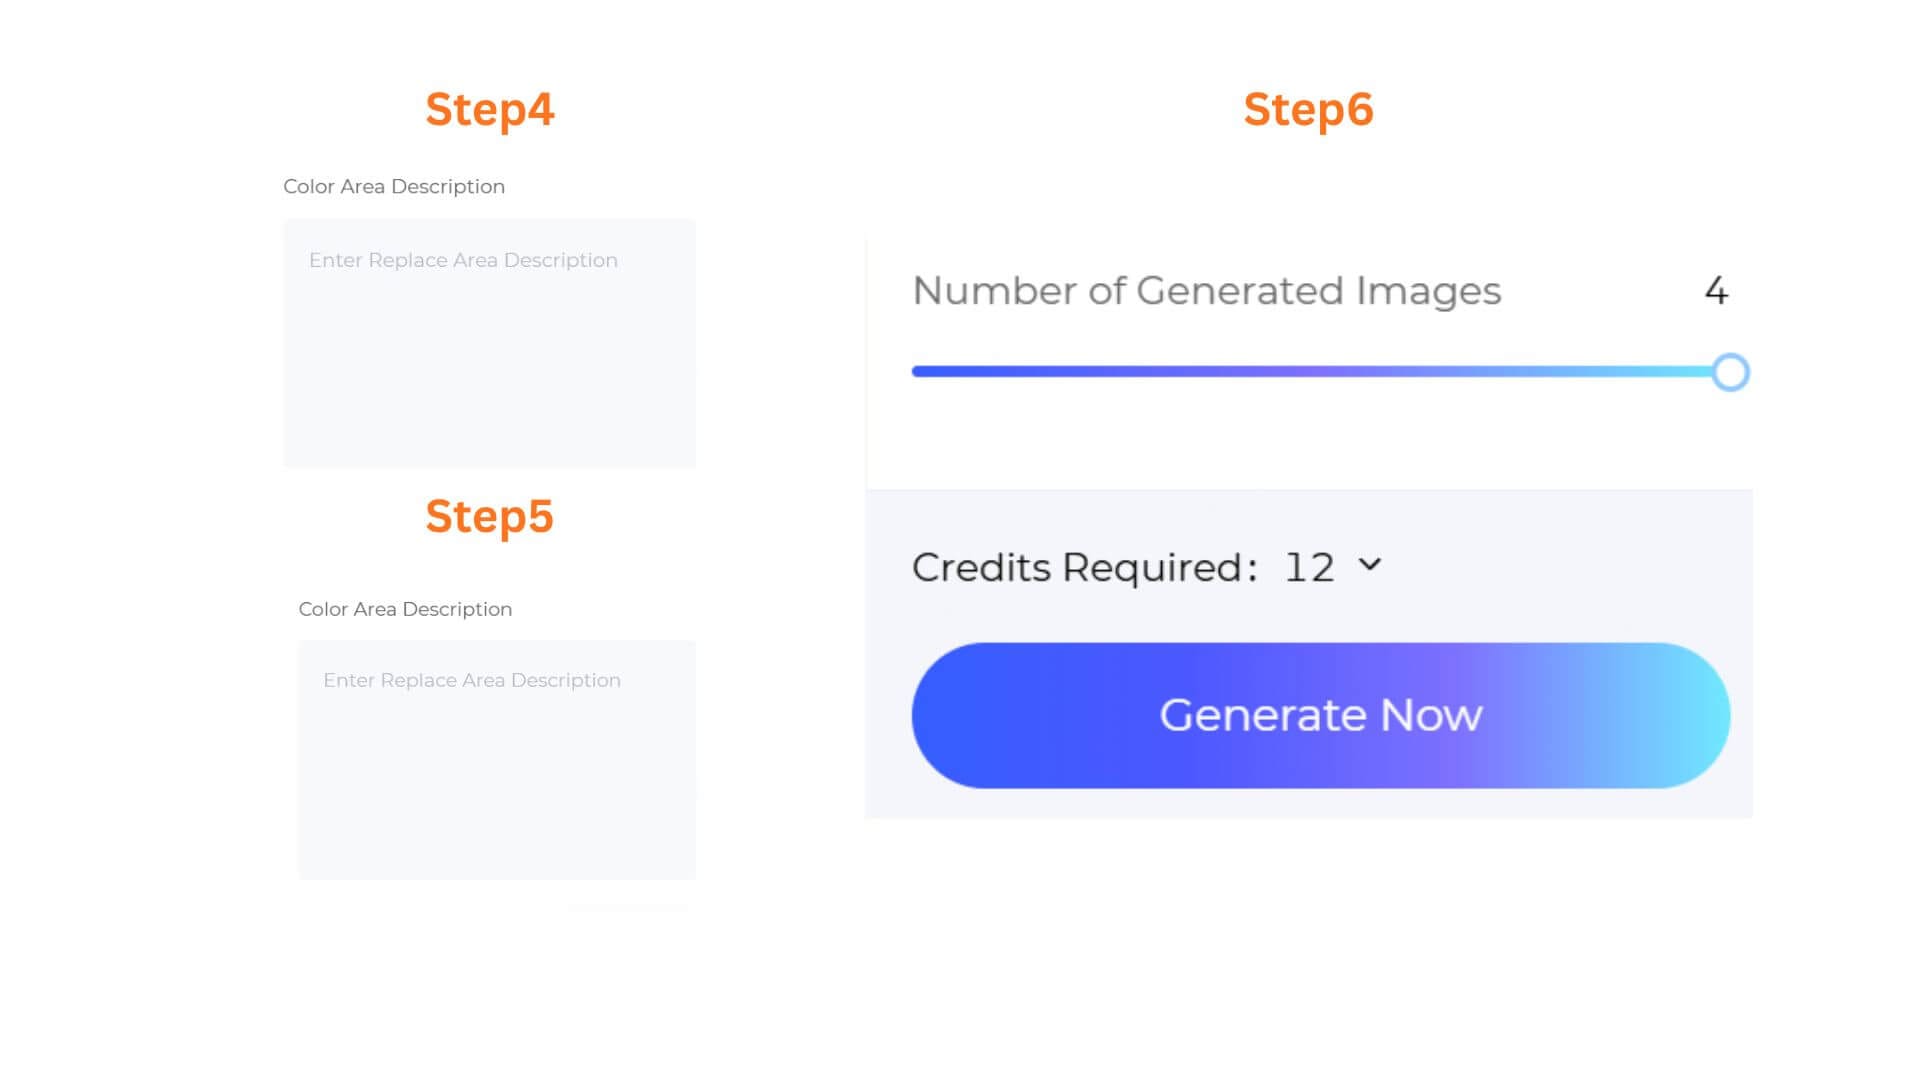
Step 4: Describe the Color Area
In the Color Area Description field, specify which part of the garment you want to recolor — for example, "the collar and cuffs only" or "the main body fabric, not the buttons." Leave this blank if you want the AI to apply the color change across the full garment.
Step 5 (HQ1.0 only): Configure Output Size & Toggle 4K Resolution
- If you selected HQ1.0, you can select an Output Size to match your intended use, and toggle 4K Output on for ultra-high-definition renders suited for client presentations or premium marketing assets. These options are not available on FS1.0.
- Select an Output Size that matches your intended use (e.g. 2:3 for standard garment reference sheets).
Step 6: Set Batch Quantity & Generate
- Number of Generated Images: Adjust the slider to determine how many design variations you want to output in a single batch, from 1 to 4 images.
- Generate Now: Double-check the "Credits Required" counter (e.g., 3 Credits), then click the gradient “Generate Now” button.
Pro-Tips
Use Custom Mode for Brand Color Accuracy
When you need to hit a specific brand color or Pantone-matched shade, use Custom mode and enter the exact HEX value. This gives you precise control that Smart mode cannot guarantee, and is especially useful when producing visuals for client sign-off or e-commerce listings where color accuracy matters.
Use Reference Mode for Trend-Driven Colorways
If your starting point is a trend image, a fabric swatch scan, or a seasonal mood board, upload it in Reference mode rather than trying to describe or manually match the color. The AI extracts the palette directly from the image, which is faster and more accurate than translating a visual reference into a HEX code.
Target Specific Areas with Color Area Description
Change Colors can apply the new color to the full garment or to a defined area. If you only want to recolor the collar, the lining, or a single panel, describe it in the Color Area Description field. This makes the tool useful for testing detail-level color variations without affecting the rest of the design.
Frequently Asked Questions
Q: Can I recolor just one part of the garment without affecting the rest?
A: Yes. Use the Color Area Description field to specify exactly which area you want to change, for example "the collar and cuffs only" or "the outer shell, not the lining." The more precisely you describe the target area, the more accurately the AI applies the color change without touching other parts of the garment.
Q: The recolored garment looks flat or inconsistent with the original fabric texture. What should I do?
A: This usually happens when the reference image has inconsistent lighting or a busy background that makes it harder for the AI to isolate the fabric correctly. Try using a cleaner, well-lit reference image with a plain background. Switching to HQ1.0 also improves the quality of fabric-aware rendering significantly.
Q: Can I recolor just one part of the garment, such as the collar or lining?
A: Yes. Use the Color Area Description field to specify which area you want to change — for example, "collar and cuffs only" or "the inner lining, not the outer shell." The more precisely you describe the target area, the more accurately the AI will apply the color change without affecting other parts of the garment.
Written by
What's Next?
How to Edit Specific Garment Areas and Details Without Starting Over?
Small garment edits should not require a full redesign. Style3D AI Garment Refine lets you modify specific areas and details of any existing garment image directly, generating a realistic updated visual in seconds. This guide covers the full workflow from upload to final output.
How to Turn Garment Photos into Clean Technical Drawings with AI?
Upload any garment photo and turn it into a clean, editable technical drawing with Style3D AI. This step-by-step guide walks you through prompt, output format selection (PNG or SVG), and pro tips to get the most out of Extract Technical Drawing.