Amazon’s Pure White Background: RGB 255 Is Not a Suggestion
Three routes reach a pure white background and each fails somewhere different. The hardest part is the edge, where pixels are partly product and partly not.
The requirement reads as a color instruction and functions as a numeric threshold. A background is either at the specified value or it is not, and the difference between those two states is not something anyone can see.
What that means in practice is that producing a compliant image is a processing problem rather than a photography problem — and the hard part of it is not the background.
The rule, briefly
The main image background must be pure white, specified as RGB 255, 255, 255. A backdrop photographed under real lights typically lands near that value rather than on it, which is why shooting on white and uploading is not by itself a reliable route to compliance.
That much is established. The question this article takes up is what to do about it, and where the difficulty actually sits once you try.
Three routes, three failure points
Shoot on white and lift the background in post. The exposure gets pushed until the backdrop reaches the target value. This works for products with dark, well-defined edges and fails wherever the product itself has light values near the boundary, because the adjustment does not distinguish between background and product.
Cut the product out and place it on a pure white canvas. The background is now exactly the target value by construction, since it was created rather than photographed. The failure moves to the boundary between the cutout and the canvas, which is the subject of the next section.
Replace or generate the background. Convenient, and the resulting background is only compliant if the replacement is at the specified value rather than at something visually equivalent. Worth verifying rather than assuming.
Each route produces a compliant-looking image. They fail in different places, and knowing which route produced an image tells you where to look.
The edge is a band, not a line
A cutout boundary is not a clean division. Pixels at the edge of a product are partly product and partly whatever was behind it — the transition happens across a few pixels rather than between two of them, which is why edges behave as bands in any cutout work.
Composite that edge onto a pure white canvas and those transitional pixels blend toward white without arriving. The result is a narrow ring around the product where values sit close to the target and below it.
The empty areas of the image are perfect. The ring may not be, and whether it matters depends on how the check samples the image — which is not something a seller can determine from outside.
This is the specific reason an image can pass every visual inspection and fail. The person reviewing it looks at the background, which is genuinely correct, and does not look at a band of pixels a fraction of a millimeter wide at print size.
The band also behaves differently depending on what was behind the product when it was photographed. A product shot against a dark backdrop and cut out carries edge pixels that are partly dark, so the transition to white is longer and the band is wider. The same product shot against white and cut out has edge pixels already close to white, so the band is narrower. Shooting against something near the final background makes the boundary easier even when the background will be replaced entirely.
White products on white backgrounds
Here the two requirements collide directly, and no amount of care resolves the collision.
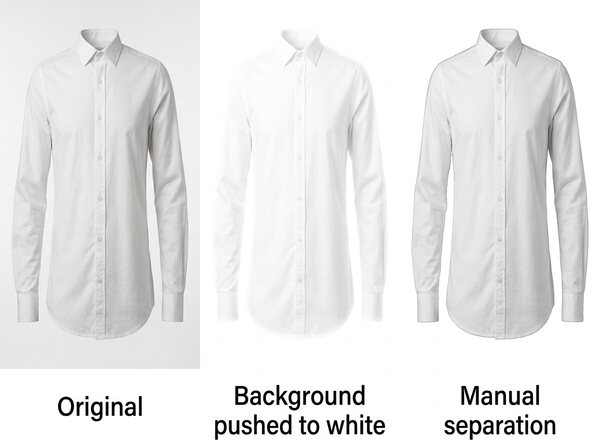
A white garment has highlights that are themselves near the top of the range. Its brightest areas and the background are numerically close, which is the entire difficulty — pushing the background up to the target value pushes those highlights up with it, and the garment’s edge disappears into the field it is sitting on.
Backing off preserves the garment and leaves the background short of the target. Pushing harder satisfies the check and flattens the product. Adjustments that operate on the whole image cannot separate these, because an adjustment redistributes the information that is present rather than adding a distinction that was never captured.
The resolutions are all partial. Separate the product from the background before adjusting either. Shoot with enough separation lighting that the garment’s edge sits meaningfully below the backdrop. Accept a slightly harder edge than a photograph would naturally produce. Each costs something, and white on white is the case where the cost is unavoidable.
Shadows are background too
A shadow falling on the backdrop is part of the background, and it is not white.
This is worth separating into two cases. A cast shadow — the shape thrown onto the surface behind or beneath the product — occupies background pixels and takes them away from the target value. A contact shadow, the darkening exactly where the product meets the surface, sits at the boundary and behaves like the edge band discussed above.
Removing shadows entirely is what compliance pushes toward, and it has a cost that shows up elsewhere: an object with no contact shadow reads as floating rather than as resting on something. That trade-off is the same one that appears whenever a background is replaced — the shadow that made the object look present was part of what got removed.
For main images the requirement takes precedence. For supporting images, where the rules are looser, the shadow can come back.
How to verify before uploading
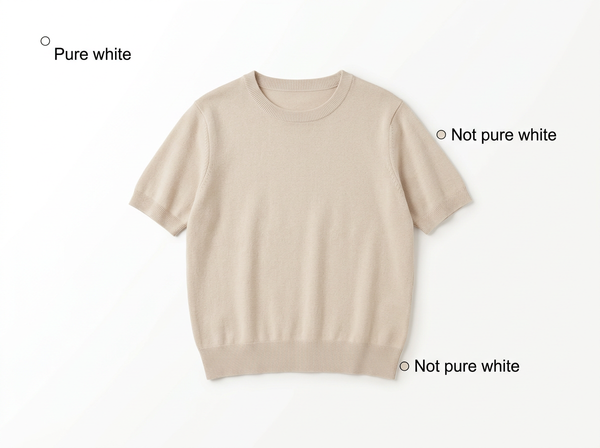
• Sample several points, not one. A corner tells you the canvas is white and nothing else. Sample near the product edge, inside any shadow transition, and between narrow features.
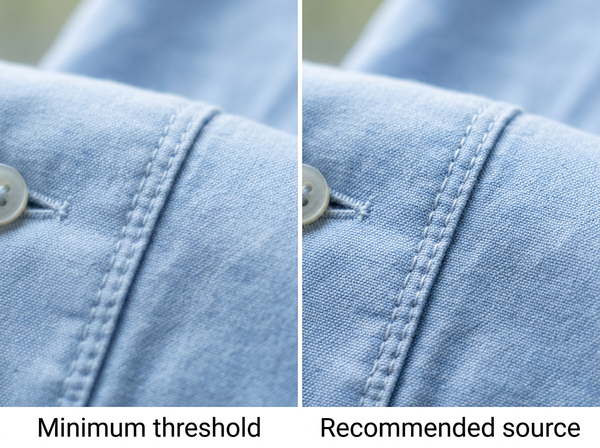
• View at full resolution or higher. The edge band is invisible at fit-to-screen and visible at a hundred percent.
• Check the alpha channel if you have one. Semi-transparent pixels in a cutout are the source of the band, and seeing them directly is faster than inferring them.
• Verify after export, not before. Compression and format conversion can shift values, so the file that gets uploaded is the file that needs checking.
The last one catches a surprising share of failures, because the version reviewed and the version uploaded are frequently not the same file.
The products that resist automation
Some products are structurally difficult to cut out, and no tool removes the difficulty entirely.
Hair and fur, where the boundary is not a boundary but thousands of thin strands each with their own partially transparent edge. Mesh, lace, and open-weave knits, where background is visible through the product itself, so “behind” and “in front” are not separable regions. Chiffon, tulle, and anything sheer, where the product is partly transparent by design. Feathers and fringe, for the same reason as hair.
For these, automated cutouts produce either a hard edge that loses the material’s character or a soft edge that carries a wide band of non-white pixels. Manual clipping remains the reliable answer, and budgeting for it on the categories that need it is more efficient than discovering the need after a batch is rejected.
Bridal and knitwear both sit in this group, which is worth knowing before a range is quoted as a single per-image rate.
There is a planning consequence beyond cost. Difficult cutouts are also the ones most likely to come back for a second pass, so they should be scheduled first rather than last. A range where the simple products were processed first and the sheer ones left until the end tends to discover its real timeline at the point where there is no time left in it.
FAQ
Can I just fill the background with white in an editor?
Filling the empty areas is straightforward and does not address the boundary, which is where the difficulty is. An image with a filled background and an untouched edge is the most common version of the problem this article describes.
Does the file format affect compliance?
Format and compression can shift pixel values, so verification should happen on the exported file rather than on the working document. An image that measured correctly in an editor can measure differently after export.
Is a very slightly off-white background actually detected?
Automated checking reads values rather than impressions, so a difference invisible to a viewer is not necessarily invisible to the check. Treating anything short of the specified value as non-compliant is the safer working assumption.
What about products that are genuinely white?
They are the hardest case and the trade-off cannot be fully avoided. Separating the product from the background before adjusting either is the approach that costs least, and some loss of edge subtlety is usually accepted.
Should supporting images also be pure white?
Supporting images are governed more loosely and are where shadows, context, and lifestyle treatments belong. Confirm current requirements for your categories rather than applying the main image standard everywhere.
How do I handle a range with mixed difficulty?
Group by cutout difficulty rather than by product line when planning, since a range containing both simple and complex silhouettes has two different cost structures inside one quote.
Where this leaves you
The background is the easy part. It can be created rather than photographed, and once created it is exactly the value it was set to.
Everything difficult sits at the boundary between the product and that background, in a band of pixels that belongs partly to both. That band is where compliance is won or lost, where white products become genuinely hard, and where the difference between an automated cutout and a manual one shows up. It is also the one part of the image that nobody inspects, because at the size anyone reviews an image, it is not there.
Sample the edge, not the corner
Take a main image you believe is compliant, zoom to full resolution, and sample pixel values along the boundary of the product rather than in the empty corner. The corner will read as pure white; it was created that way. The band around the product is where values drift, and it is the part no visual review has ever looked at. If it drifts, the fix is at the cutout stage rather than in another round of background adjustment. See how cutouts and background replacement handle edges.
→ https://www.style3d.ai/image-editing-tools/background-remover
Written by