How to Change Outfits in Videos with AI?
Swap outfits in any video with AI. Upload a garment and source video, get a fresh new look in minutes. This guide covers the whole workflow.

Introduction: What is Video Outfit Changer?
Re-shooting the same model in a different outfit is one of the most expensive parts of fashion video production. You need the model back, the lighting matched, the camera re-rolling, and an editor to stitch it together — just to test a single new look on footage you've already shot.
Video Outfit Changer changes that workflow. Upload a new garment image and the source video, and Style3D AI swaps the outfit in every frame while preserving the model's pose, motion, and background. You get a fresh new look from footage you already have, no reshoot required.
Quick Start Guide
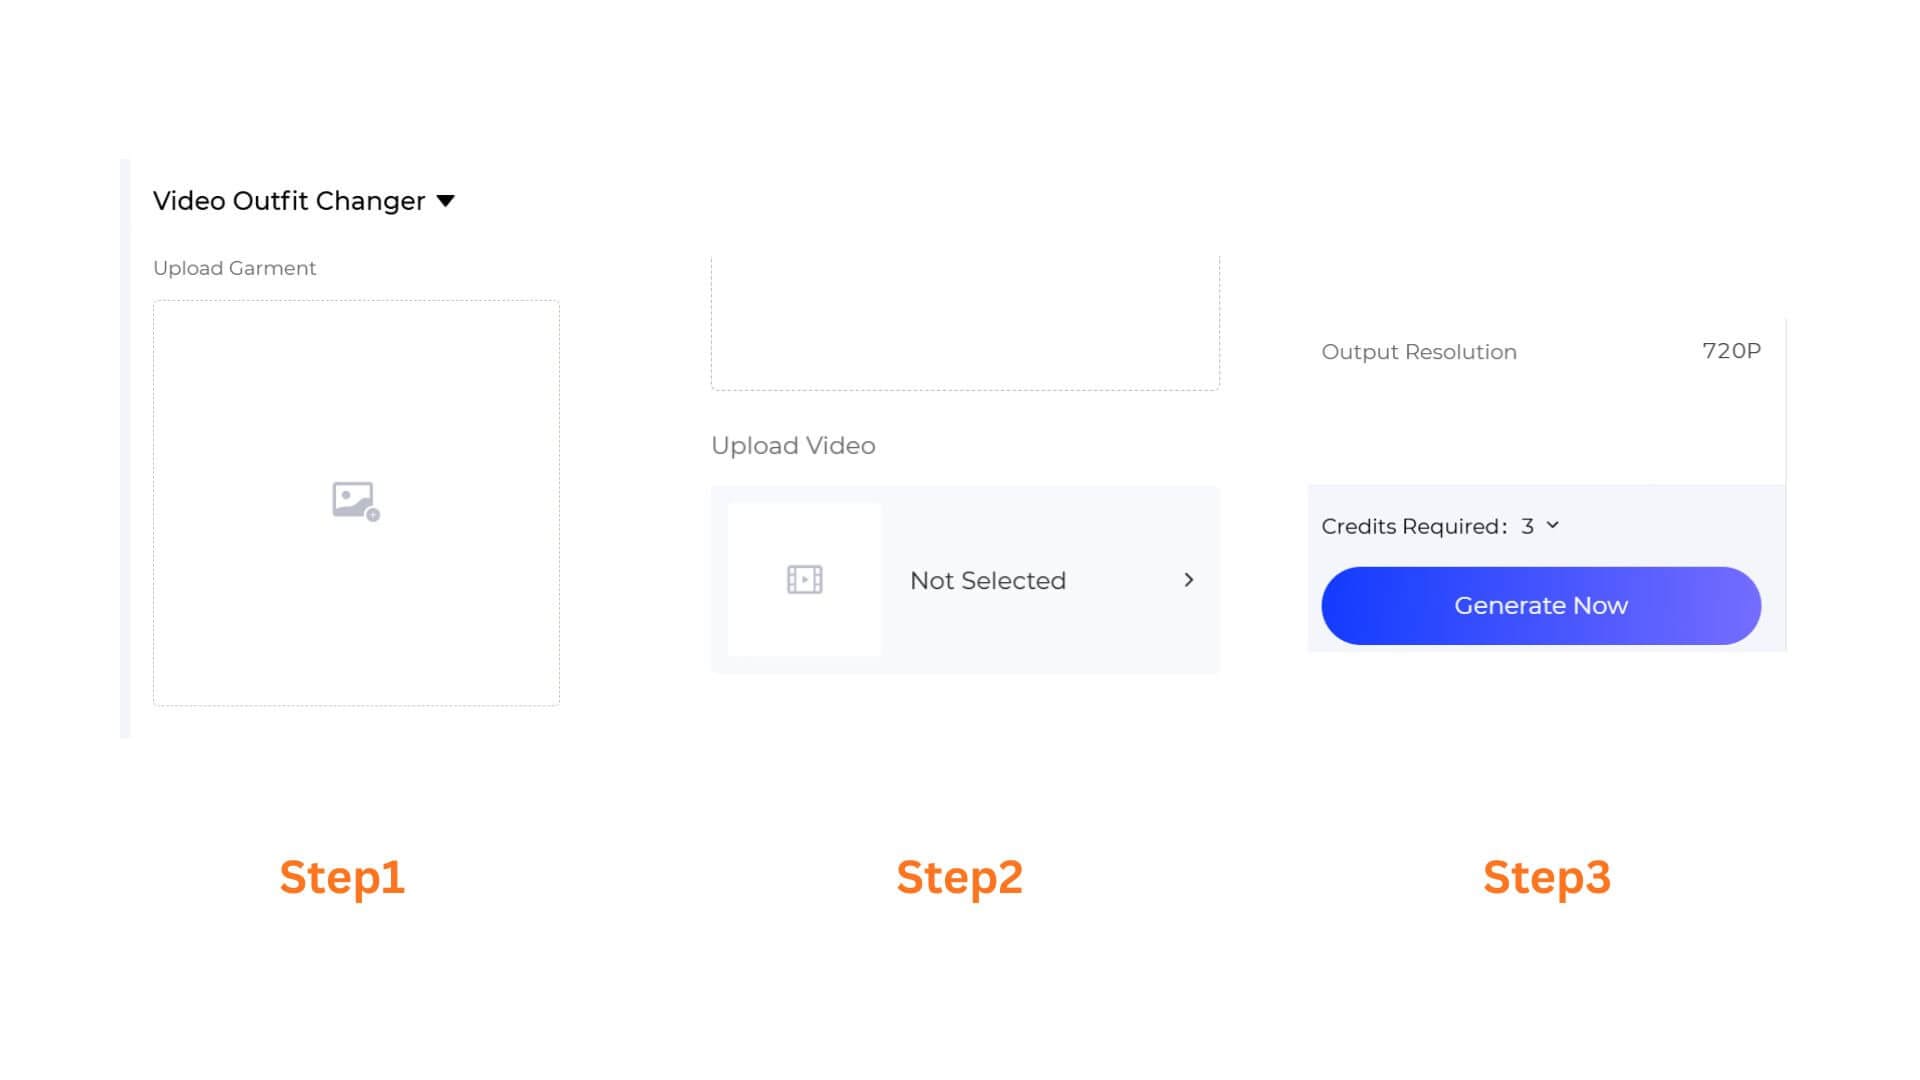
Step 1: Upload the Garment Image
Click the Upload Garment area on the left panel and select the new clothing item you want to appear in the video. This is the outfit that will replace whatever the model is currently wearing in the source video.
Step 2: Upload the Source Video
Click the Upload Video area below to add the video you want to edit.
Stick to a 9:16 (vertical) or 16:9 (horizontal) source video. Other aspect ratios will be auto-stretched, which distorts the model and degrades the final output.
Step 3: Check the Output Resolution and Generate Now
The default resolution is 720P.
Confirm both uploads are in place, then click the blue Generate Now button at the bottom of the left panel. The AI will process the video and produce a new version with the garment swapped in. Review the result and regenerate as needed.
Pro-Tips
- Use a clean, well-lit garment photo. Pick an image where the clothing is clearly visible, the fabric texture reads, and the cut is unobstructed. Avoid flat-lay shots where folds are crushed — on-model or hanger shots work best.
- Keep the model in-frame throughout the video. Outfit Changer works best when the full outfit area (torso, arms, legs) stays visible across the clip. Cuts where the model steps out of frame can leave glitches in the swapped outfit.
- Test multiple outfits on the same clip. Reuse a single well-shot video to preview many different looks — just swap the garment image and regenerate.
- Pair with Virtual Try-On for previews. Generate the look on a model image first with Virtual Garment Try-On or Outfit Try-On, then bring the approved look into Video Outfit Changer for the moving version.
Frequently Asked Questions
Q: How long can the source video be?
A: Outfit Changer works best on short clips where the model stays in frame. For longer videos, split the clip into segments and process each one separately for the most consistent results.
Q: Will the new garment match the original lighting?
A: The AI adapts the new garment to the lighting of the source video, so the swapped outfit blends with the original scene. For best results, pick a garment image that has neutral lighting similar to the video's environment.
Q: Can I change multiple outfits in one video?
A: Each generation swaps a single outfit across the whole clip. To produce a multi-look video, generate separate versions with different garments and stitch them together in your video editor.
Q: What if the person in the source video is partially hidden or out of frame?
A: The AI needs the outfit area to be visible to swap it cleanly. If the model steps out of frame or is occluded for long stretches, the swapped garment may glitch in those segments. Trim the source clip to the parts where the outfit is fully visible.
Written by
What's Next?