

How to Create Realistic Embroidery and Craft Effects with AI?
Style3D AI Embroidery Techniques help you turn flat artwork into realistic embroidered designs. This guide walks through the complete workflow, from choosing a generation mode to creating high-quality embroidery previews.

Introduction:What's Embroidery Techniques?
Flat prints have their place, but embroidery and raised craft effects add a tactile dimension that can transform a basic pattern into a premium design. Traditionally, previewing how embroidery techniques will look requires physical sampling — a process that takes days and costs hundreds per test.
Embroidery Techniques lets you apply embroidery and craft effects to your prints instantly. Upload any graphic and select a process from the Reference Library, or describe a design in HQ1.0 Description mode — optionally with a reference image. The AI generates realistic previews showing texture, stitch density, and dimensional effects.
Quick Start Guide
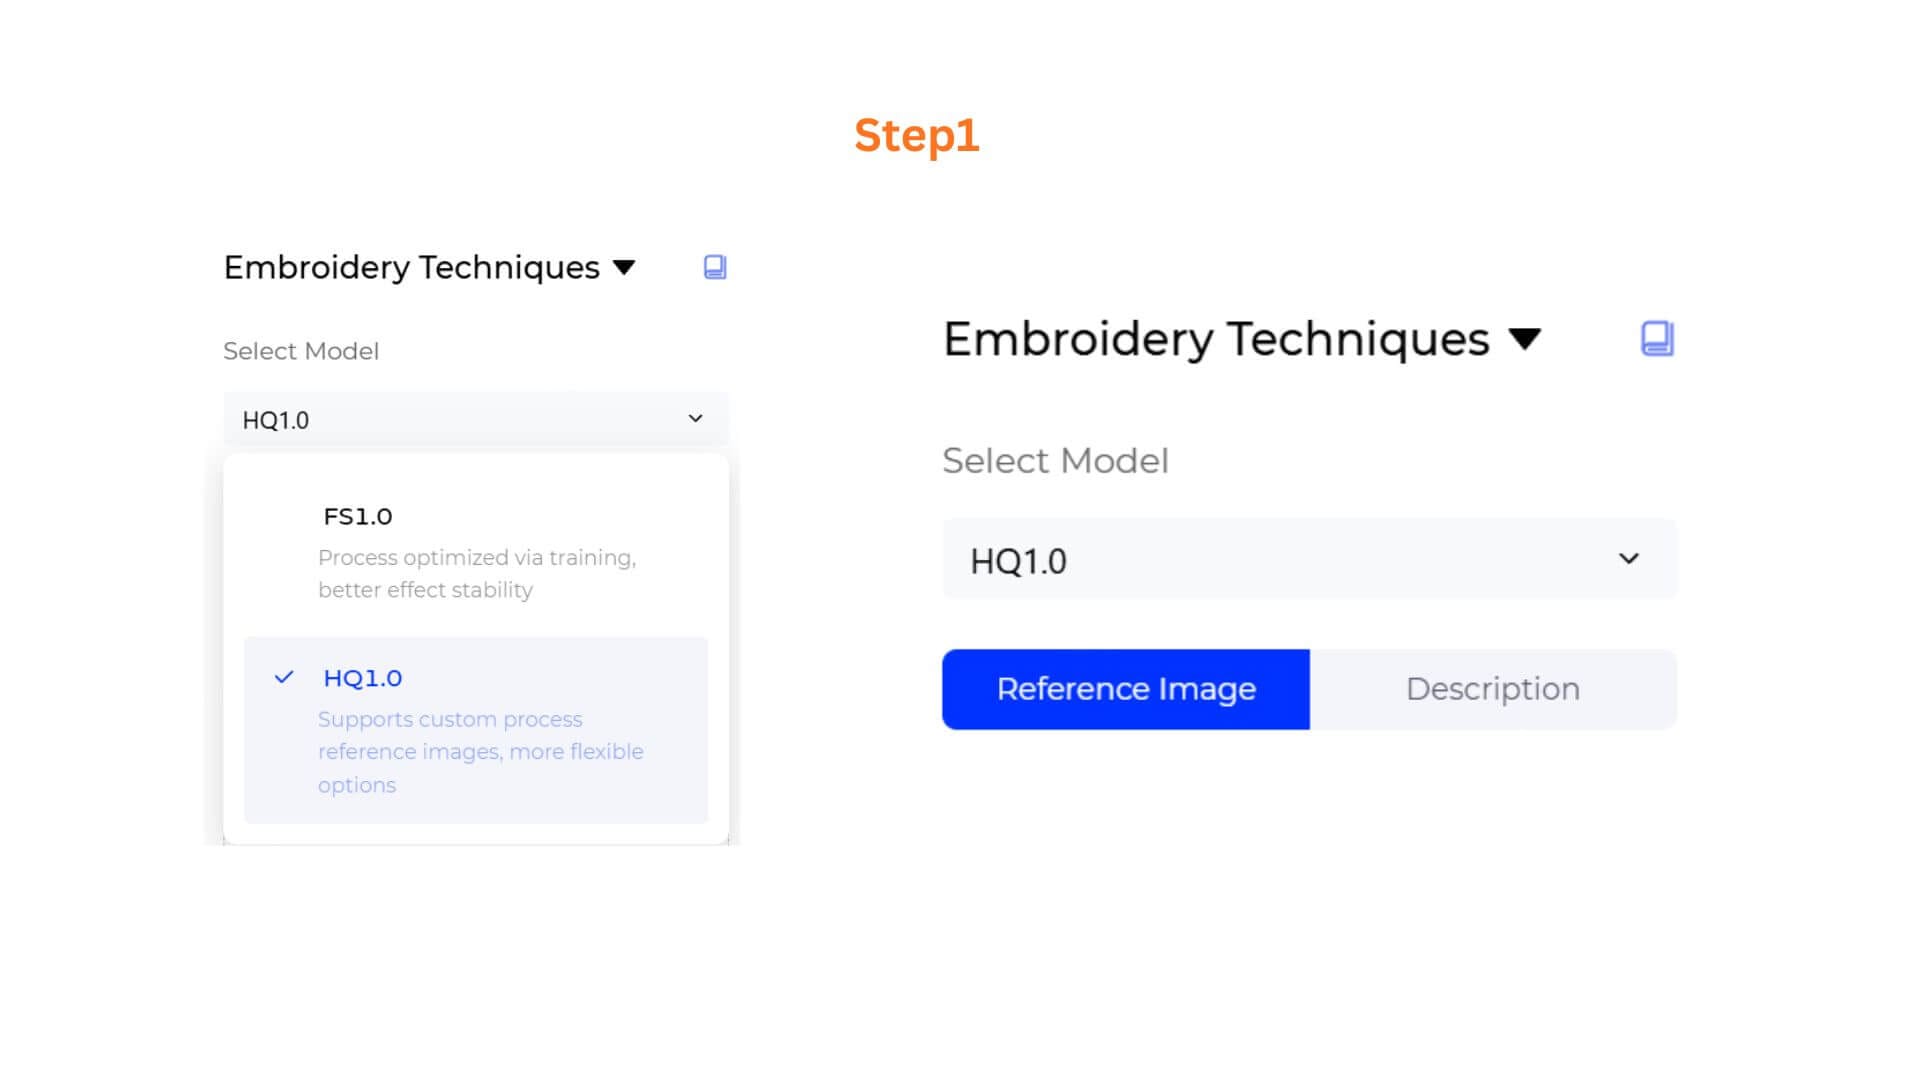
Step 1: Choose Your AI Generation Model
Select the processing engine tailored to your need:
FS1.0 (Fast Speed): Optimized for high-speed visual iterations and rapid layout brainstorming.
HQ1.0 (High Quality): Engineered for professional presentation graphics and retail-ready aesthetics.
If you choose HQ1.0, there are two mode options:
- Reference Image tab: Upload an image + apply a Reference Library process (same workflow as FS1.0, higher quality)
- Description tab: Generate an embroidered design from a text prompt, optionally supported by an uploaded reference image, with full output customization
Step 2: Define Your Design
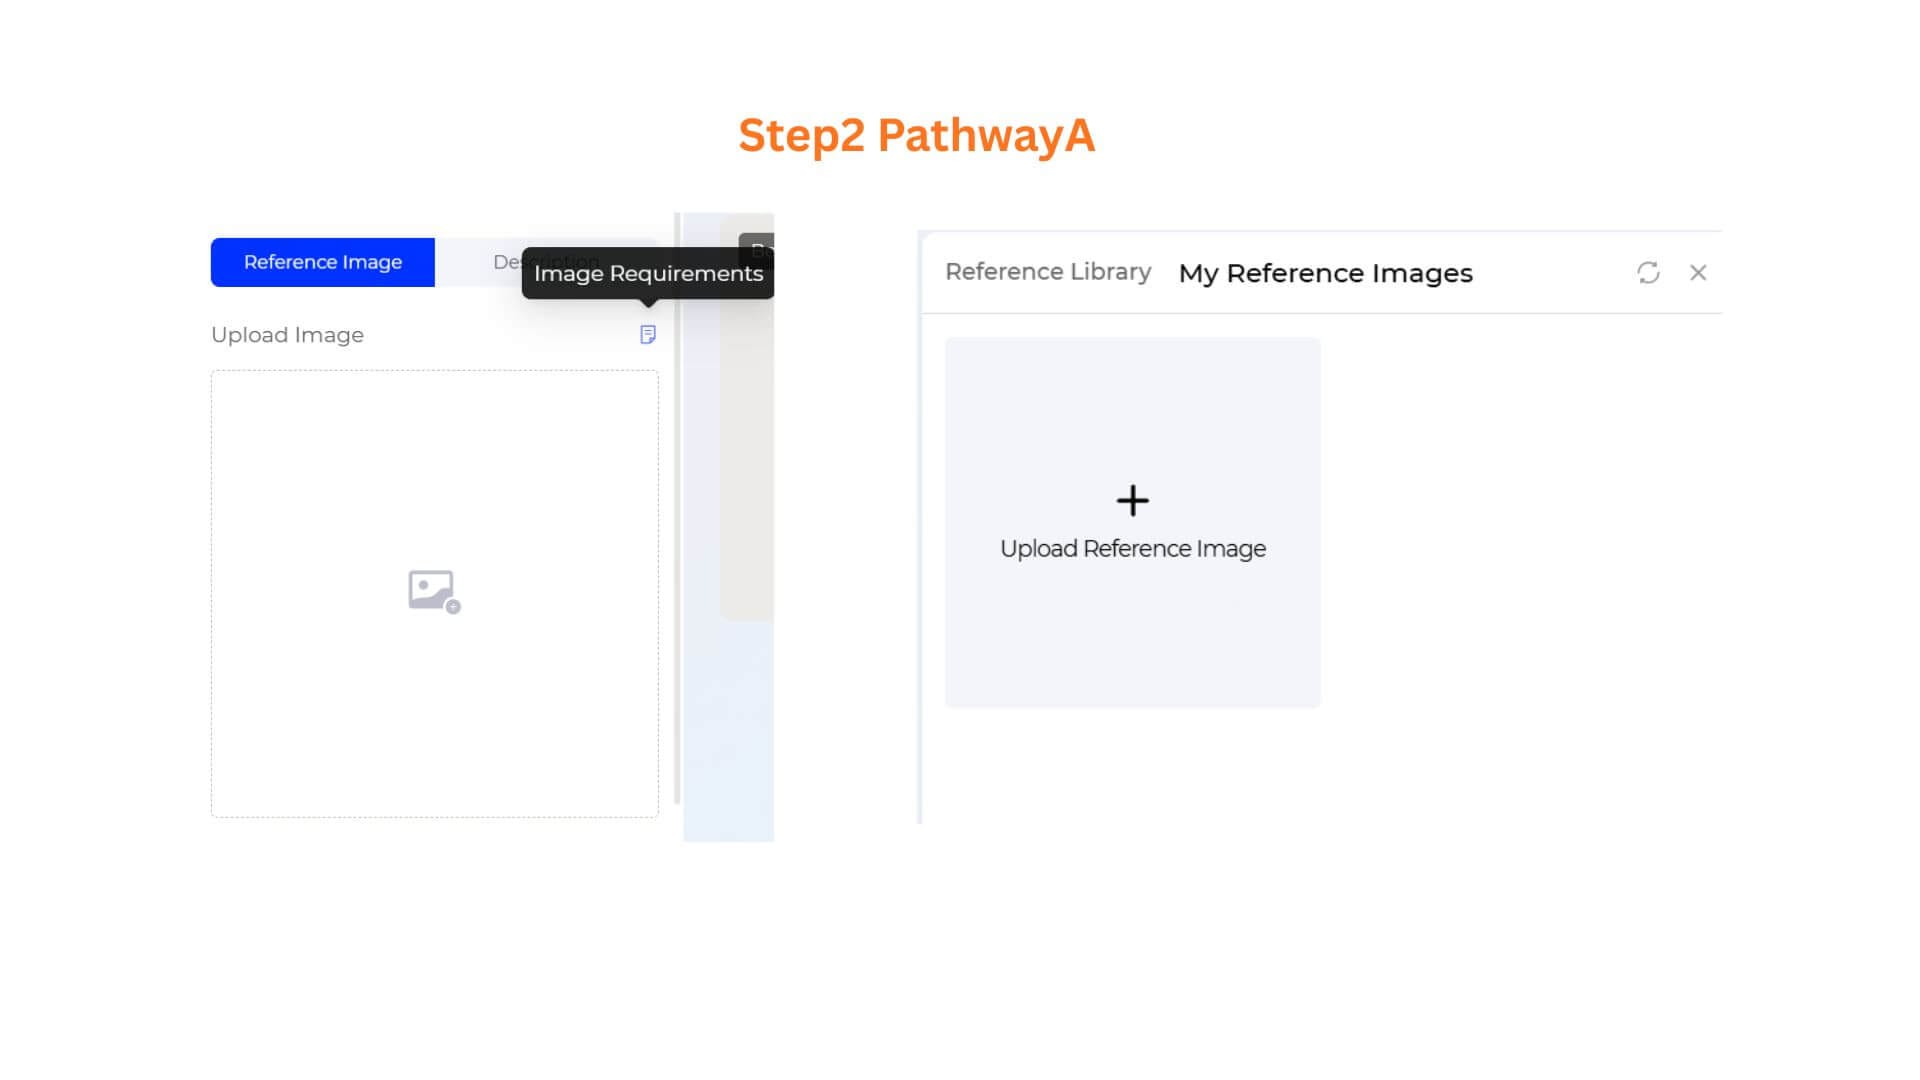
Pathway A: If you choose FS1.0 or HQ1.0 Reference Image Mode
2.1 : Click the Upload Image area to open your file picker
Image Requirements (hover the info icon to view the tooltip):
- Supported formats: JPG, JPEG, PNG, WEBP, AVIF, BMP
- Size range: 1 KB – 20 MB
- Maximum dimensions: 4096 × 4096 pixels
- Avoid: Blurry or partial images (these will not produce clean embroidery effects)
2.2 Click "Not Selected"
- This gallery displays embroidery and craft effect presets, Browse the gallery, hover to preview, and click to select.
- You can also upload your reference images.
Pathway B: If you choose HQ1.0 Description Mode
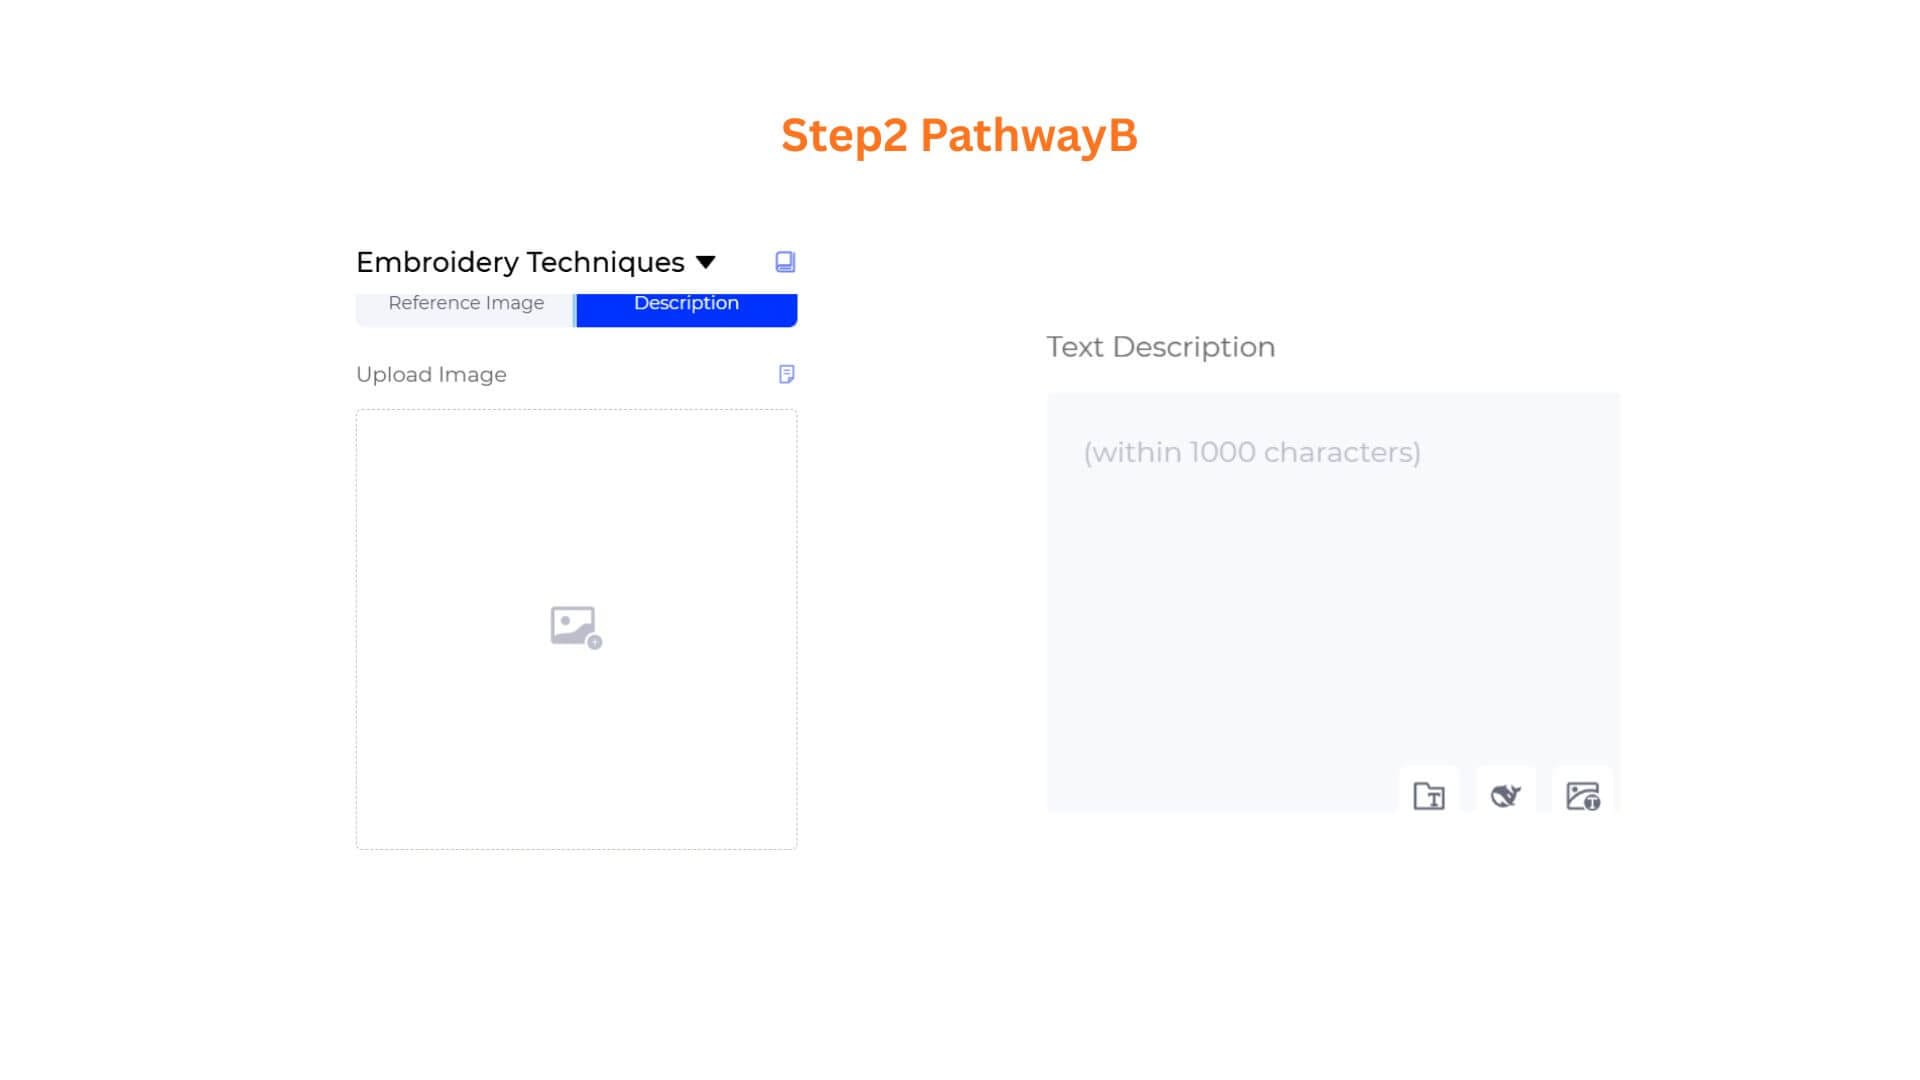
Switch to the Description tab. The interface shows two input areas stacked vertically:
- Upload Image— An upload area at the top. This is especially useful when you have a visual direction but want to describe specific details in text.
- Text Description — Below the upload area, a text field (up to 1000 characters) where you describe the embroidered design you want. Include subject matter, style details, color palette, and material hints.
Use the three helper icons at the bottom right of the text field:
- Prompt Manager — Open the side panel to search, manage, or add custom prompt templates to your workspace
- Opt Prompt — Instantly expand a simple idea into professional, highly descriptive prompt options
- Rev Prompt — Upload an inspiration reference photo to automatically reverse-engineer the visual into text inside your box
Example prompt: "A large satin-stitch monogram letter 'B' in navy and gold metallic thread, dense chain stitch border, on white cotton, realistic thread dimension"
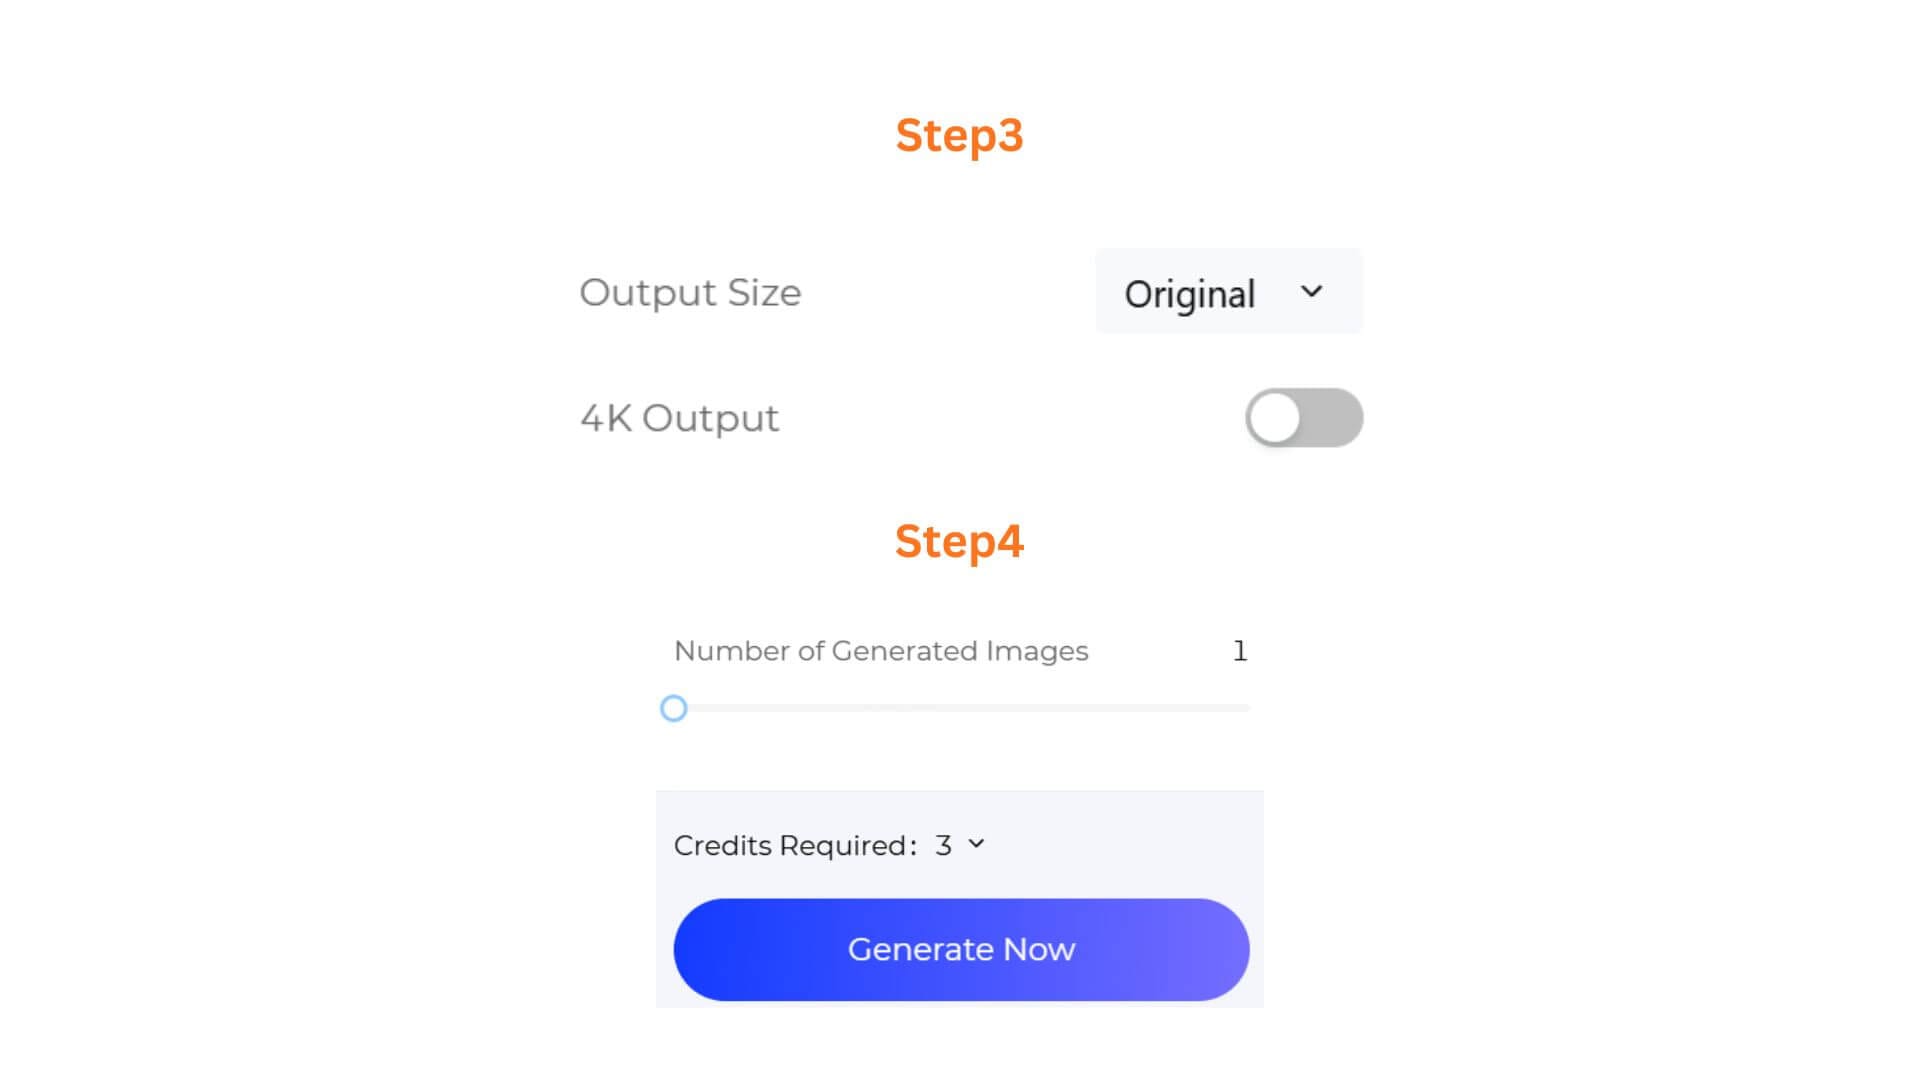
Step 3: (HQ1.0 only)Configure Output Size & Toggle 4K Resolution
- If you selected HQ1.0, you can select an Output Size to match your intended use, and toggle 4K Output on for ultra-high-definition renders suited for client presentations or premium marketing assets. These options are not available on FS1.0.
- Select an Output Size that matches your intended use (e.g. 2:3 for standard garment reference sheets).
Step 4: Set Batch Quantities & Generate
- Use the slider to determine how many design variations you want to output in a single run, from 1 to 4 images.
- Verify the Credits Required counter and click the vibrant “Generate Now” button
Pro-Tips
- Start with a clean, high-contrast source image. For the Reference Image workflow, embroidery effects look best on designs with clear edges and defined shapes. The Image Requirements tooltip explicitly warns against blurry or partial uploads for this reason.
- Use the Reference Library to explore unfamiliar styles. The gallery shows real embroidery and craft examples (sequin letters, floral motifs, dimensional textures) that help you visualize what each process produces before you commit credits.
- Pair with Apply Print To Garment. Once you've applied an embroidery effect, use Apply Print To Garment to preview it on actual clothing and see how the raised effect interacts with fabric drape.
Frequently Asked Questions
Q: What are the image requirements for the upload workflow?
A: Your uploaded image must be in JPG, JPEG, PNG, WEBP, AVIF, or BMP format, between 1 KB and 20 MB, with maximum dimensions of 4096 × 4096 pixels. Avoid blurry or partial images — these will not produce clean embroidery effects. The Image Requirements tooltip (click the info icon next to the upload area) shows these details at any time.
Q: What types of embroidery and craft effects are in the Reference Library?
A: The Reference Library contains a curated gallery of embroidery and craft presets, including classic thread-based techniques (chain stitch, satin stitch), dimensional effects (sequin, puff, flocking), and decorative motifs (floral, ornamental, lettering). Hover over any preset to see a preview before selecting it. The gallery is updated over time as new styles are added.
Written by
What's Next?
How to Blend Multiple Garments into a New Design with AI?
Style3D AI Design Variations lets you blend design elements from multiple reference images to generate fresh garment concepts. This step-by-step guide covers the full workflow from uploading your base and reference images to generating new design directions.


