How to Create Virtual Hat Try-Ons with AI?
Learn how to visualize caps, beanies, fedoras, and other headwear on models without AI. This guide covers the whole workflow.

Introduction: What is Virtual Hat Try-On?
Hats are one of the hardest accessories to photograph well. Flat lays don't show fit, mannequin shots look stiff, and model shoots for every cap, beanie, and fedora add up fast — especially for small brands that need fresh visuals across dozens of styles every season.
Virtual Hat Try-On changes that workflow. Upload a hat product photo or use a reference model, choose how the model should appear, and Style3D AI places the headwear onto a model with realistic fit, angle, and lighting. You get a natural wearing preview in seconds without a studio or a physical fitting.
Quick Start Guide
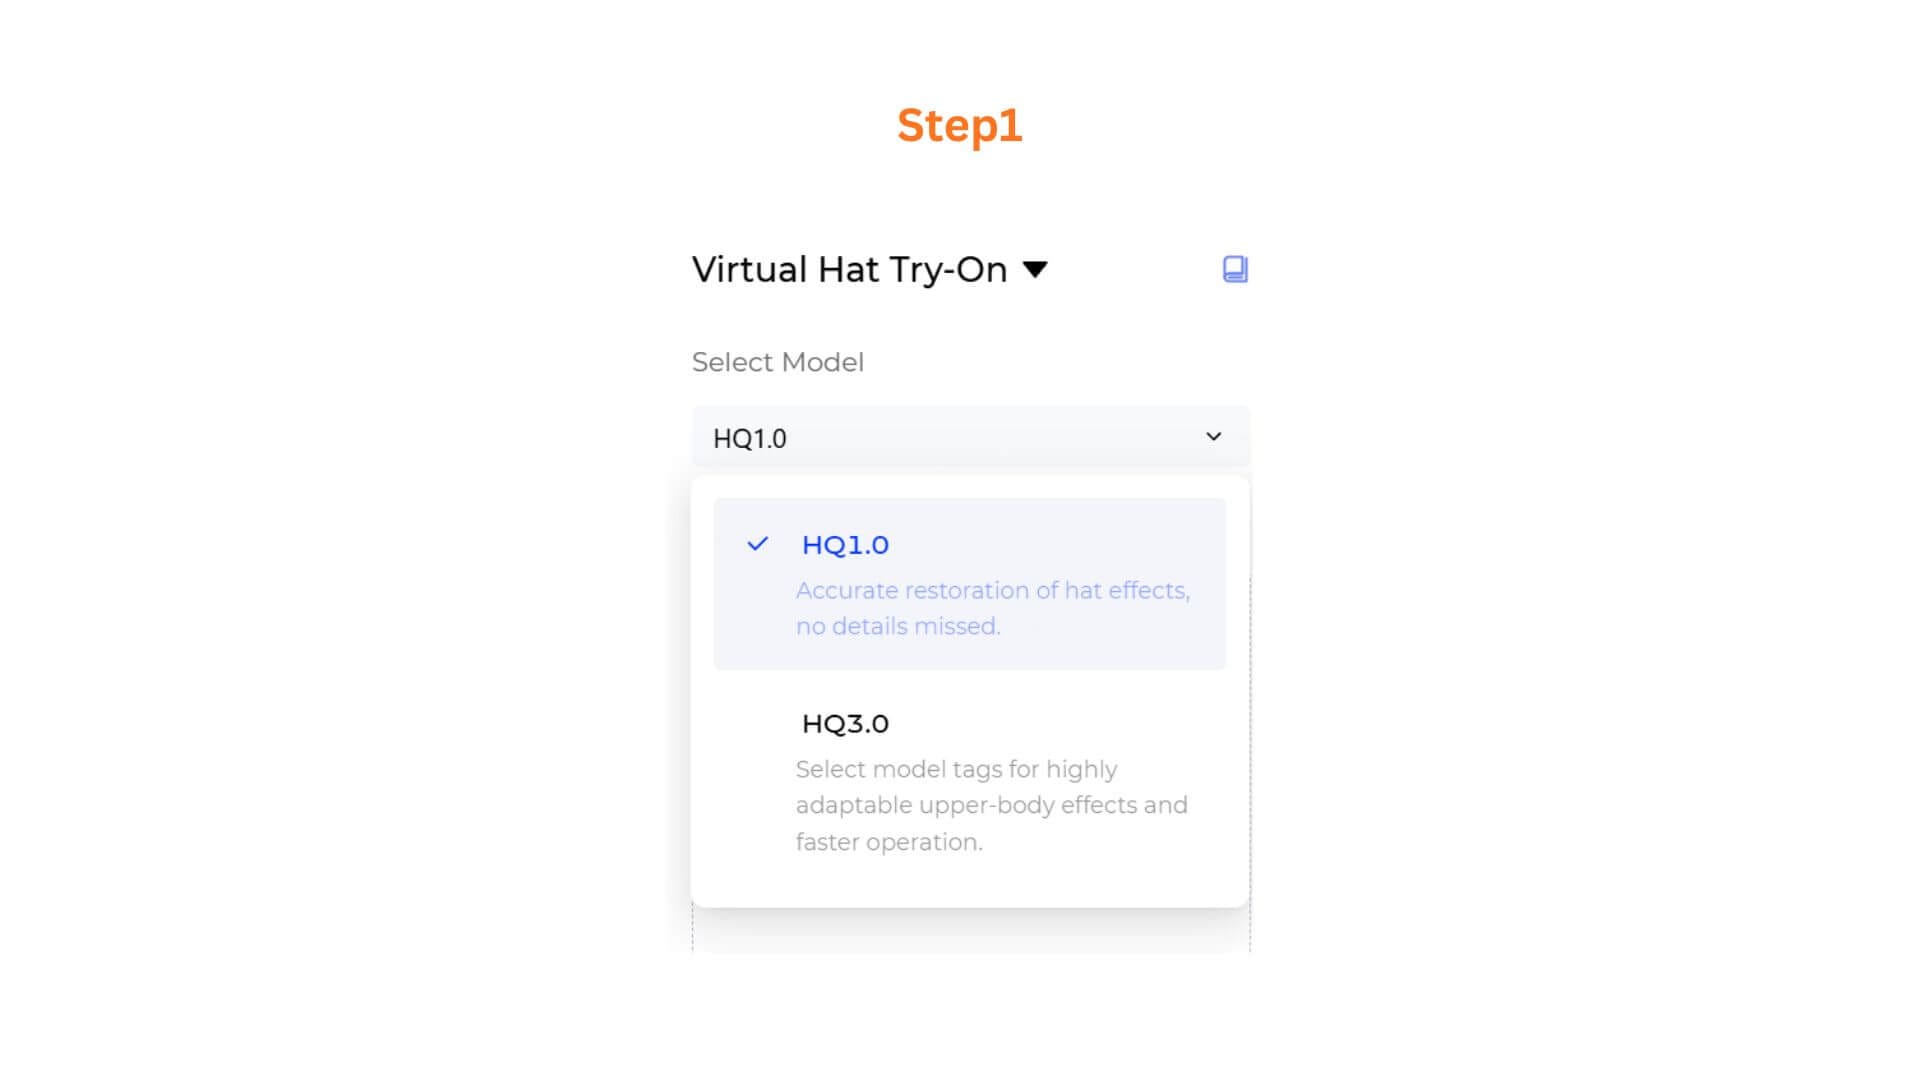
Step 1: Select Your Model
Open Virtual Hat Try-On and choose a model from the Select Model dropdown at the top of the panel.
- HQ3.0 — Best for editorial shots and campaign-ready images. Supports both Model Tags and Reference Image input modes.
- HQ1.0 — Best for quick product previews with fast turnaround. Uses the Reference Image mode only.
Pathway A: HQ3.0 with Model Tags
Use this pathway when you don't have a reference photo and want the AI to generate a model from tags.
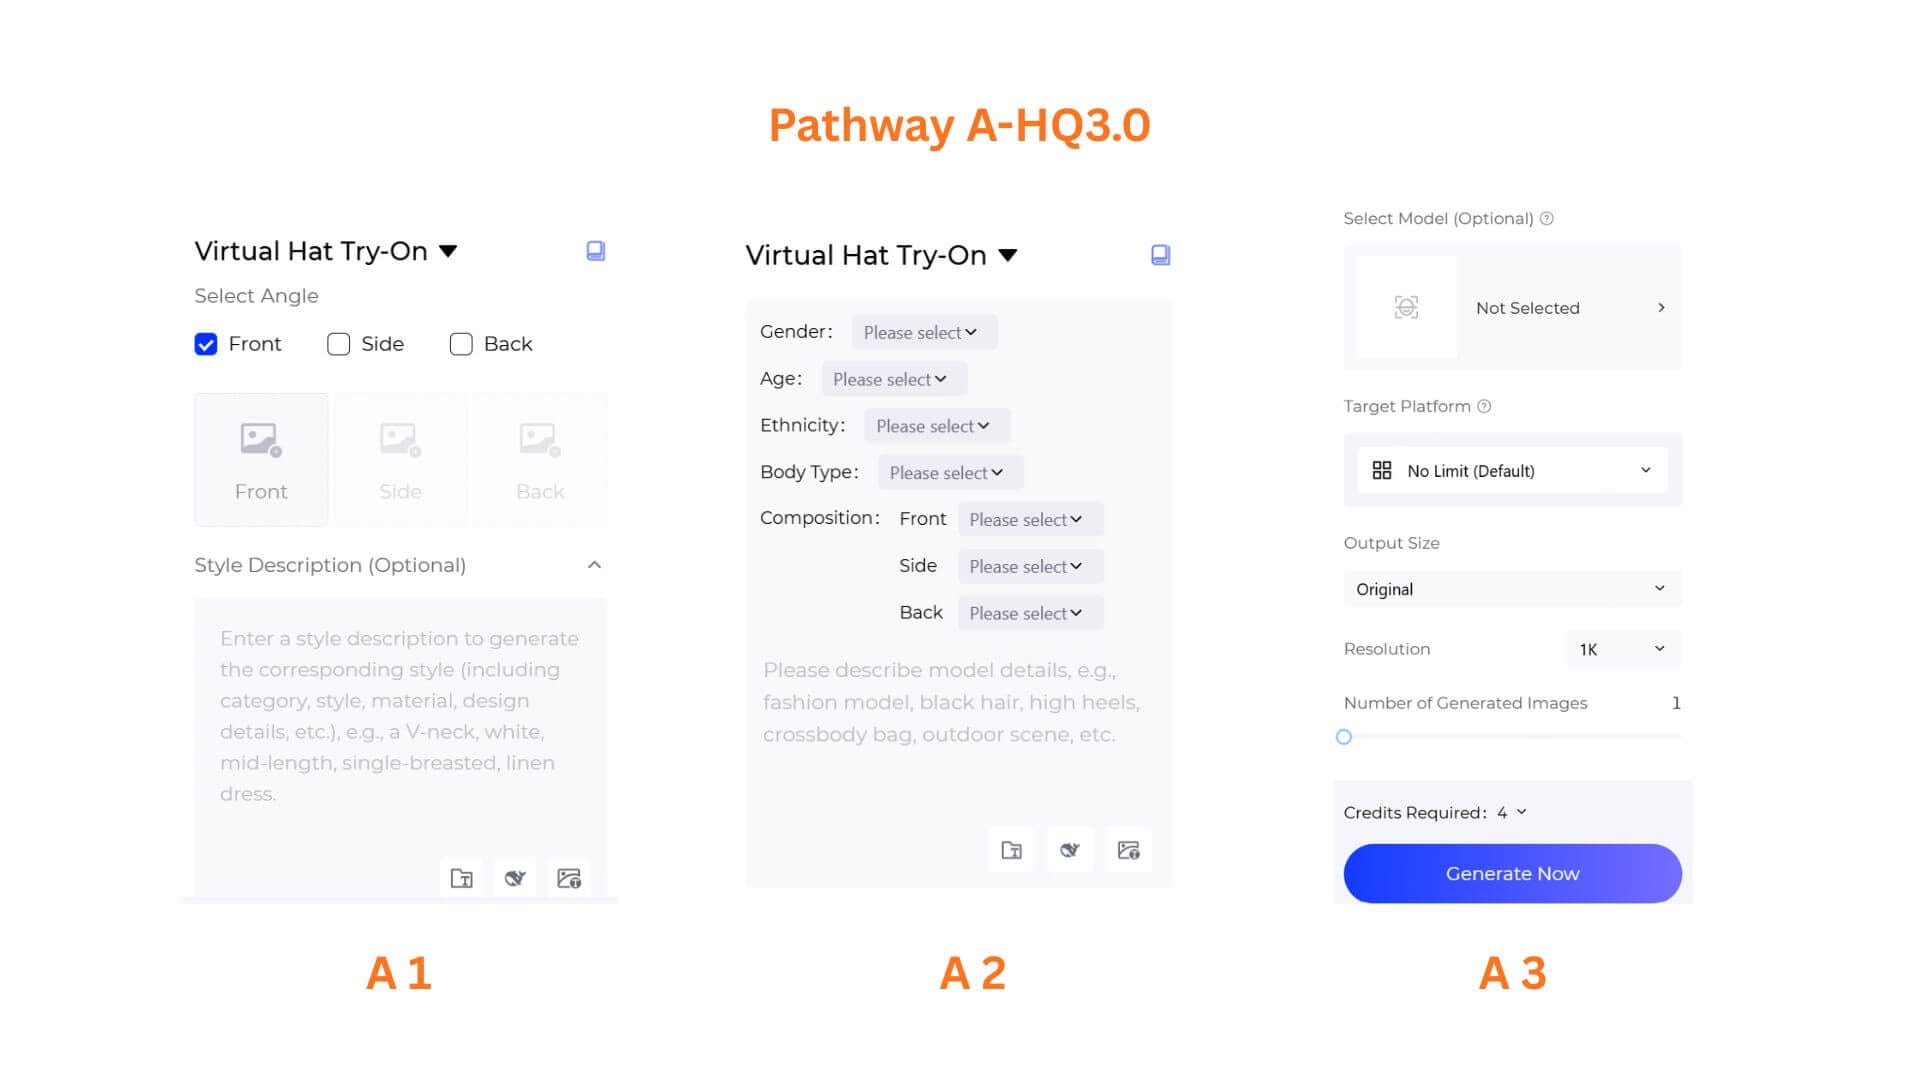
A1. Set the Angle and Describe the Hat
Keep Model Tags selected. Under Select Angle, check the view(s) you need — Front, Side, and/or Back. Each selected angle produces one result.
Expand Style Description (Optional) and describe the hat style, material, or design details you want emphasized (e.g., "black wool fedora with leather band").
A2. Define the Model Tags
Fill in the Model Tags section:
- Gender: Select from the dropdown.
- Age: Choose the age range.
- Ethnicity: Select the ethnicity group.
- Body Type: Pick a body-type preset.
- Composition: Set poses for each selected angle — Front / Side / Back.
- Use the text box below to add extra scene or styling details, such as "fashion model, blonde hair, outdoor street scene, soft daylight."
A3. Pick Optional Settings and Generate
Scroll down to configure:
- Select Model (Optional): Choose a specific model from the library, or leave it as "Not Selected" for fully AI-generated results.
- Target Platform: Keep No Limit (Default) or choose a preset like Amazon, Shopify, TikTok, or Instagram.
- Output Size: Select Original or another size from the dropdown.
- Choose your preferred resolution
- Number of Generated Images: Drag the slider or enter the count you want.
Click Generate Now to produce the try-on previews.
Pathway B: HQ3.0 with Reference Image
Use this pathway when you already have a model photo and want to place the hat onto it.
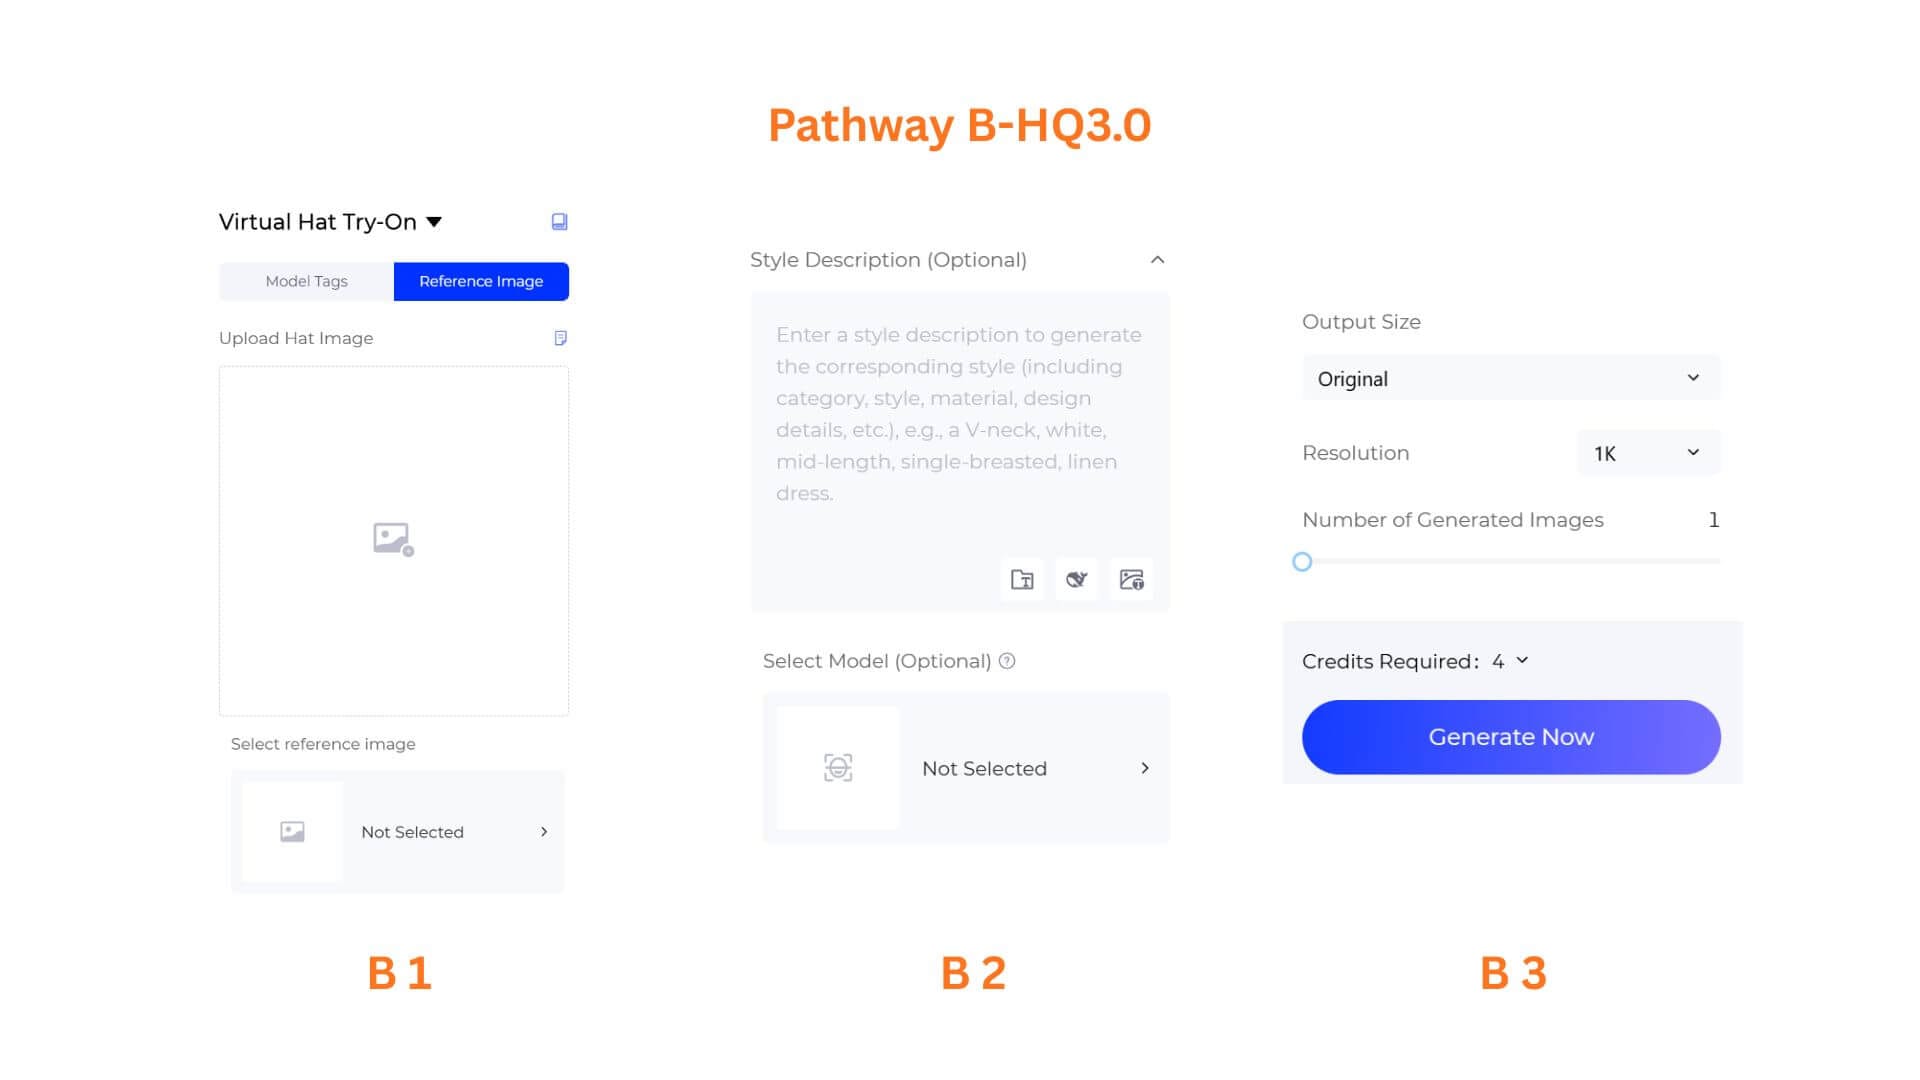
B1. Upload the Hat Image and Reference Photo
Switch to the Reference Image tab. Click Upload Hat Image and select a clean product photo of your hat. Then under Select reference image, choose a model photo from the library or upload your own.
B2. Add Optional Style Description and Models
Expand Style Description (Optional) to refine the hat's style or material. Choose a model from Select Model (Optional) if you want to override the reference model's body.
B3. Configure Output and Generate
Set the remaining options:
- Output Size: Choose from the dropdown.
- Choose your preferred resolution
- Number of Generated Images: Adjust the slider to the desired count.
Click Generate Now to preview the hat on the reference model.
Pathway C: HQ1.0 with Reference Image
Use this pathway for fast, lightweight previews.
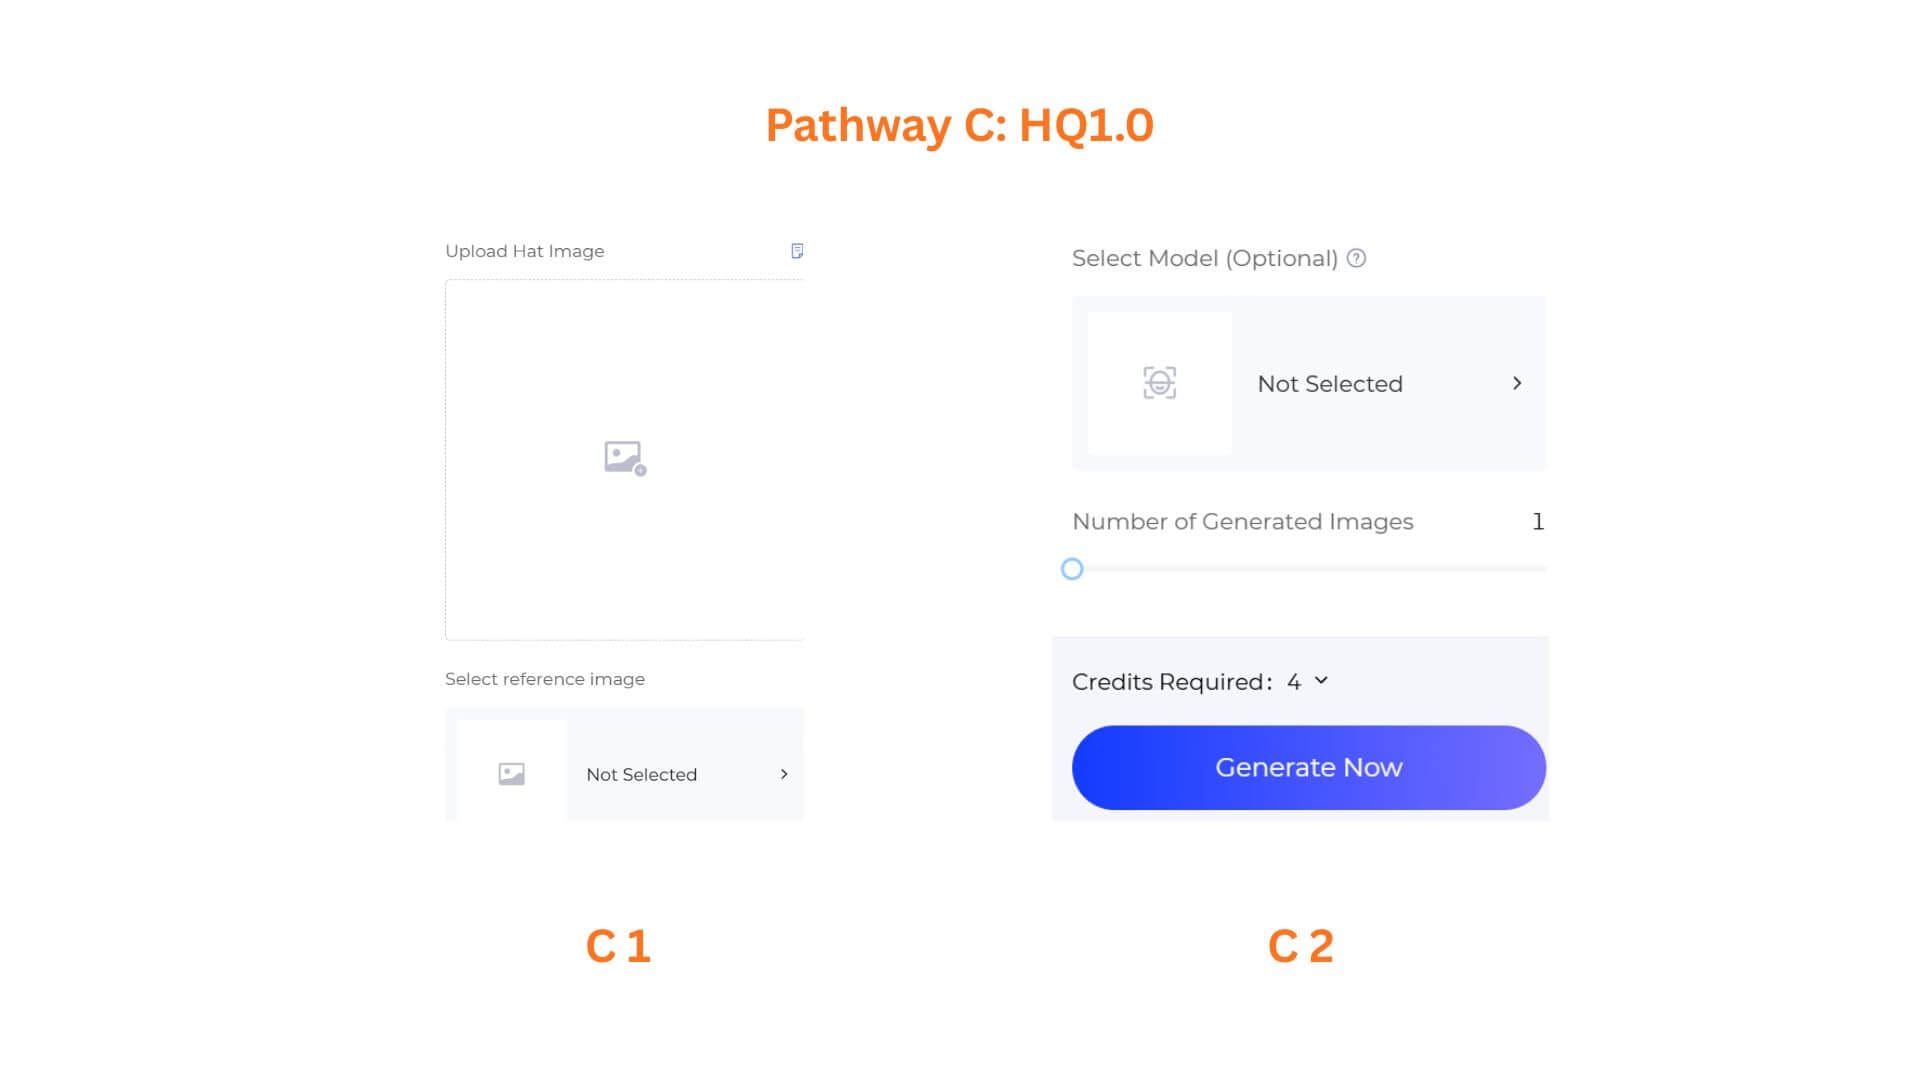
C1. Upload the Hat Image and Reference Photo
Select HQ1.0 from the model dropdown. The panel automatically shows the Reference Image mode. Click Upload Hat Image and select your product photo. Then under Select reference image, choose the model photo you want to use.
C2. Set the Output Count and Generate
Optionally choose a model from Select Model (Optional) and set the Number of Generated Images.
Click Generate Now to get the quick preview.
Pro-Tips
- Match hat style to pose. Baseball caps work well with front-facing poses. Wide-brim hats benefit from slight profile angles that show the brim's shape.
- Multiple angles in one go. In HQ3.0 Model Tags, select Front + Side + Back to generate a full angle set for the same hat without re-uploading.
- Pair with Apply Print To Garment. If you're previewing a hat with a custom logo or graphic, use Apply Print To Garment first, then use Virtual Hat Try-On to see the full result.
- Use Change Model & BG after try-on. Drop your hat-on-model result into Change Model & BG to create outdoor, studio, or editorial scene variations.
Frequently Asked Questions
Q: What types of hats work with this tool?
A: Baseball caps, beanies, fedoras, bucket hats, sun hats, and structured headwear all produce good results. Unstructured or highly irregular hat shapes may need more iteration.
Q: What is the difference between HQ3.0 and HQ1.0?
A: HQ3.0 produces higher-quality campaign-style images and supports both Model Tags and Reference Image inputs. HQ1.0 is optimized for faster previews via Reference Image only.
Written by
What's Next?