How to Visualize Fabrics on Garments with AI?
Learn how to visualize fabrics without physical samples. Preview fabric swatches on garment, bag, and hat silhouettes with Style3D Fabric Try-On. This guide covers the whole workflow.

Introduction: What is Fabric Try-On?
Fabric sourcing is visual. You have a swatch, but your buyer wants to see it as a finished garment. Producing physical samples for every fabric option is expensive and slow — especially when most of those options will never go into production and you still need to present a realistic wearing effect to make a decision.
Fabric Try-On changes that workflow. Upload a fabric image and a garment, bag, or hat silhouette, and Style3D AI renders the fabric on the item with realistic drape, texture, and lighting. You can preview patterned prints and solid textures across multiple categories without cutting, sewing, or producing a single physical sample.
Quick Start Guide
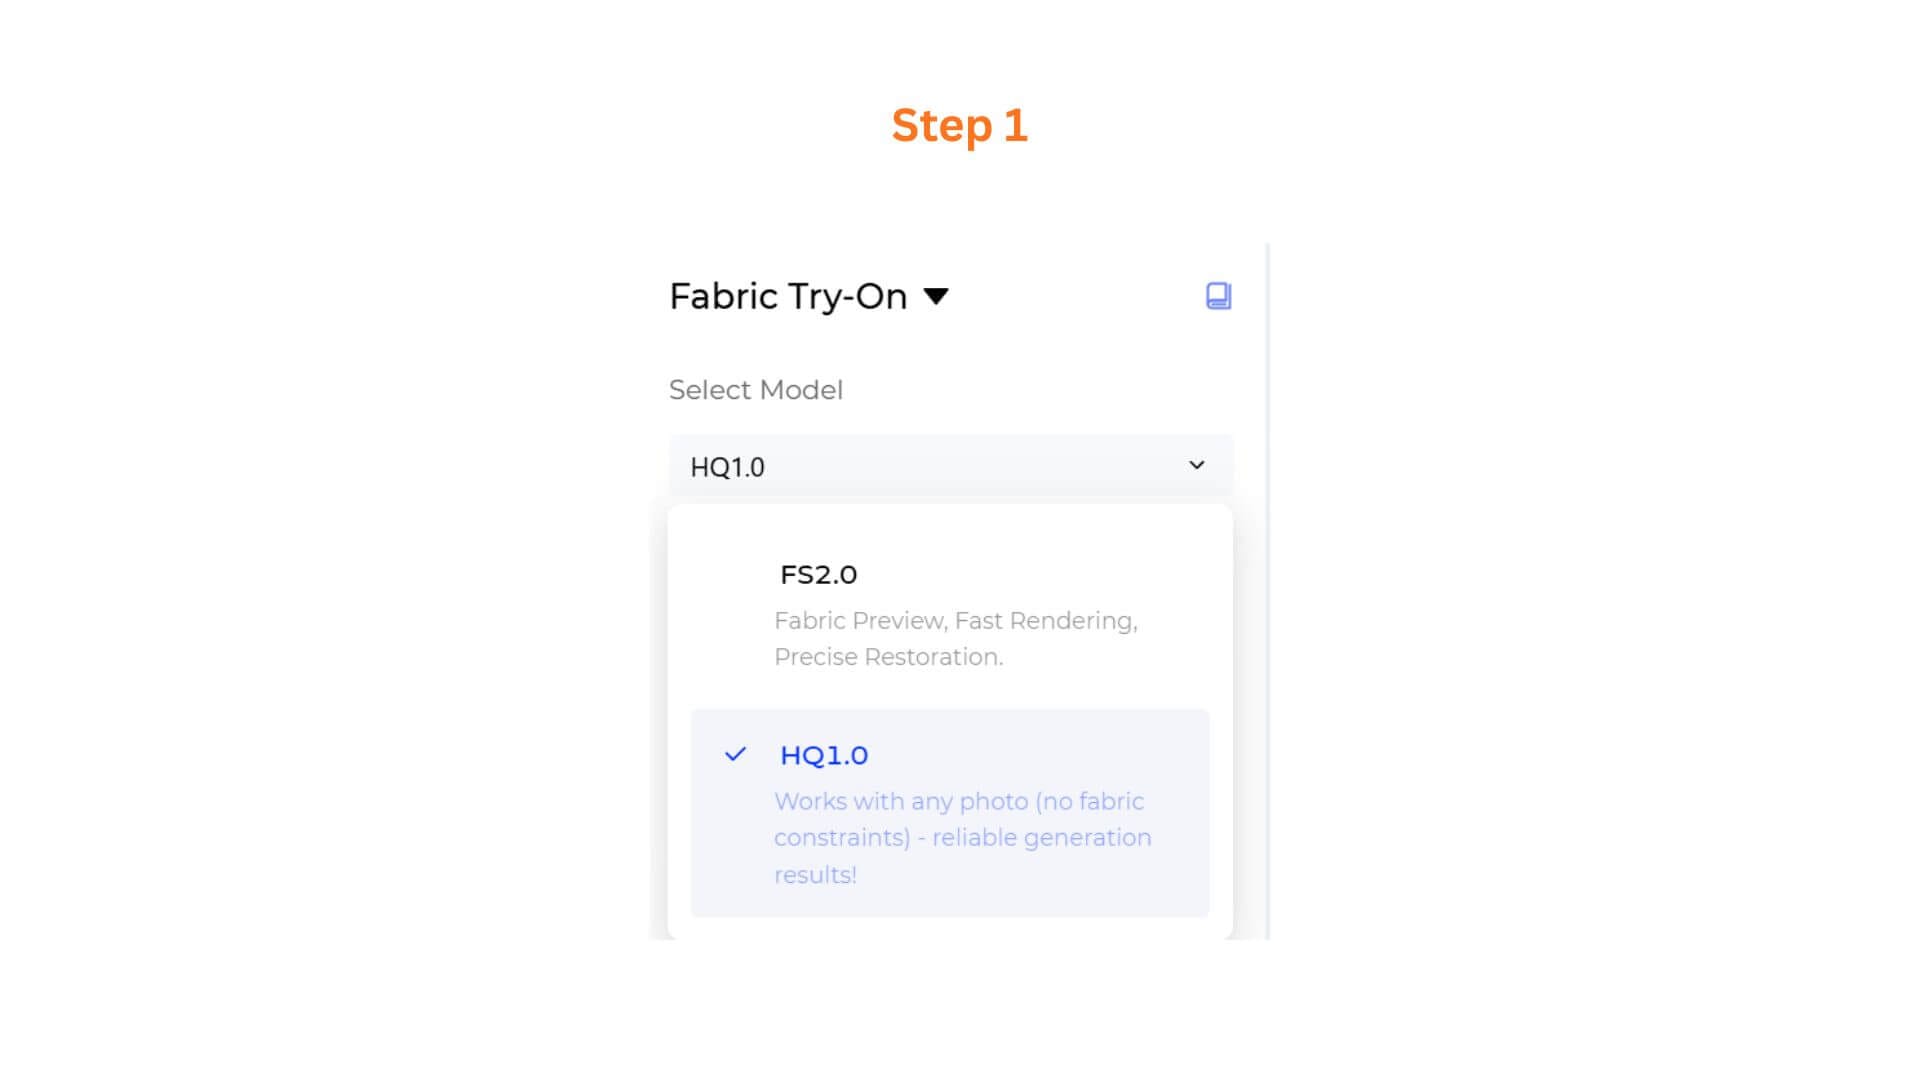
Step 1: Select Your Model
Open Fabric Try-On and choose a model from the Select Model dropdown. Two models are available:
- FS2.0 — Best for fast fabric previews.
- HQ1.0 — Best for higher-resolution campaign-style previews.
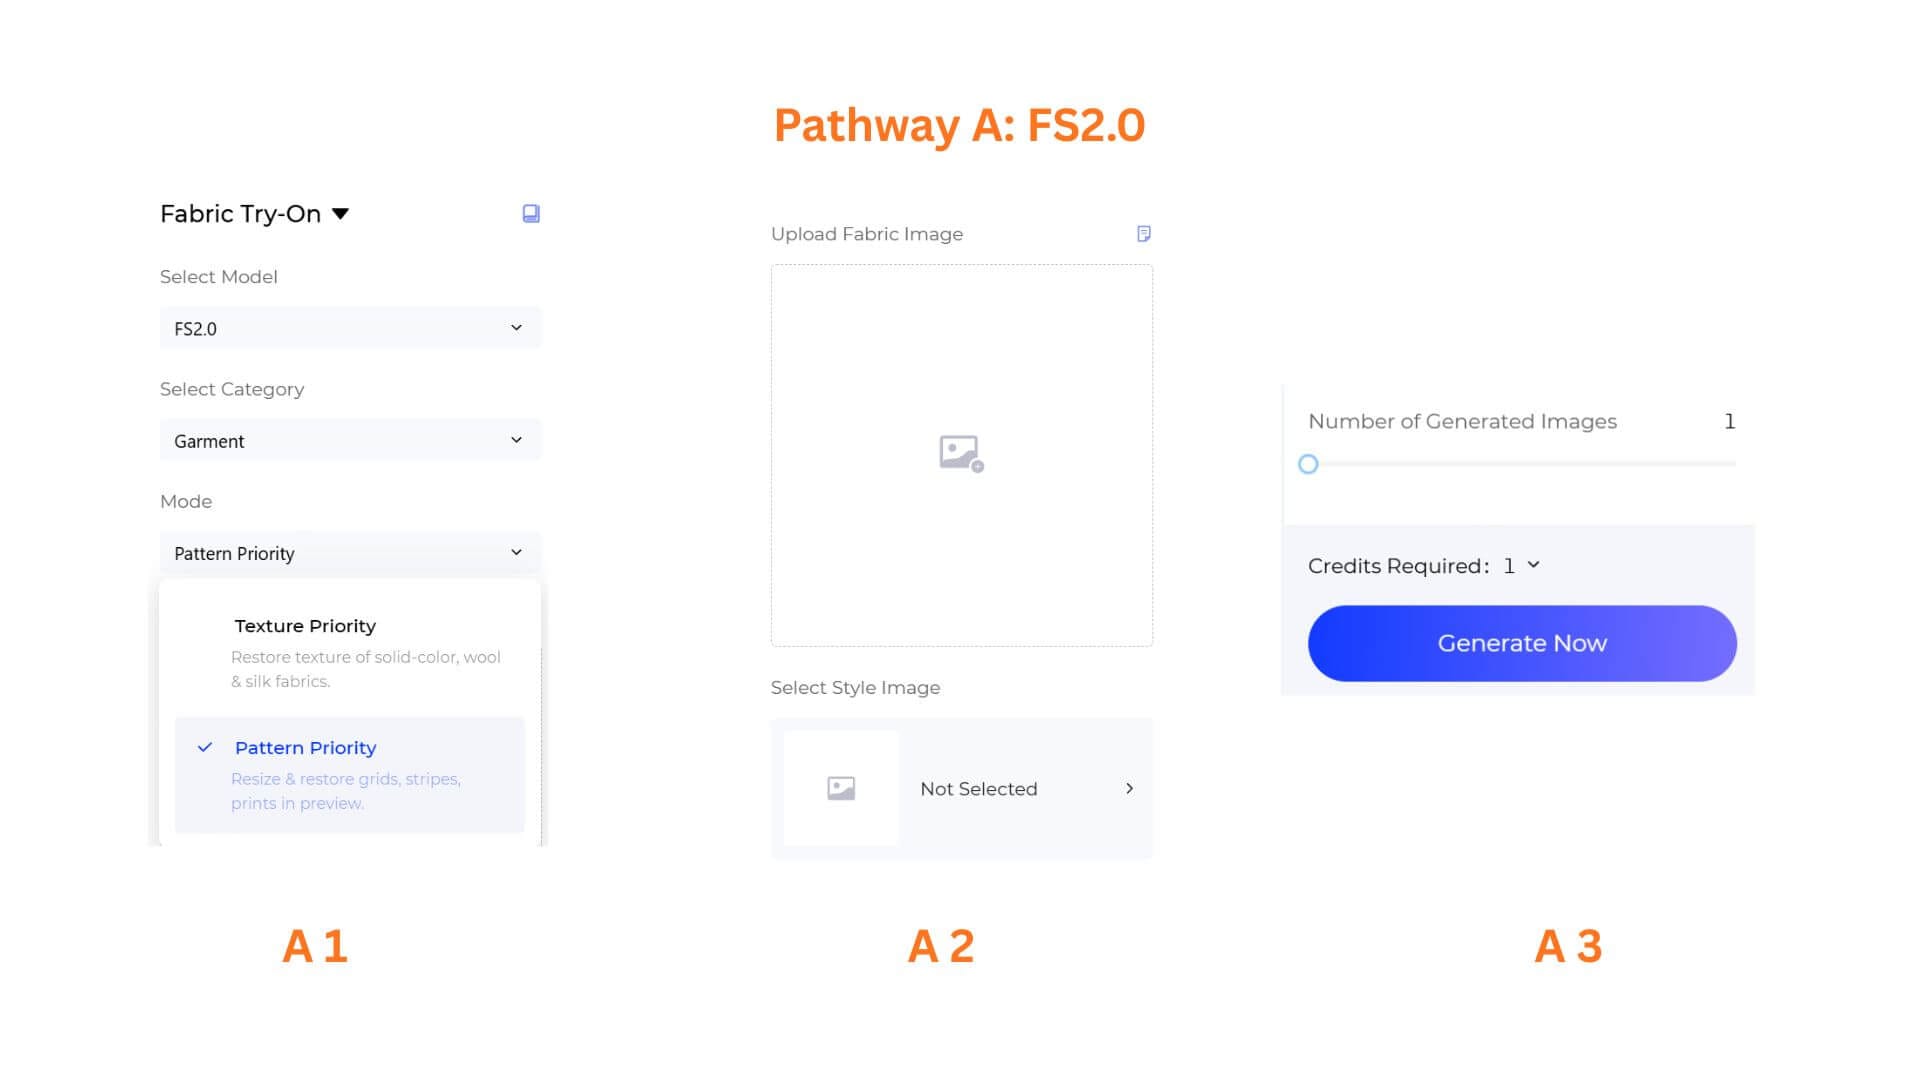
Pathway A: FS2.0
Use this pathway for fast previews and pattern-sensitive fabrics.
A1. Choose Category and Mode
Under Select Category, pick the type of item you want to dress:
- Garment
- Bag
- Hat
Then set the Mode:
- Pattern Priority — Resize and restore grids, stripes, and prints in the preview. Best for patterned fabrics.
- Texture Priority — Restore the texture of solid-color, wool, and silk fabrics. Best for texture-heavy or plain materials.
A2. Upload Fabric and Style Images
Click Upload Fabric Image area and select a high-quality fabric swatch photo.
Supported Image formats: JPG、JPEG、PNG、WEBP、AVIF、BMP,Size range: 1 KB - 20 MB,Maximum image width and height: 4096x4096px
Under Select Style Image, choose the garment, bag, or hat silhouette you want to apply the fabric to. You can select from the library or upload your own.
A3. Set Output Count and Generate
Drag the Number of Generated Images slider to the desired count.
Click Generate Now to preview the fabric applied to the selected silhouette.
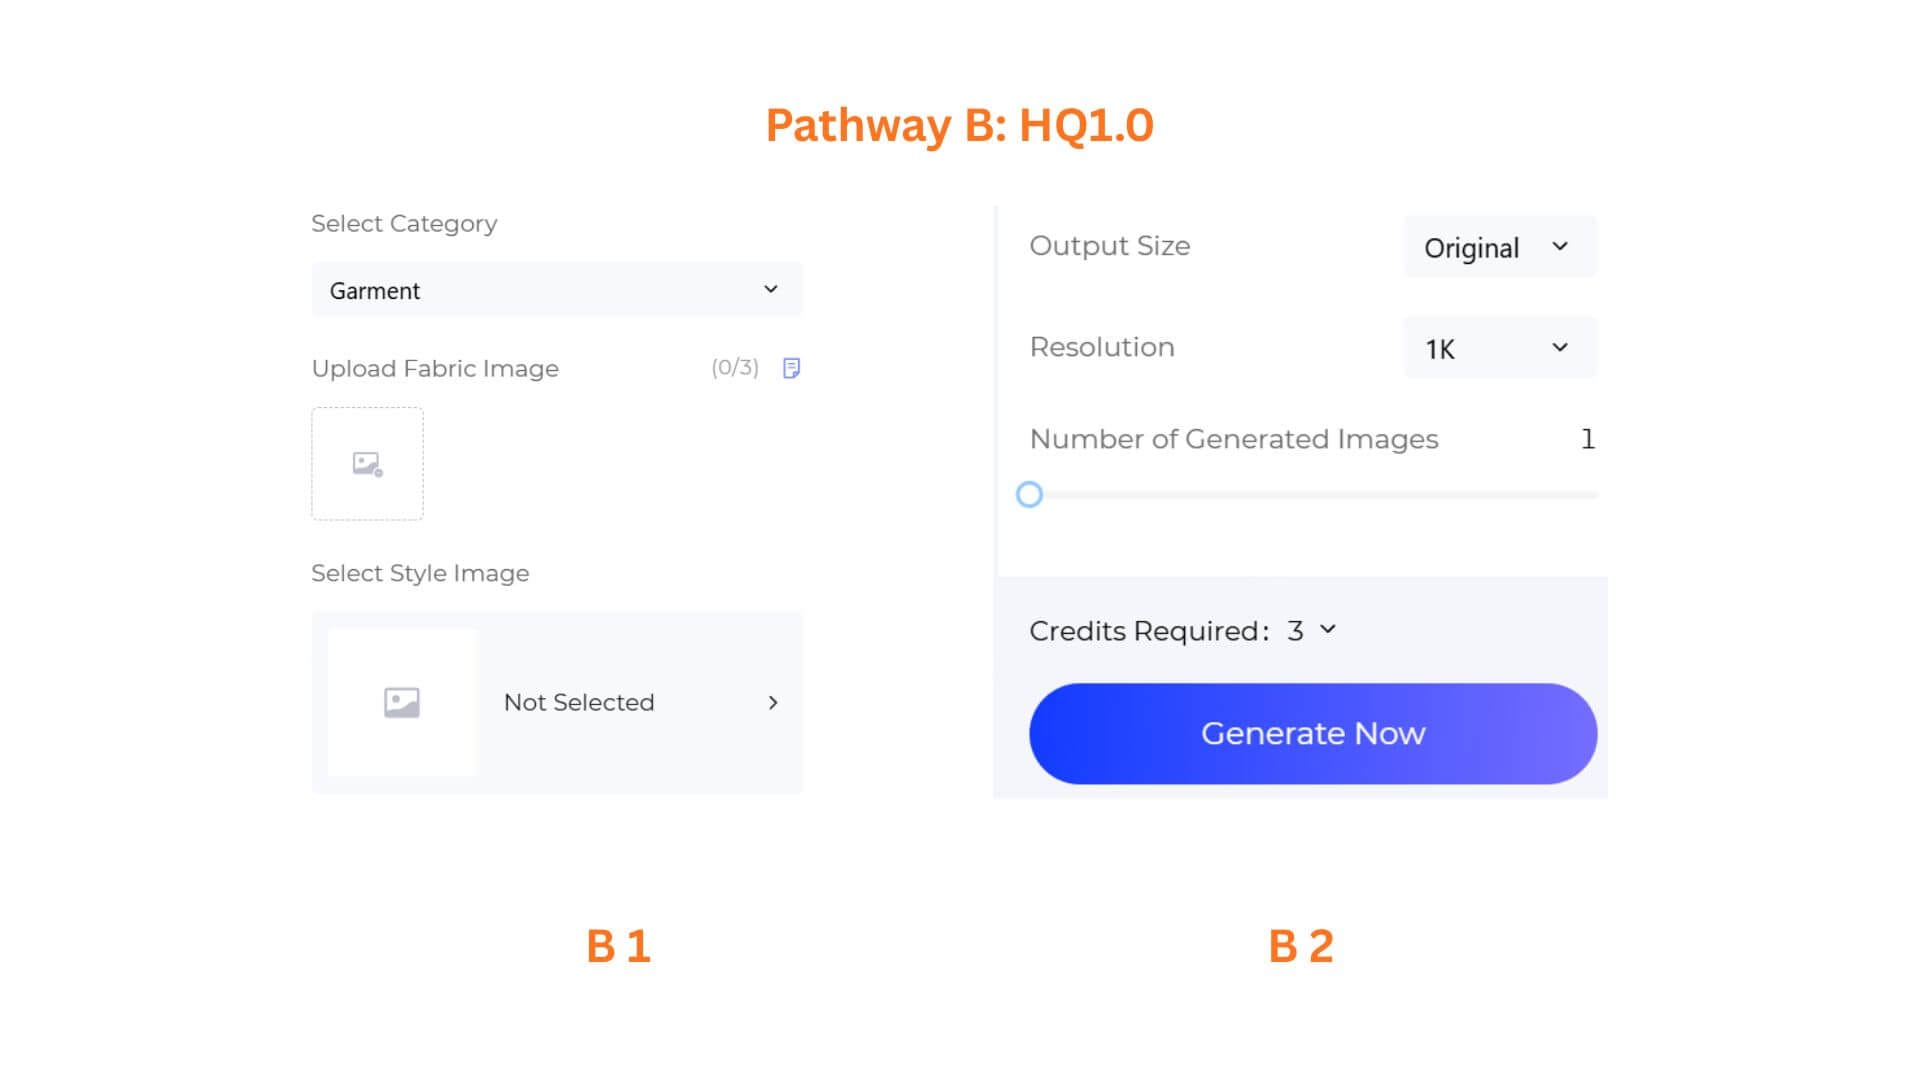
Pathway B: HQ1.0
Use this pathway for higher-resolution fabric previews.
B1. Choose Category and Upload Images
Under Select Category, choose Garment, Bag, or Hat.
Click Upload Fabric Image area to add your fabric swatch (up to 3 images). Then under Select Style Image, pick the silhouette from the library or upload your own.
B2. Configure Output and Generate
Set the remaining options:
- Output Size: Choose Original or another size from the dropdown.
- Choose your preferred resolution.
- Number of Generated Images: Drag the slider to the desired count.
Click Generate Now to produce the high-resolution preview.
Pro-Tips
- Use Pattern Priority for prints. Stripes, plaids, florals, and repeating graphics keep their scale and alignment better with Pattern Priority mode.
- Use Texture Priority for solids and wools. Solid-color, wool, and silk fabrics show richer surface detail with Texture Priority mode.
- Test multiple silhouettes with one fabric. Apply the same fabric swatch to different garment, bag, or hat shapes to preview a full range from one material choice.
- Pair with Virtual Garment Try-On. After Fabric Try-On, use Virtual Garment Try-On to see the fabric-on-garment result on an actual model.
Frequently Asked Questions
Q: What categories does Fabric Try-On support?
A: You can apply fabrics to Garment, Bag, and Hat silhouettes.
Q: What is the difference between Pattern Priority and Texture Priority?
A: Pattern Priority preserves and restores prints, grids, and stripes. Texture Priority enhances the surface detail of solid-color, wool, and silk fabrics.
Q: What is the difference between FS2.0 and HQ1.0?
A: FS2.0 is faster and includes the Mode setting for pattern/texture priority. HQ1.0 produces higher-resolution output with 4K support.
Written by
What's Next?