How to Reimagine Existing Visuals into New Garment Collections with AI?
Upload a garment photo and redesign it with Style3D AI "Image to Design".This guide covers transformation modes, similarity settings, and pro tips.

Introduction: What is Image-to-Design?
Have you ever had an instant idea for a garment you already own, saw in a storefront, or are currently producing? Maybe you want to change the fabric, shorten a sleeve, add a unique detail... and see the technical visual result immediately?Most garment modifications start with a clear picture in your head and a long wait before you can see the result. Getting to a visual used to mean another round of sampling and back-and-forth.
Image to Design cuts that process short. Upload a reference photo, describe the change you want, and Style3D AI generates a realistic, production-accurate visualization in moments. Fewer sample rounds, shorter iteration cycles, and a faster path from reference image to something your team can actually work with.
Quick Start Guide
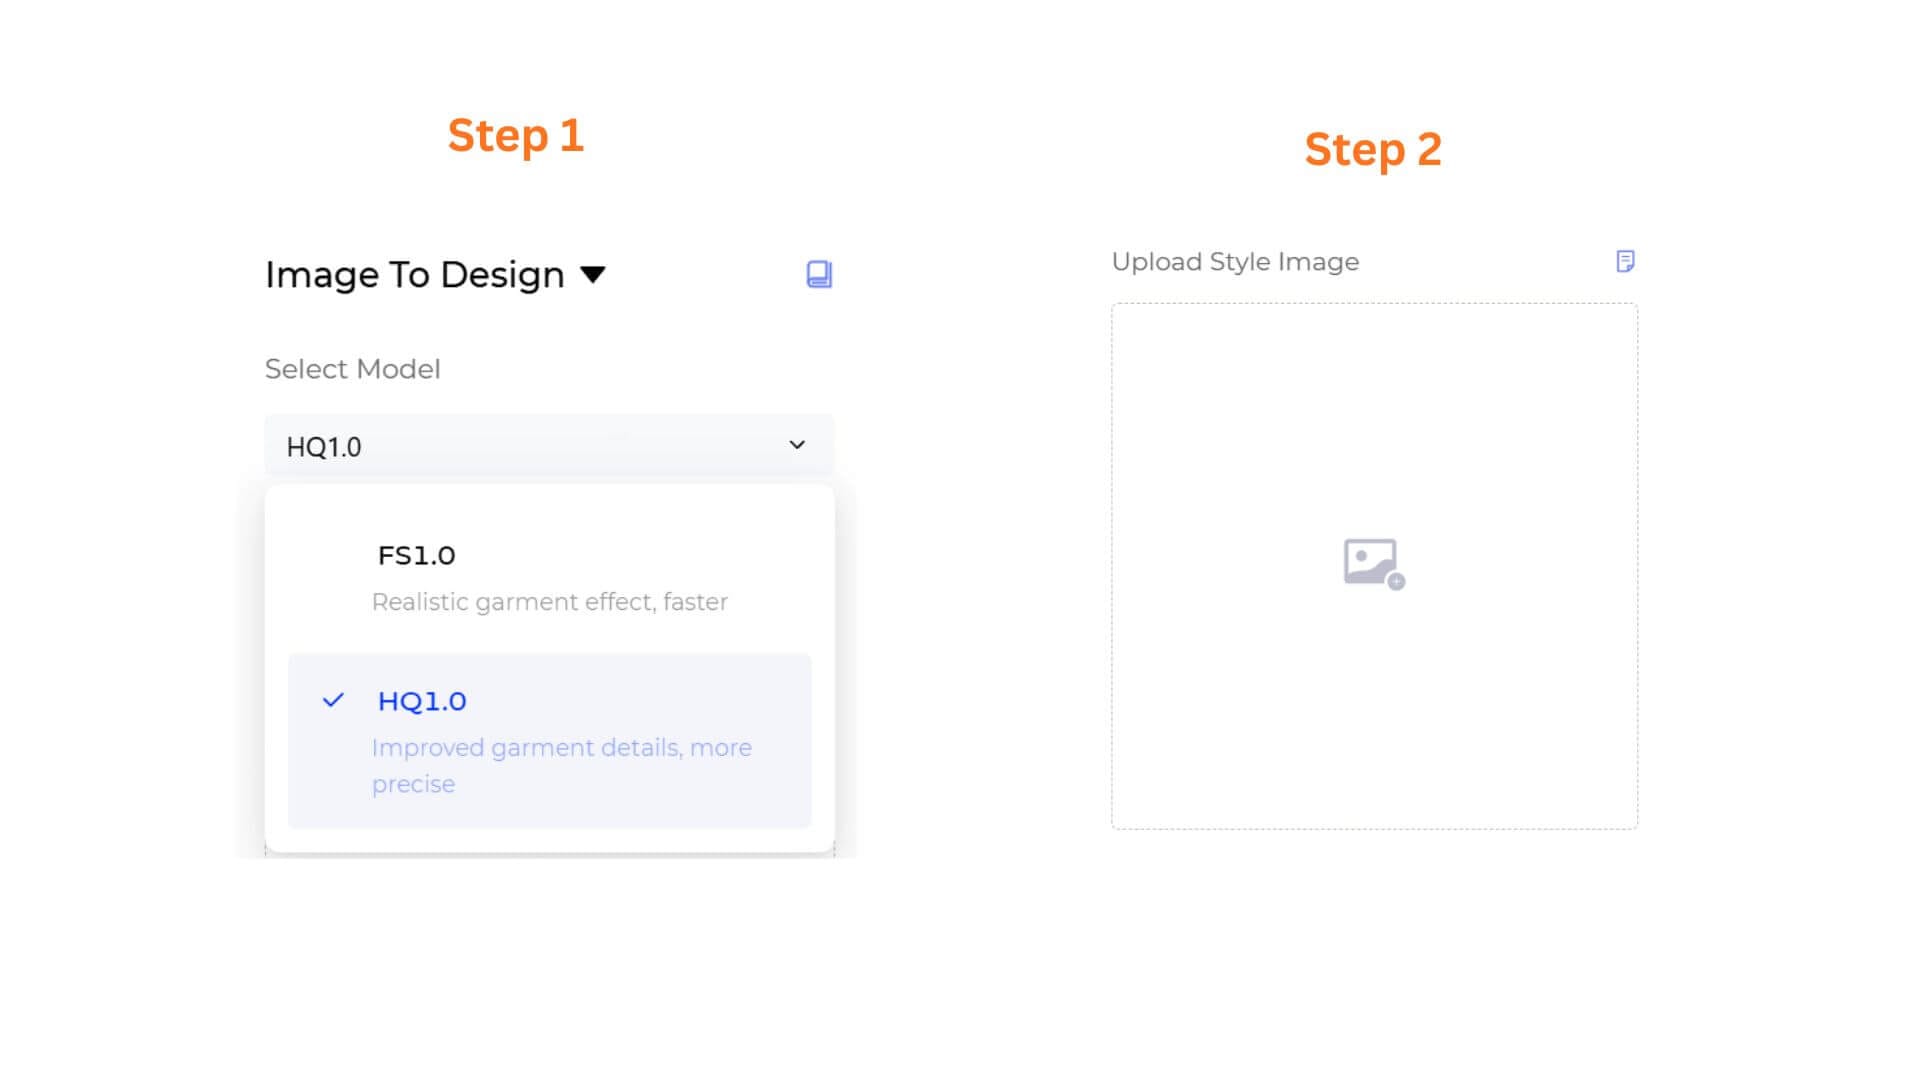
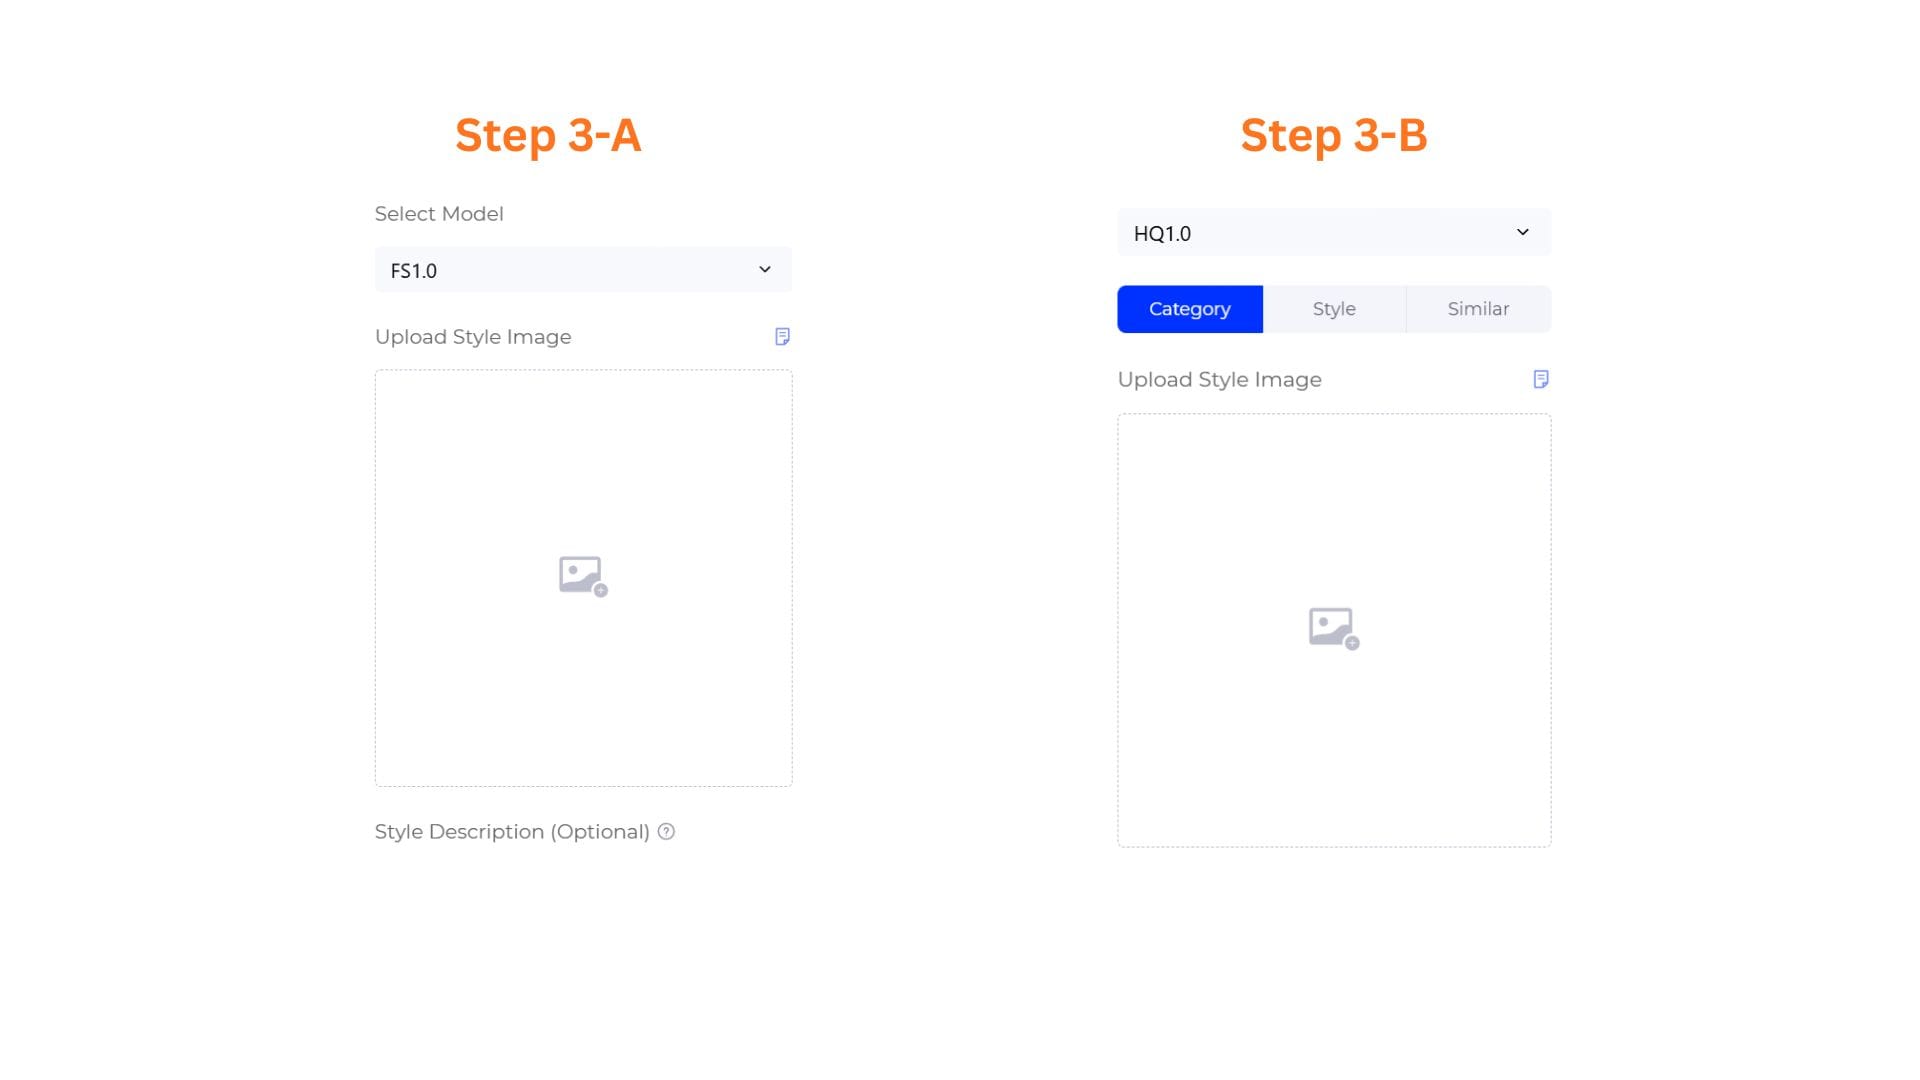
Step 1: Choose Your AI Processing Engine
Select the processing engine according to your needs :
- FS1.0 (Fast Speed): Optimized for rapid layout brainstorming and instant conceptual testing.
- HQ1.0 (High Quality): Engineered for professional presentation graphics and retail-ready aesthetics.
Step 2: Upload Your Baseline Reference Image
- Click the central icon inside the uoload box to upload your existing garment photo, product shoot, or flat-lay reference. This image locks in as the foundation for your style modifications.
Step 3: Select Your Design Workflow(Based on Model Selection)
- Pathway A: If You Selected the FS1.0 Engine
The system reveals a highly efficient, text-assisted modification panel:
Write Style Description: Go to the Style Description (Optional) text field and input your specific material choices or style modifiers.
- Pathway B: If You Selected the HQ1.0 Engine
Click one of the three horizontal pathway buttons to define your design direction.
- Category: For migrating materials and styles onto different clothing patterns.(e.g. turn a jacket reference into a dress).
- Style: For altering overall fashion themes and aesthetic contexts while keeping the garment type .
- Similar: For generating fine-grained variations based on the original silhouette.
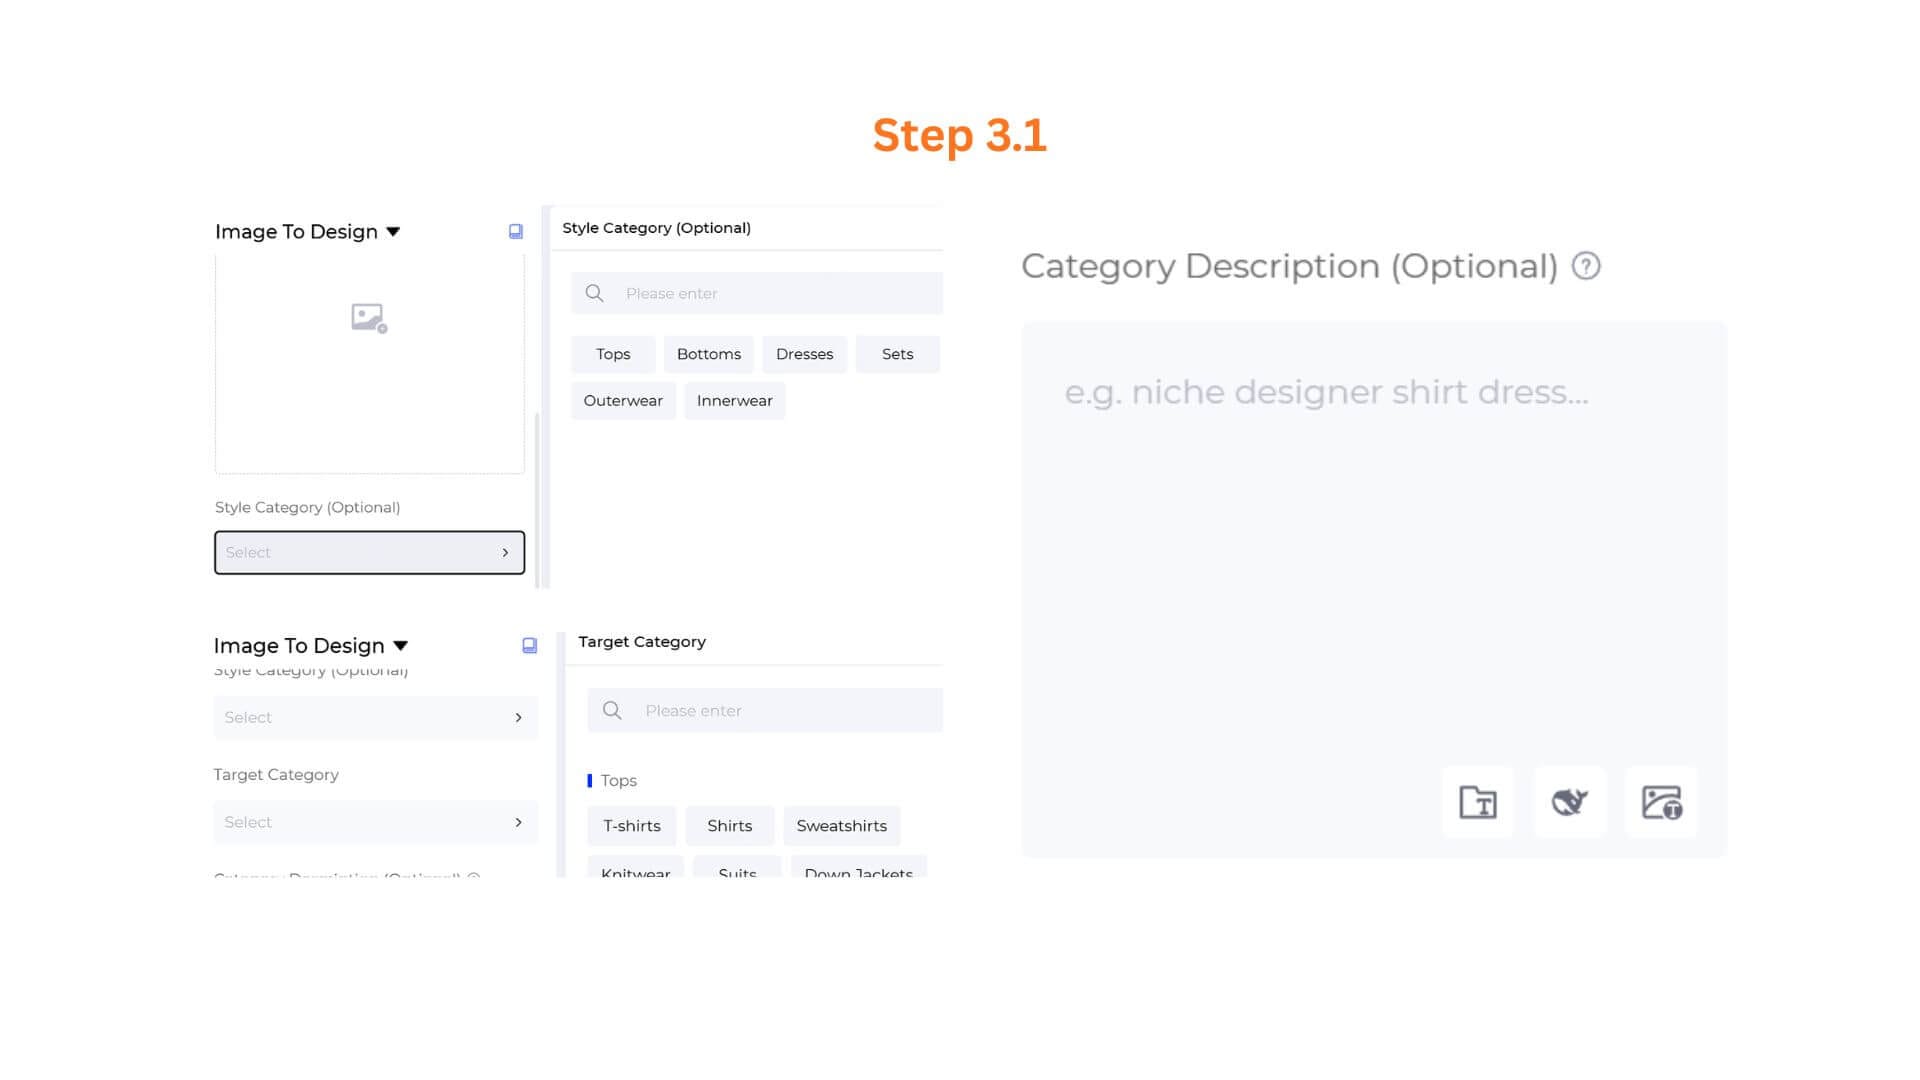
3.1: Define the Advanced Parameters (Under HQ1.0 "Category" / "Style" Mode)
Locate the dynamic configuration panel below the model selector tabs. When the Category or Style tab is active, complete the following cascading fields to guide the fashion transformation:
Style Category (Optional): Click the Select > drop-down box to open the specialized tag panel on the side. Select the structural clothing tag that accurately matches your uploaded baseline image (Tops, Bottoms, Dresses, Sets, Outerwear, or Innerwear).
Target Category /Style:Click the Select > entry bar. Choose your desired output garment type or design theme from the selection list (e.g., transforming a jacket fabric into a dress silhouette under Category mode, or remapping it into a brand-new design theme under Style mode). This crucial setting tells the AI engine how to reconstruct the pattern shape or artistic direction.
Category /Style Description (Optional): Click inside the dedicated text block to type out your specific design modifiers, material weaves, or styling nuances.
Formatting Note: For the best visual results, follow the system's structural placeholder hint: "e.g. niche designer shirt dress..."
Smart Shortcuts: Utilize the three quick-action tool icons (Prompt Manager, Opt Prompt, Rev Prompt) at the bottom right corner of the field to instantly optimize your descriptive vocabulary or reset entries.
- Prompt Manager: Click to open the side panel to search, manage, or add custom prompt templates to your workspace.
- Opt Prompt: Click to instantly expand a simple idea into professional, highly descriptive prompt options.
- Rev Prompt: Click to upload an inspiration or trend reference photo, automatically reverse-engineering the visual into text inside your box.
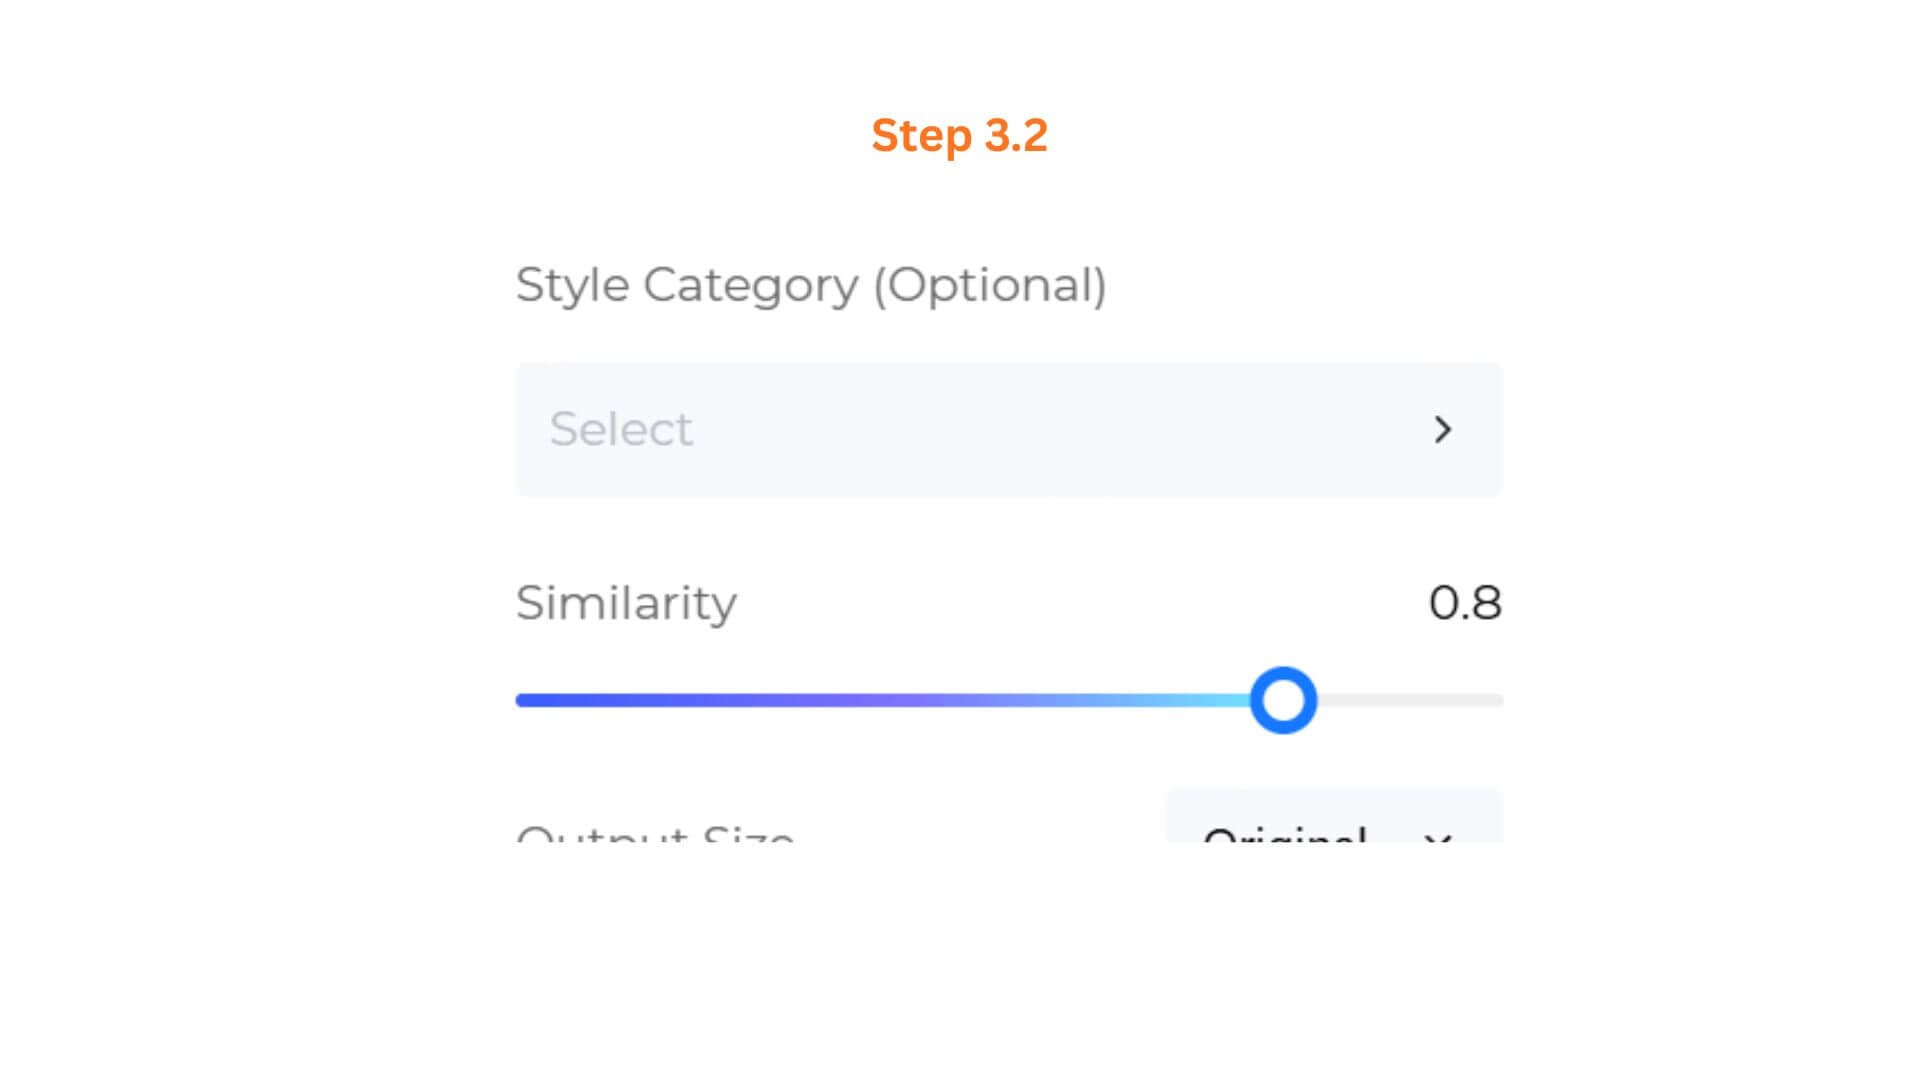
3.2: Adjust the Similarity Precision(Under HQ1.0 "Similar" Model or FS1.0 Model)
Locate the Similarity slider row.
- Slide the handle to balance creative freedom against the original reference.
- Setting the Value: The system defaults to 0.8. Lower values give the AI more freedom to introduce design variations, while higher values enforce strict retention of original details.
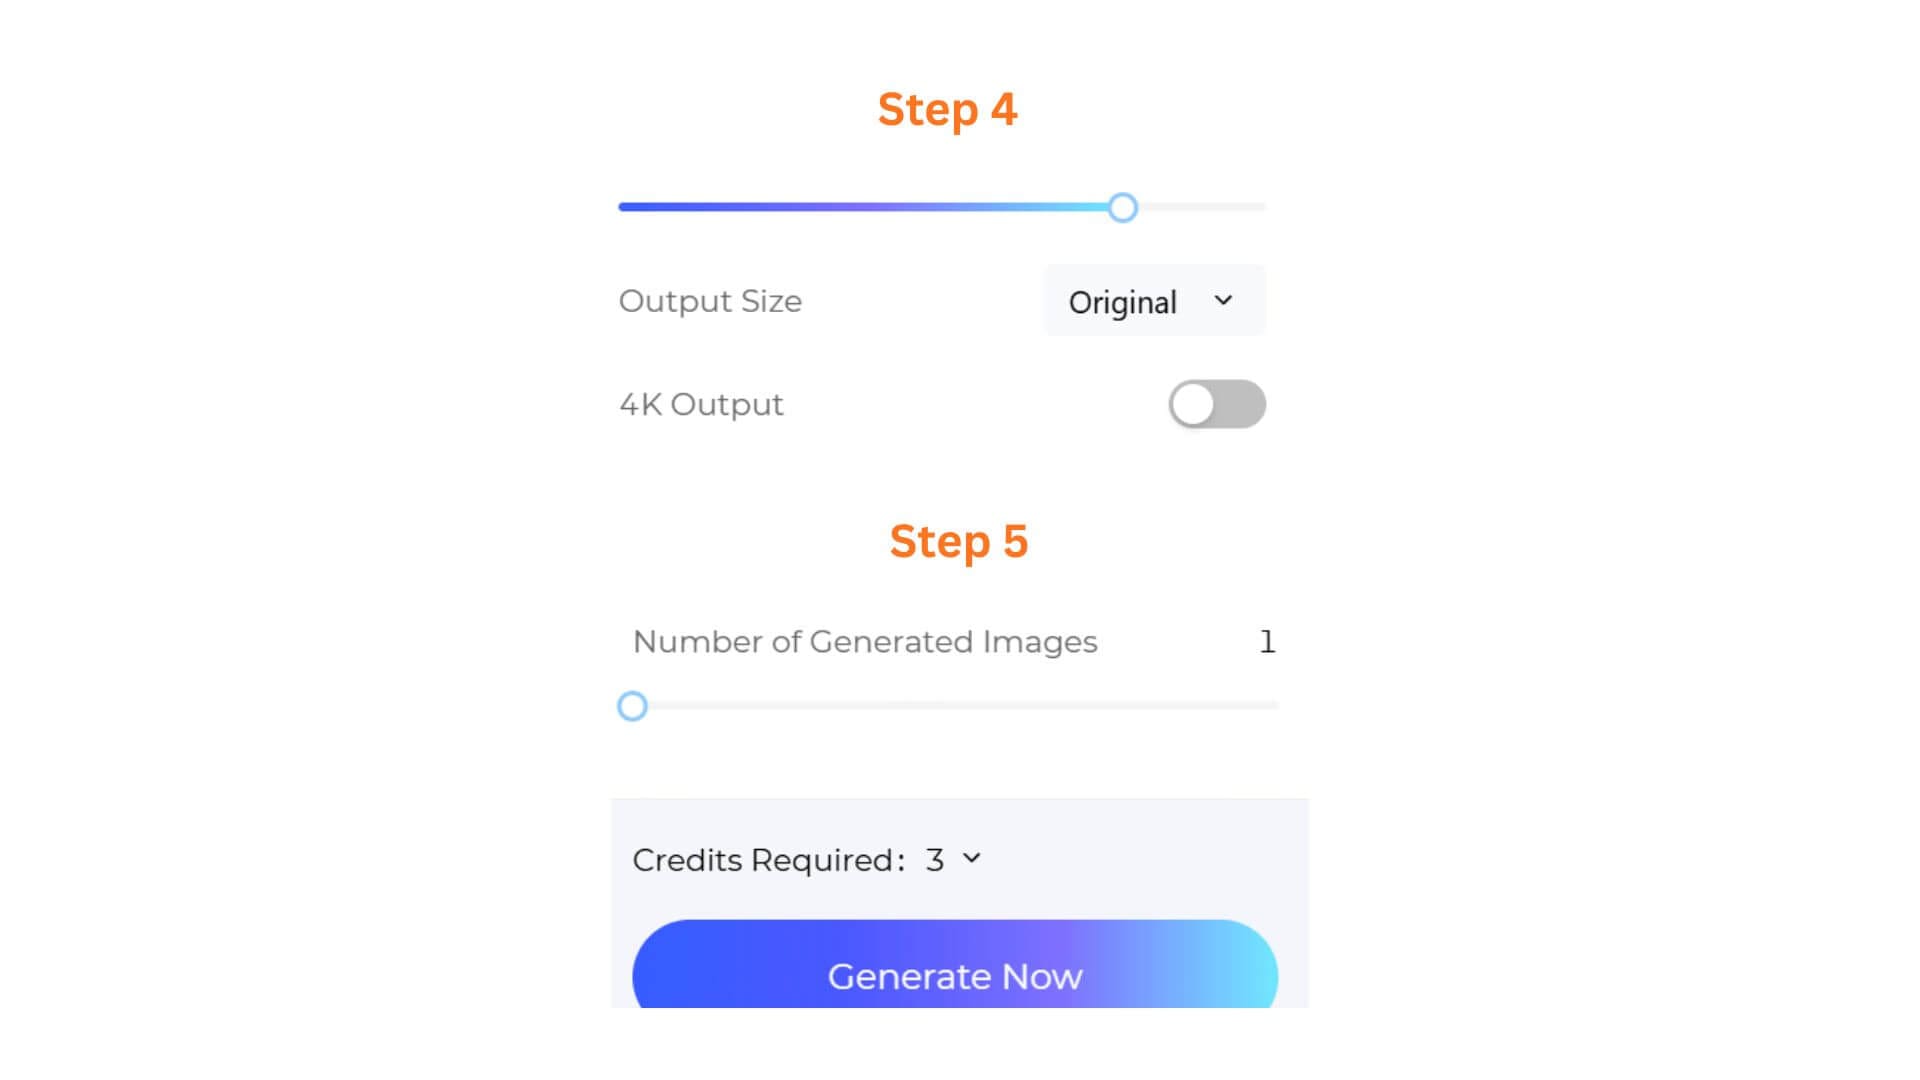
Step 4: Set Framing & Output Size
- Output Size: Click the drop-down menu to keep the aspect ratio at Original (or select standard layout presets like 4:5) to perfectly match your storefront formatting.
- 4K Output Toggle: Toggle the 4K Output switch ON if you require ultra-high-definition digital presentation assets for client review or marketing lookbooks.
Step 5: Configure Batch Quantities & Render
- Number of Generated Images: Adjust the slider to determine how many design variations you want to output in a single batch, from 1 to 4 images.
- Generate Now: Double-check the "Credits Required" counter (e.g., 3 Credits), then click the gradient “Generate Now” button to watch the AI render your new collection variations instantly!
Pro-Tips
Use Similarity Settings Strategically
The Similarity slider has a significant impact on the final result. Higher values help preserve the original garment structure and are ideal for product refinements such as colorway updates, trim adjustments, or subtle silhouette changes. Lower values give the AI more creative freedom and are better suited for concept exploration, category migration, or generating fresh design directions. If you are unsure where to start, a Similarity value between 0.6 and 0.8 typically provides the best balance between consistency and creativity.
If the generated outputs feel too close to the original image, reduce the Similarity value.
Choose the Right Transformation Mode for Your Goal
Each transformation mode is designed for a different stage of the design process. Similar mode works best when refining existing products and generating commercially viable variations. Style mode is ideal for exploring different fashion aesthetics while keeping the original garment type intact. Category mode is most effective when extending a successful design into new product categories, allowing materials, colors, and visual characteristics to be reinterpreted across different garment structures.
Start with High-Quality Reference Images
The quality of your reference image directly affects the quality of the generated output. Images that clearly display a single garment with minimal background distractions generally produce the most accurate results. Front-view or three-quarter-view product photos are recommended, as they provide the AI with sufficient structural information. For best performance, avoid low-resolution screenshots, heavily edited images, or photos containing multiple overlapping garments.
Frequently Asked Questions
Q: Which transformation mode should I choose?
A: Choose based on your design goal:
Category Mode – Change the garment type while preserving visual characteristics.
Style Mode – Change the aesthetic style while maintaining the garment category.
Similar Mode – Create close variations of an existing design.
If you're refining an existing product, Similar Mode is usually the best starting point.
Q: Why does the generated result look too similar or too different?
A: This is controlled by the Similarity setting.
Lower values allow more creativity and variation.
Higher values preserve more of the original design.
For most projects, a Similarity range of 0.6–0.8 provides the best balance between creativity and consistency.
Q: What kind of reference image works best?
A: Use a high-quality image that clearly shows a single garment.
For best results:
- Simple background
- Clear garment details
- Front or three-quarter view
- High resolution
Avoid images with multiple garments, heavy shadows, or complex backgrounds.
Written by
What's Next?