What Is a Ghost Mannequin Photo, and How It Is Actually Made
A ghost mannequin image is not one photograph with the form removed. It is a composite, and the shot that makes it work is the one nobody thinks about.
A ghost mannequin image shows a garment holding its own shape with nothing inside it. The shoulders sit where shoulders would sit, the chest has volume, the collar stands — and there is no body, no form, and no visible support.
The name describes what was removed. It does not describe what was added, and what was added is the part that makes the technique work.
The common explanation is backwards
Almost every description of this technique says the same thing: photograph the garment on a mannequin, then remove the mannequin in post-production. That makes it sound like subtraction — take a picture, take something out of the picture.
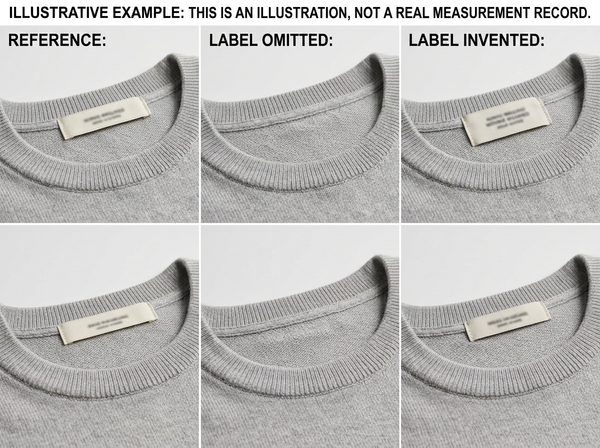
Follow that description literally and you cannot produce the image. Removing the mannequin from a front-on photograph leaves a hole where the neck opening is, and behind that hole there is nothing, because the mannequin’s neck was blocking the only thing that could have been there: the inside of the collar.
That piece of fabric was never photographed. It has to be shot separately and added in.
It is three shots, not one
The standard sequence runs like this.
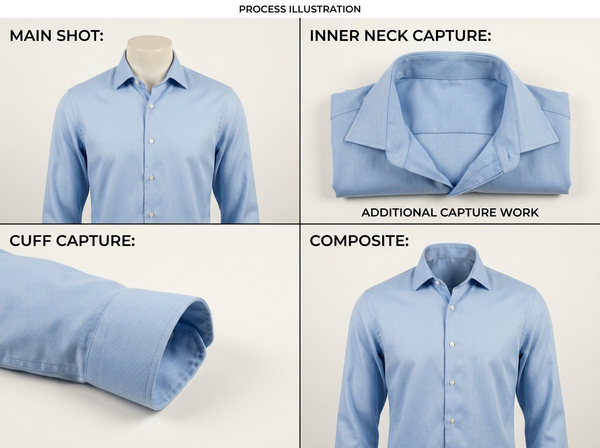
The main shot is the garment on a mannequin, lit and styled the way the final image should look. This is the frame most people picture when they hear the term, and on its own it is unusable.
The second shot exists to capture the inside of the neckline. The garment comes off the form, or gets turned and folded so that the inside back of the collar faces the camera, and that area is photographed under the same lighting. It is an awkward, ugly frame that no customer will ever see.
Additional shots follow wherever the garment has an opening that reveals its interior — cuffs, a front placket left open, a vent at the back hem, a jacket lining visible at the front edge. Each of those needs its own capture for the same reason the collar does.
The composite assembles them. The main frame provides the garment; the supplementary frames provide every interior surface the main frame could not see.
The inside of the collar is the whole job
Everything difficult about ghost mannequin work concentrates in that second frame and how it joins the first.
The interior piece has to match the exterior in three ways at once. The lighting has to correspond, or the inside of the neck reads as belonging to a different photograph. The fabric direction has to be consistent, because a woven or a rib has a visible orientation and a mismatched one is noticeable without being nameable. And the edge where the two frames meet has to carry thickness — a garment opening is a folded edge with depth, not a line, which is the same reason cutout edges are bands rather than lines in any compositing work.
Get those three right and the image looks like a garment. Get any one wrong and it looks like a photograph with something pasted into it, which most viewers register as wrongness rather than as a specific fault.
Where the cost actually sits
The retouching is not the expensive part, which surprises people who assume the compositing is where the labor lives.
The expensive part is the additional setups. Every interior surface requires the garment to be repositioned, re-lit consistently, and photographed again — and the number of those surfaces depends entirely on the garment.
A plain crew-neck tee has one interior surface worth capturing. A tailored coat with turned-back cuffs, an open front showing lining, and a back vent has several, each needing its own handling. The technique costs what the garment’s openings cost, which has nothing to do with the garment’s price or its importance to the range.
This matters commercially because ghost mannequin work is usually quoted per image. A flat per-image rate across a mixed range means simple garments subsidize complex ones, and whoever is producing the images absorbs the difference on the complex end.
The same arithmetic explains a pattern that looks like inconsistency from the brand side. A photographer who quoted comfortably on a knitwear range comes back with a different number for outerwear, and the reaction is often that the price went up. The price did not move; the garment did. Counting interior surfaces before asking for a quote turns that conversation from a negotiation into a specification.
What it shows that a model cannot
The technique persists because it does something specific well.
It shows construction without interpretation. A model brings a posture, a body, and a way of standing, all of which affect how a garment reads and none of which are properties of the garment. A ghost mannequin image removes those variables, which is why it is common in categories where the customer is assessing the make rather than the look — outerwear, tailoring, shirting.
It holds consistency across a range at low cost. Once the form and lighting are set, every style in a category is photographed the same way, and a set of images earns trust through consistency rather than through the quality of any single frame.
And it removes the scheduling problem. No booking, no availability, no reshoot when a garment arrives late — which for a large range is often the deciding factor rather than any aesthetic argument.
What it cannot show
A ghost mannequin image shows the garment on the mannequin’s shape, and that shape belongs to nobody.
This cuts both ways, and the two sides are the same fact. It is more neutral than a model image, since it carries no body type and invites no comparison. It is also more abstract, since it carries no fit information at all — a customer looking at one learns how the garment is made and nothing about how it will sit on them.
It also cannot show drape from a live body. A mannequin does not shift weight, breathe, or move an arm, so anything that depends on the garment responding to a body is absent by construction.
And it flatters. A form is symmetrical and rigid, so garments photographed this way hang more evenly than they will on a person. That is not a flaw in the technique — it is what a form does — and it is worth knowing when the image is being used to set expectations.
The flattering runs in a consistent direction, which is worth naming because it is the same direction every production shortcut runs in. Shoulders sit squarer, hems fall level, and any asymmetry the garment actually has gets absorbed by a form that has none. Nobody sends an image back for being too resolved, so this particular distortion passes every review it will ever face.
How to tell a bad one
• The collar interior does not match. Wrong fabric direction, wrong tone, or lighting that comes from a different angle than the exterior.
• The shoulder line is too smooth. Over-retouched shoulders lose the small irregularity a real garment has, and the result reads as rendered rather than photographed.
• The symmetry is perfect. Real garments are not, and a mirrored composite is a common shortcut that the eye catches without identifying.
• The opening edge has no thickness. A collar or cuff edge shown as a line rather than a folded band is the single most frequent error.
• The interior is brighter than it should be. Insides of garments are in shadow; an interior lit as brightly as the exterior looks like a separate object.
Checked at thumbnail size against the rest of the set, a weak ghost mannequin image usually announces itself by not matching its neighbors — which is also true of flat lay imagery and every other production method in a mixed set.
FAQ
Is a ghost mannequin the same as an invisible mannequin?
The two terms describe the same technique, along with a few others in circulation. Different photographers and different regions favor different names, and none of them indicates a difference in method.
Can it be done without a mannequin at all?
Some approaches use pinning, hanging, or stuffing to give a garment volume, and they can work for simpler pieces. What a form provides is repeatable shape, which matters most when a whole range has to look consistent rather than when one garment has to look good.
Which garments are hardest?
Anything with multiple interior surfaces visible at once — open jackets, layered pieces, garments with contrast linings. Difficulty tracks the number of openings, not the complexity of the garment’s construction.
Does the mannequin’s size matter?
It sets the shape the customer sees, so a form that is not close to the garment’s intended size will show the garment stretched or slack. Using one form across a range means larger sizes photograph loose and smaller ones photograph tight, which is a reason to photograph the sample size consistently.
How does this compare with a flat lay or an on-model shot?
Each settles a different question — construction and shape here, detail and texture in a flat lay, fit and styling on a model — and the comparison deserves more space than a FAQ answer allows.
Does the technique work for non-apparel products?
Anything hollow that should appear to hold its shape can use it: bags, shoes, hats. The principle is identical, and so is the cost driver, which remains the number of interior surfaces that have to be supplied.
Where this leaves you
The next time somebody describes this as removing the mannequin, notice that the description leaves out the shot that does the work.
The image is a composite, and the interior surfaces in it came from frames that were never meant to be looked at. Understanding that changes what you ask for when you commission it, what you check when you receive it, and why a coat costs more to shoot this way than a tee — which has nothing to do with the coat being a coat, and everything to do with how many places you can see inside it.
Ask to see the supplementary frames
Next time you commission ghost mannequin images, ask the photographer how many interior surfaces each garment needs. That number, not the garment’s price or importance, is what the shoot actually costs — and asking it before the quote prevents the situation where a range of simple pieces and complex ones is priced as though they were the same job. Then check the delivered images at the opening edges first. See how a consistent product image set gets built.
Written by